
I have now made four Ashtons and it is now my favourite summer top pattern. I love the faced hem. One linen, one silk, one a gauzy linen which was too see through so I made a double layer with one hem higher than than the other and a heavy polyester crepe version. I have come to the conclusion that it really only works well though with the full facings. The bias strip included with the pattern is far narrow for most fabrics and can be a nightmare to handle. I've tried twice with it and abandoned it both times. On my linen versions I used 1 inch commercial bias binding which worked well, but on the crepe version it didn't sit quite right. I had already sewn up the sides so too late for the facings. I hadn't had enough fabric to cut them in the first place anyway so I bodged it with separate neck and armhole facings cut from lining fabric. This has worked. In future though (and there will be others) I will only do it with full facings.

great result! :) For some reason, I found it a bit of a slog, which I was surprised by, but it was worth it. Really tidy end result, and I enjoyed being able to use contrasting fabric (from scraps even - win!) for the ties. I do wonder just how short the cropped must be, as the standard length was reasonably short as it is (I'm 5"7).

Simple pattern with different cup sizes which makes all the difference to the fit of the finished garment. I made this top twice in one day and I’m very slow, I used woven fabric for both. The first was in a cream cotton and linen mix fabric that has some drape but not a lot. Top was great perfect length for me. I made the medium and it fitted well although I thought the hips measurement was a little neat. The next one in a very soft patterned fabric with a lot of drape also worked incredibly well, again I thought the hips a little neat. The seams are finished separately so before hemming I made small slits in the side seams. I will try this top again in a stretch fabric. It’s definitely a summer winner.

My first time making a skirt and I'm quite the beginner. I did make a few small mistakes, but it turned out amazing anyway! I followed the YouTube video along with the printed instructions and it all came together in about 3 days for me.

I've had this pattern for a while and have recently made it up in some Merchant and Mills striped linen. I made the cross over bodice and sleeve C. I altered the hemline to level it a little as I don't like a hi-lo hem and shortened it by an inch, as I am only 5ft 1 (and a size 16/18 UK)
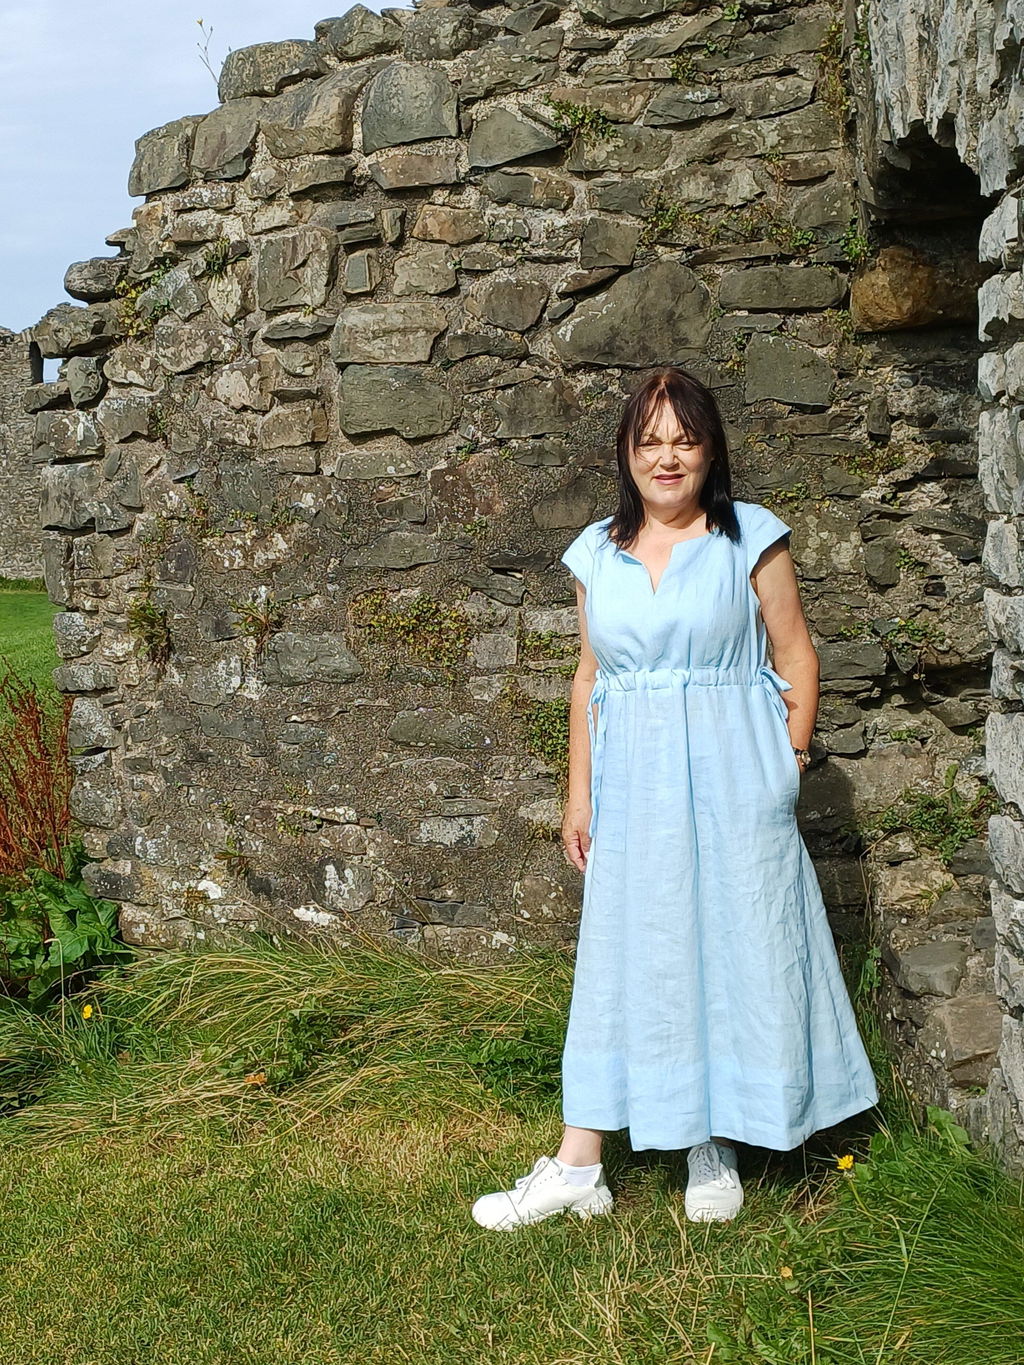
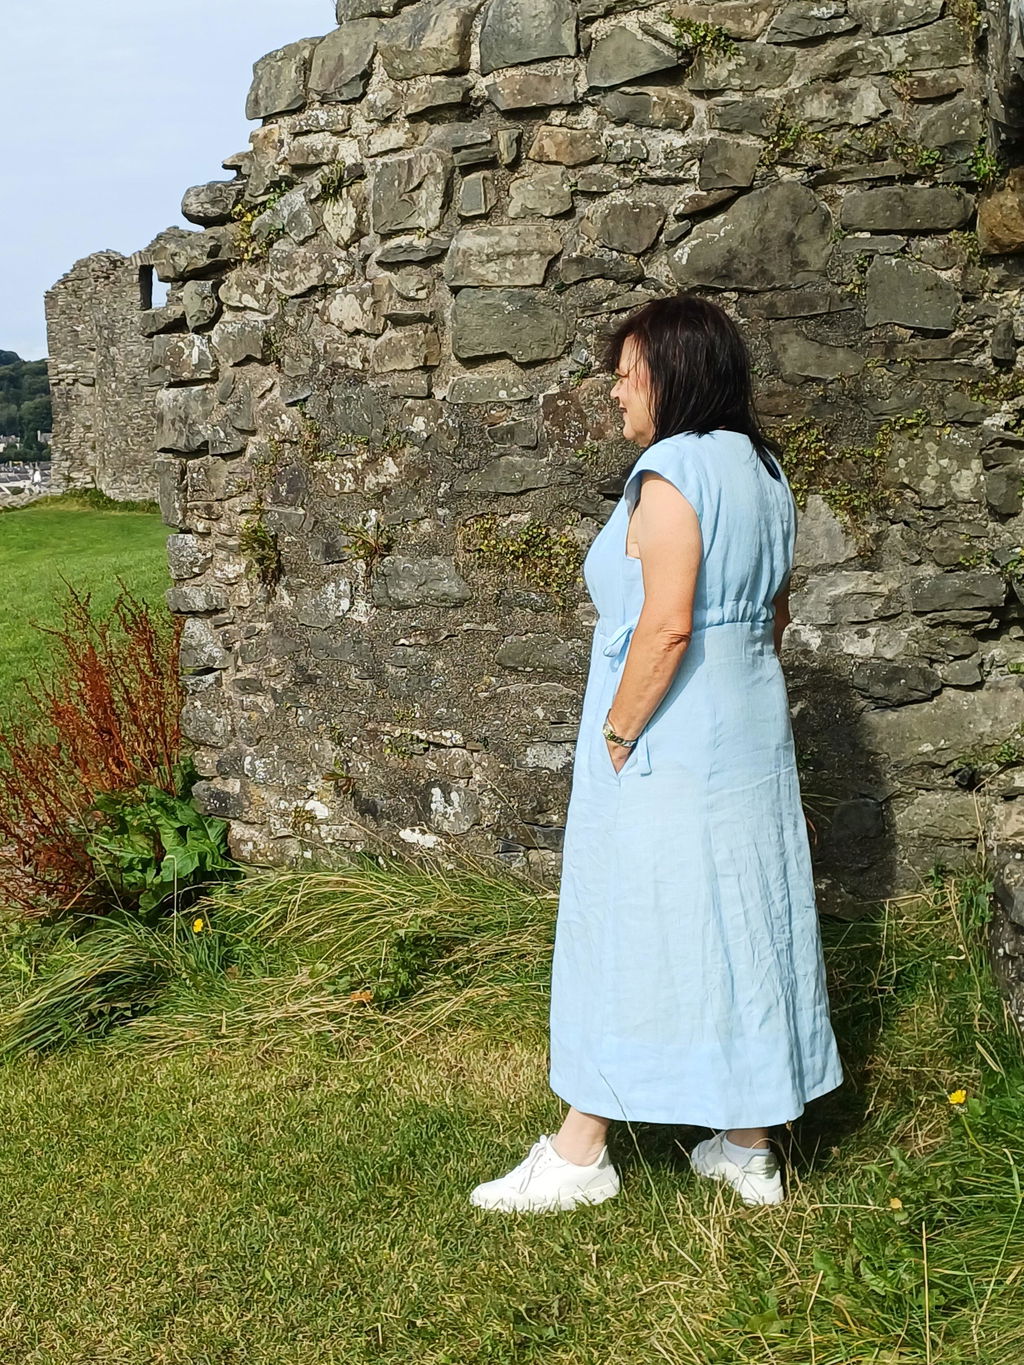
It is a beautifully cut pattern. The bodice sits flat and doesn't gap in wear. The curved skirt seams create an easy drape and the whole thing looks comfortable and stylish in the hot weather. It's and easy but not tent-like fit and the pockets are well positioned. I will definitely make at least one more, probably with the straight sleeves. Greatly recommended.

I really enjoyed sewing this. Its one of the few dress patterns I have bought that actually fit me but at 5 foot it was very long on me. I found doing the top a bit tricky as never done burritto method before so used youtube for help. Instructions are good though and the pattern pieces all matched up. I made it in a heavier weight linen which in retrospect was probably a bit too thick. Im planning to make another in double gauze, with skirt shortened to mid calf and perhaps the waistline dropped to my natural waist. Thats just personal preference rather than a fault of the oattern.

Based on the body measurements I selected size EU 36 / UK 8 however it was at least 1-2 sizes too small.

Simple dress with largely unfaced neck (I suspect it wont keep its shape that well) This dress turned out to not suit my shape, the elastic waist sat strangely on me so all in all I'm sadly not delighted by it. The instructions are badly translated (sorry but they are!) BUT they are otherwise simple and clear to follow with good diagrams. This is a beach cover up and would work better in a very drapey fabric like crepe or viscose ratehr than the indian block cotton I used.

This is a quick make and a lovely statement piece. The instructions are easy to follow. I used a lightweight Indian block print fabric and regular ribbed cuffing, I shortened the length of the rib to make it fit better for my arms. The lightweight fabric works well. My only notes are: The binding at the neck needed a lot of pressing to lay flat, Its a bit fiddly. I think next time I'll use ribbing at the neck too.

I made this in a black cotton poplin with white contrast topstitching in a thicker topstitching thread. The bold white lines and smooth poplin fabric are an excellent combo and give the dress a sporty vibe. I love it, it's so easy to wear and comfortable. The pattern was very detailed and easy to follow. I cut a medium top and large bottom to accommodate my bigger hips but there ended up being enough ease that I didn't need to split sizes. I also skipped the vilene and just stay stitched which seemed to work fine for my fabric.

I absolutely love this pattern. It's such a good basic and I love the details that elevate it such as the all in one facing and hem facing. I usually need a narrow shoulder adjustment but this fit perfectly. It's really hackable - I'm planning a peplum version for a co-ord. Love love love it!
I really wanted to like this jacket but I’m very disappointed. The instructions are so thin as to be virtually useless. There is a video, which is more helpful but which scoots along very fast and there is a very tricky tuck in the lining, at the bottom that doesn’t match the facing, which I could not get right at all. I had to unpick twice and ended up hand sewing..

made a top with this pattern and it's clear

I loved the photo and line drawings and have wanted something similar for a while. I'm done apart from the armhole facings and the buttonholes and just dont like it on. Its too boxy and feels like a high viz jacket. Not sure what I'm going to do to salvage it, if at all. I dont have any more fabric left and dont really want to buy more of its going to be a waste (it was Merchantand Mills), but for me its an epic fail and i feel very frustrated and despondent.

This was a really nice afternoon project. The pattern is well designed and the instructions are detailed. I made mine ankle length and put slits on both sides.

I really liked how minimalistic the pattern is. The instructions are great and easy to follow. But what I have problem with is how deep the neck is with the dress version A. I made it couple centimetres higher and it's still sticking out weirdly and calling for a bigger chest. I will try again but my version one is unwearable so be careful.

I’m still a beginner but I really loved making both dress. I have also made the top without the frill.
The instructions were okay for me, the first one had to be adjusted after completion but I didn’t have any issues.
I’m considering making the original design but a longer length.

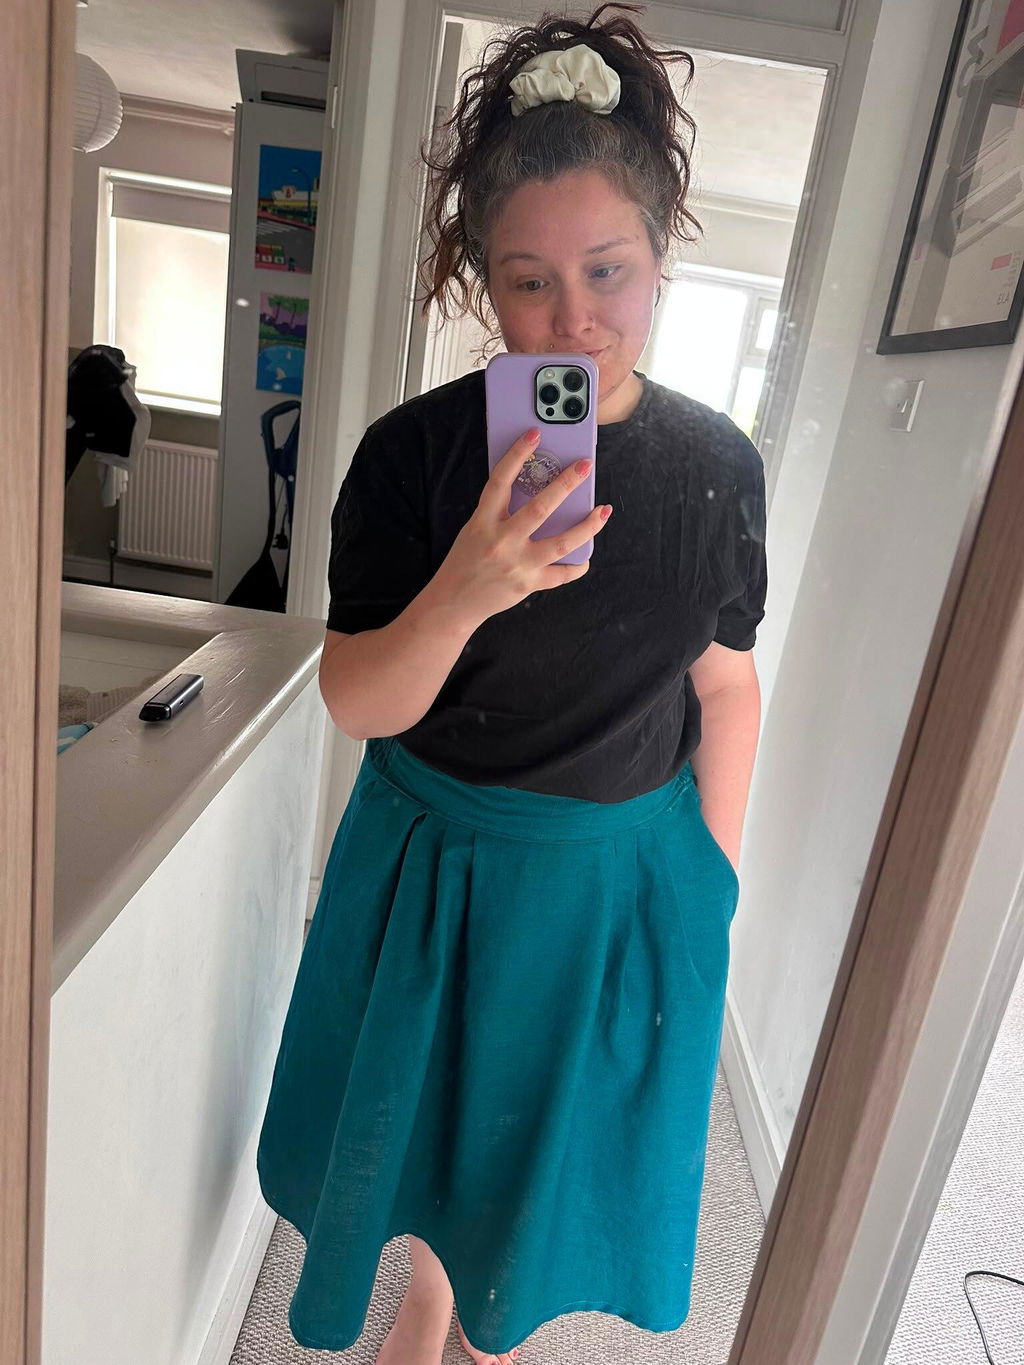
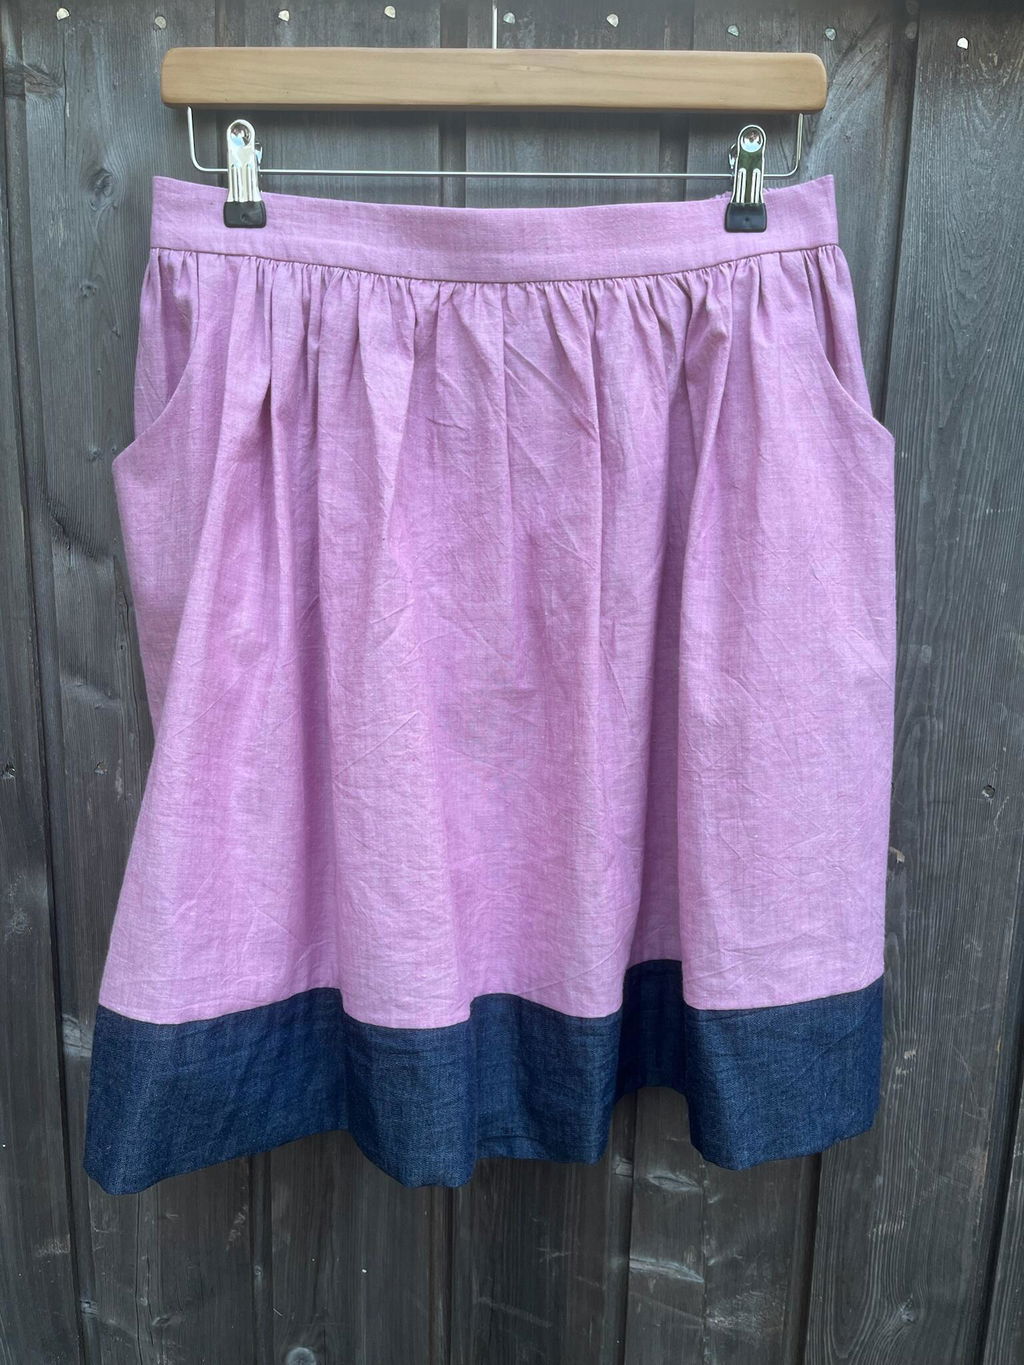
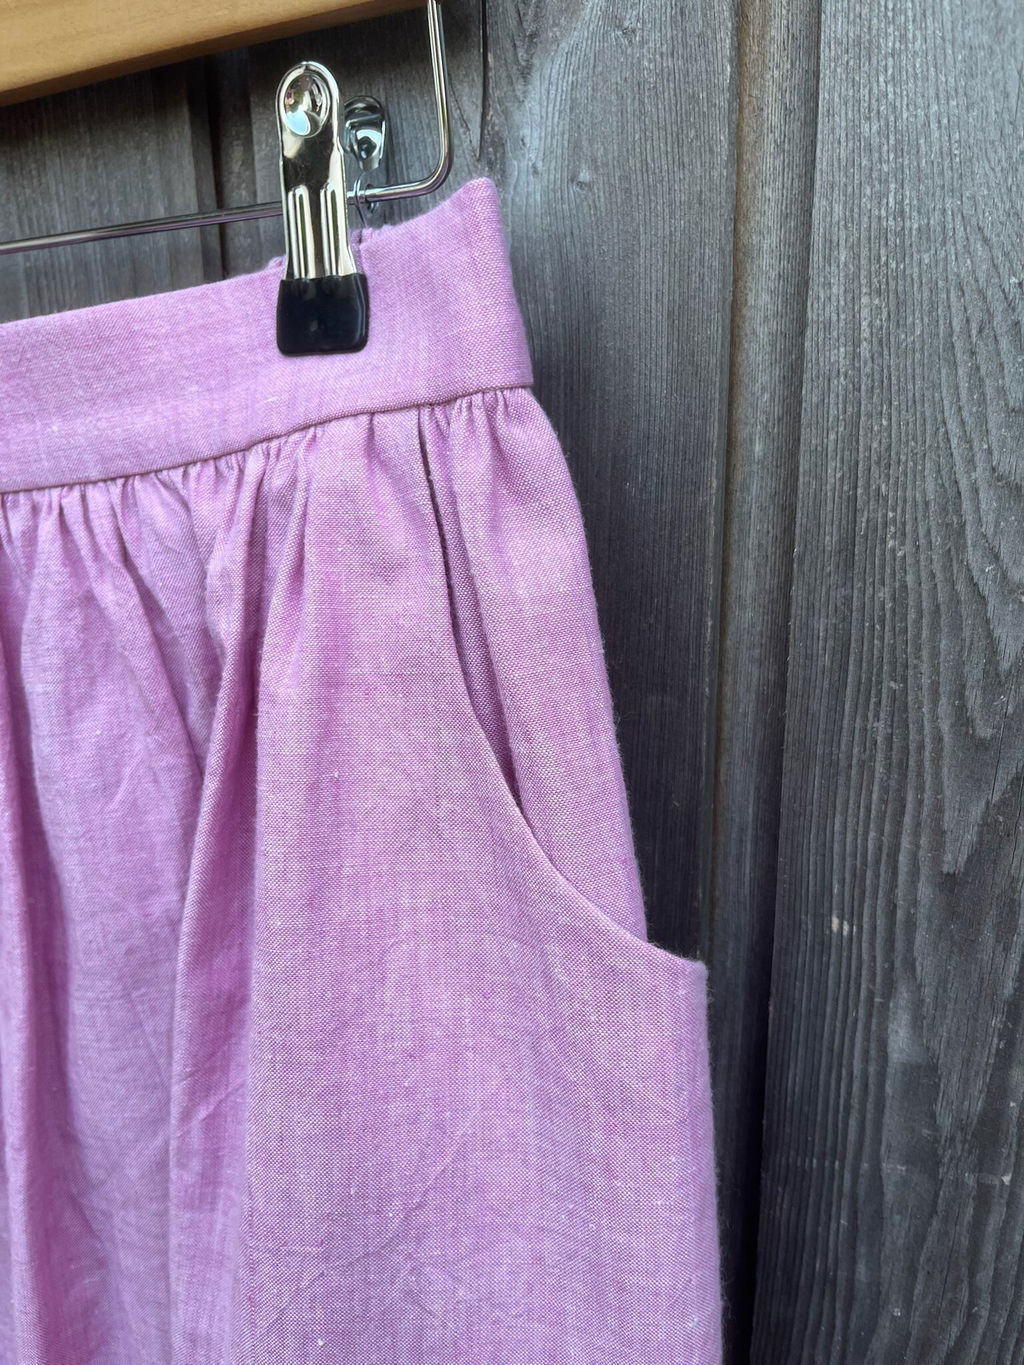
After an unsuccessful dyeing of a white linen skirt a few days before going on holiday I decided to make a skirt. Despite all the handmade garments in my wardrobe there was not one skirt.
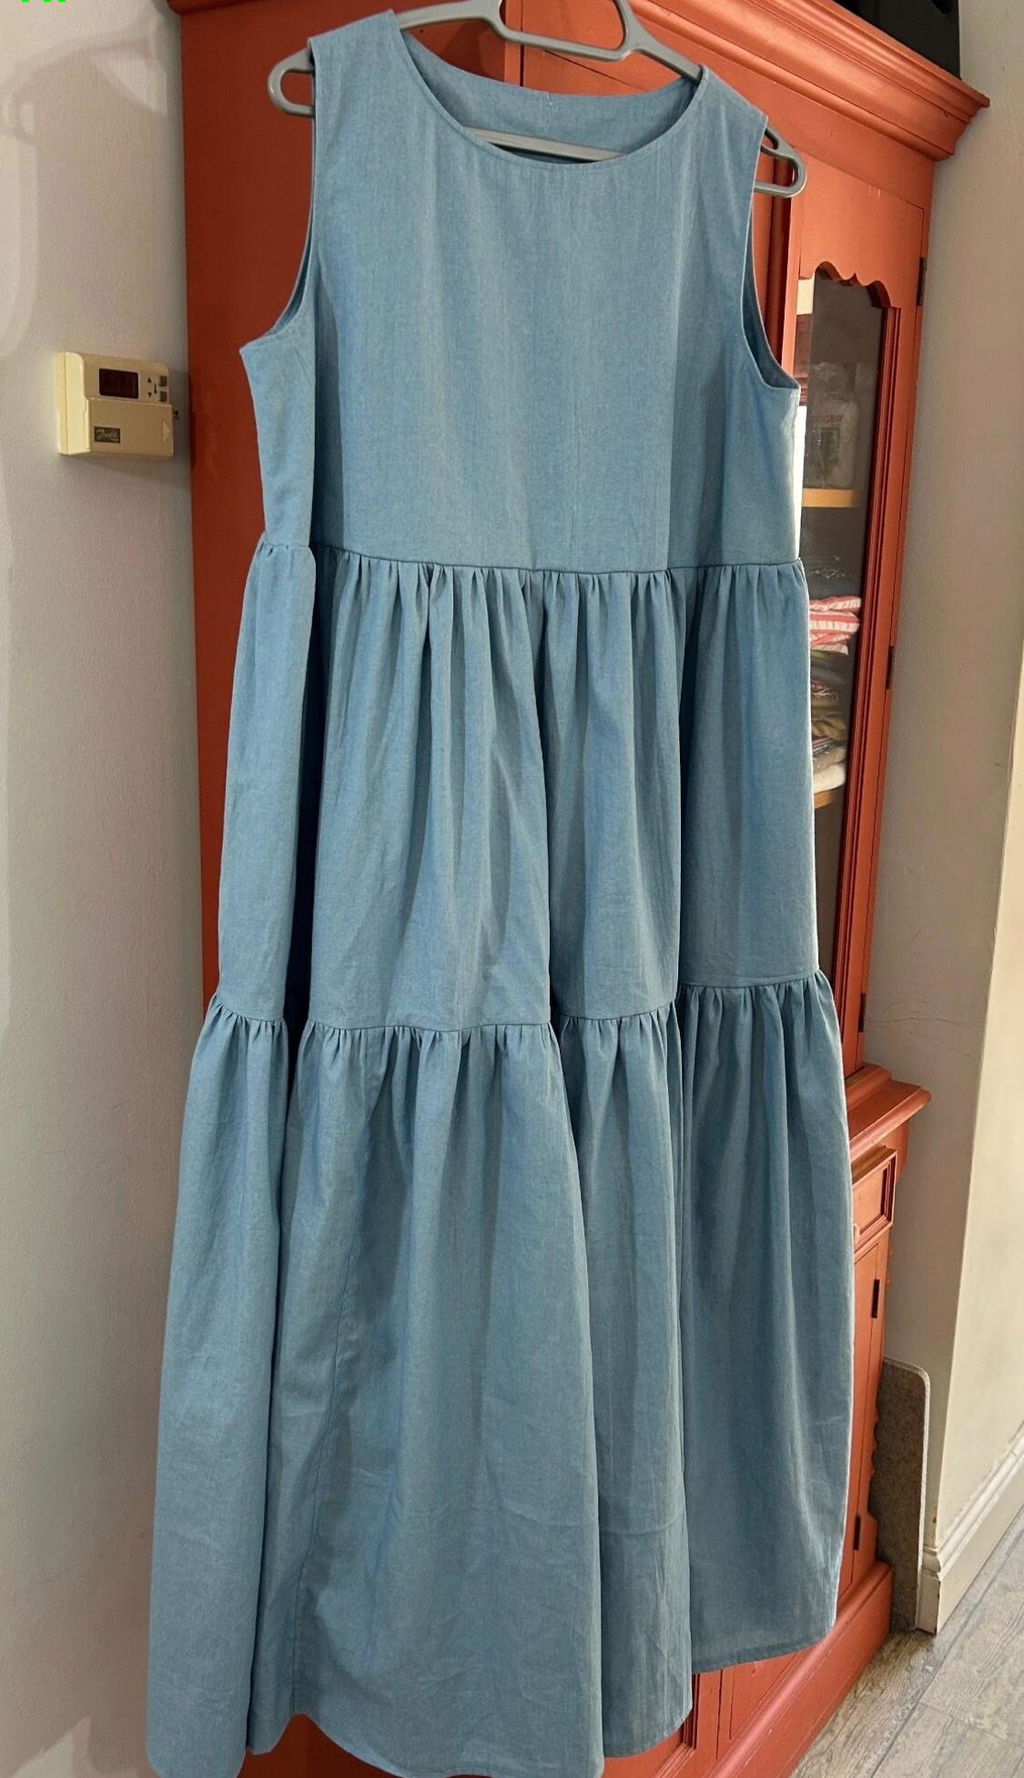
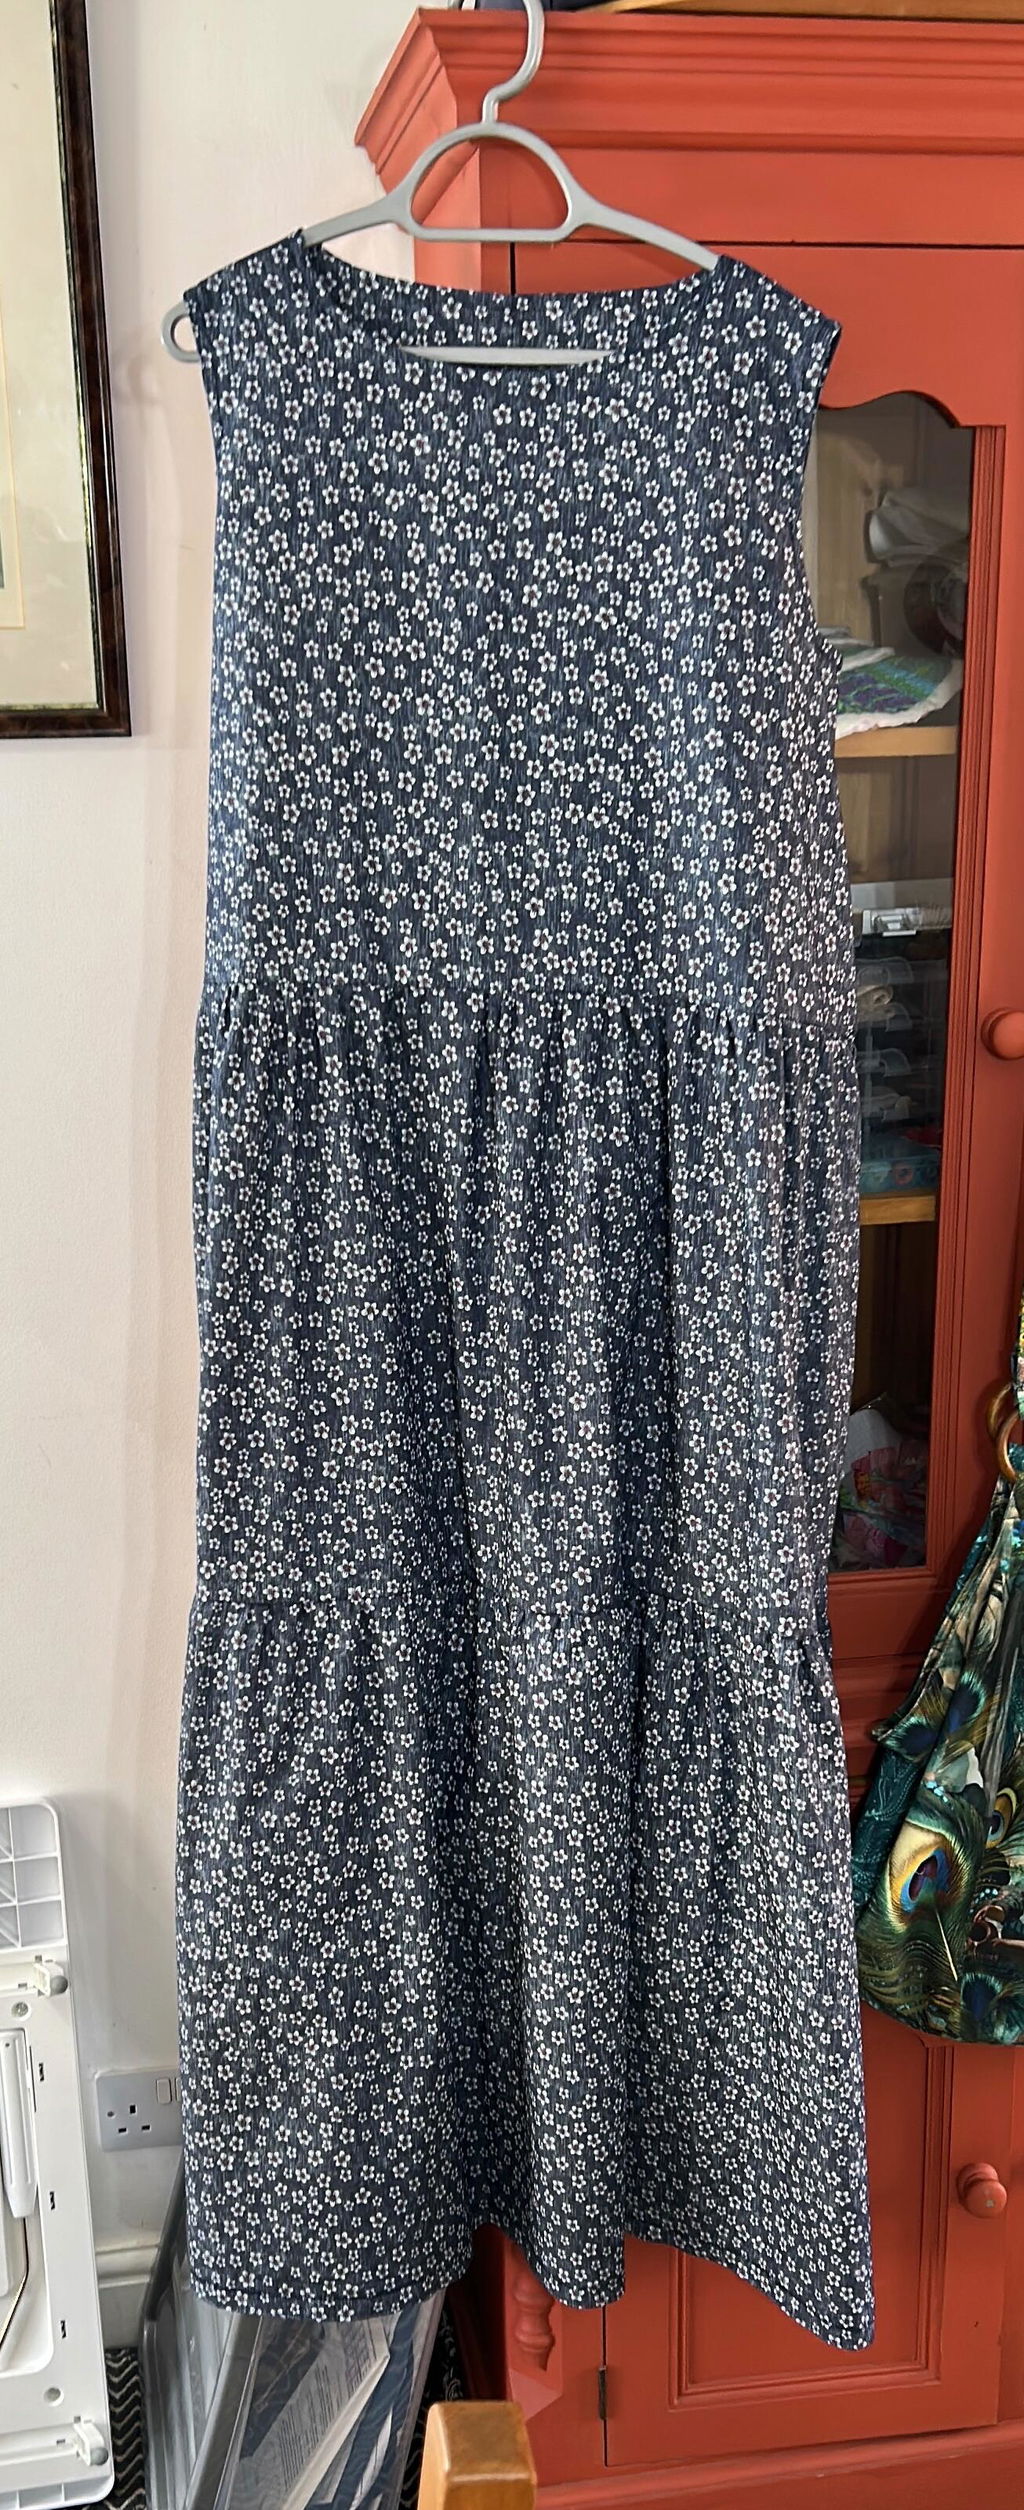
I had a length of chambray fabric from the charity shop along with a scrap of denim chambray which I decided would be perfect for this pattern (which had been stashed since 2018).
I opted for view A, knee length with cutout pockets.
The instructions were straightforward to follow. I choose to French seam the pockets, all other seams were overlocked.
The irony is that this was finished in plenty of time however I then decided to not pack it for holiday. I have however worn it a number of time since, it’s great for the hot weather we’ve been experiencing this month.

I bought this pattern as I wanted a short top to wear with Tessuti Demi pants as a coord. I made the size 40 which suited my measurements and other reviews said it was roomy. My fabric choice was a cotton that was possibly slightly thicker than the recommended fabrics but was perfect for the pants. The instructions are in French and English and were probably clear to most people but I of course made silly errors especially with the facings. I would say read the instructions carefully and cut out carefully marking every pattern piece. My facings although cut to the correct lengths did not match up with the sides and the back. I’ve no idea why as the paper pieces do.
The seam allowance is 1 cm that’s a little tight for the shoulders which are French seamed and for folding in and top sewing on the front seam. You don’t need an overlocker as all the seams are finished or hidden on the facings. My fabric frayed a lot so I wished I had overlocked it.
The fit is quite short so it’s worth checking that is the length you want. I found the neck to be a bit too high for me so will try to lower that on my next one. I loved the side button fastening but as I was short on time I just sewed on the buttons through both pieces as I didn’t need them to be open as the top has a zip at the back. I will make this again but will go up a size which will give me more play on the seam allowance and also make it slightly more roomy for the warm weather.

This is one of my favourite patterns. I didn’t fall in love with the design as soon as it was released because I don’t normally like the look of a seam going up the front of a shirt, but after seeing so many iterations on social media I decided to give it a try. I love the way the neckline and collar are constructed. You definitely need to be careful to mark the dot at the base of the neckline precisely, and sew carefully right up to the dot in steps 14, 16 and 17 of the instructions to get a neat finish. But it’s overall a very quick sew and I can make a size M out of just 1m of 150cm wide fabric. I found the bottom V of the neckline too low for me on the first one I made, but there’s instructions on the FPC blog for changing this. I raised it by 1 inch and now it’s perfect.
The Donny has become a summer staple for me. I’ve made it 4 times and have a few more versions queued up.

This is one of my favourite patterns. I didn’t fall in love with the design as soon as it was released because I don’t normally like the look of a seam going up the front of a shirt, but after seeing so many iterations on social media I decided to give it a try.
I love the way the neckline and collar are constructed. You definitely need to be careful to mark the dot at the base of the neckline precisely, and sew carefully right up to the dot in steps 14, 16 and 17 of the instructions to get a neat finish. But it’s overall a very quick sew and I can make a size M out of just 1m of 150cm wide fabric. I found the bottom V of the neckline too low for me on the first one I made, but there’s instructions on the FPC blog for changing this. I raised it by 1 inch and now it’s perfect.
The Donny has become a summer staple for me. I’ve made it 4 times (once with the long sleeve add-on) and have a few more versions queued up.

Matchy matchy are one of my favourite designers. Their instructions are clear and easy to follow and garments look chic, playful and are very comfortable. This set is a no difference.
The shorts are maybe more oversized than I thought and I would definitely recommend to size down.
Top is a nice every day capsule addition.

This pattern is so variable and can be used with many different fabrics. It's rather quick sew but skirt looks advanced and is very comfortable due to elastic back.
Instructions are clear and accompanying video very helpful.
Je l'ai réaliser dans un tissus en 100 % coton assez rigide ce qui donne un beau tomber.
Je fait petit un bonnet E est contrairement au commentaire précédent cela me convient très bien. j'ai juste bien fait attention lors de ma prise de mesure car j'était entre 2 tailles. Je peux même le porter sans soutient gorge et avoir un maintient grâce a la partie corset qui met aussi bien en valeur la taille.
C'était ma première robe, je la porte tous le temps. J'ai eu aucune difficulté grâce au explication (qui son en anglais mais avec google traduction on y arrive facilement)
La seule modification que j'ai faite est au niveau e la logeur où j'ai retirer 10cm et j'ai pas encore mis l'élastique dans les manches mais je pense laisser comme ca.

I made a toile for this first and had to make a minor adjustment to the neckline and facing to bring it slightly lower. I love a boatneck but it was just slightly too high for me.
My only othe reservation is about the sleeves. I love the crinkle look but am less convinced about the way they stick out at the top (you can see it in the official pictures above). I think it looks a bit odd. I don’t like the finish on the inside of the cuff - you can see the elastic. And also wish I’d found a lighter weight elastic (if such a thing exists) - I made this in a very delicate Nano Iri sateen and the elastic feels to heavy.
But otherwise 4 stars!
