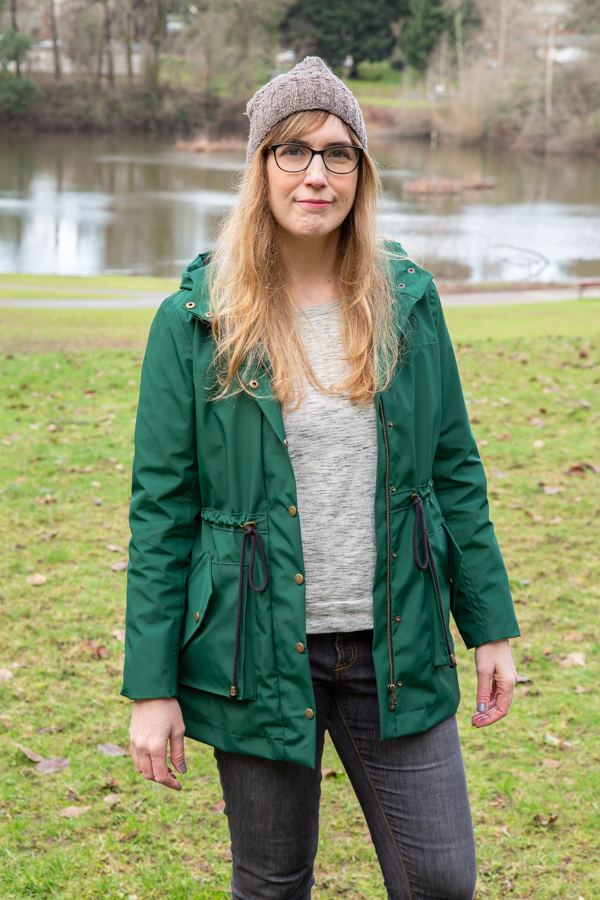
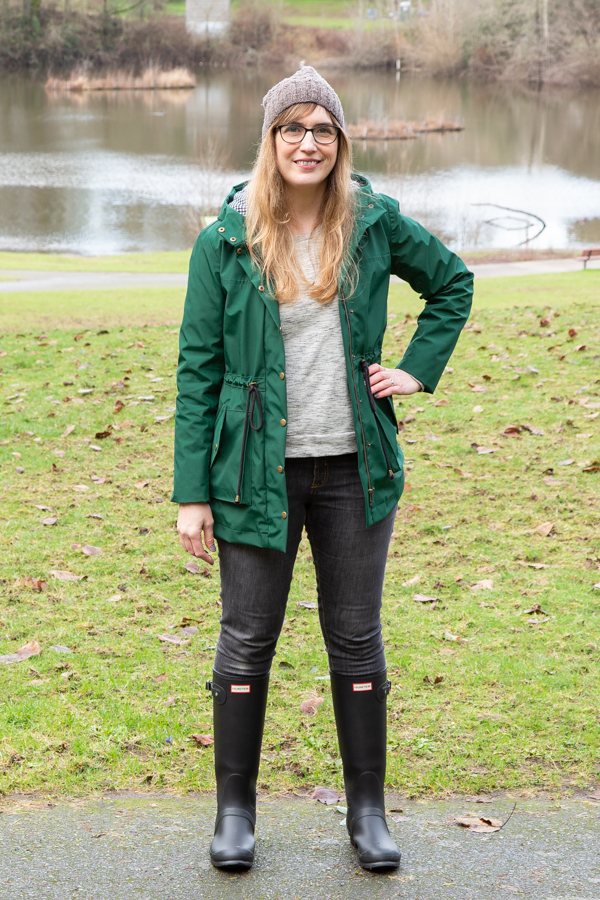
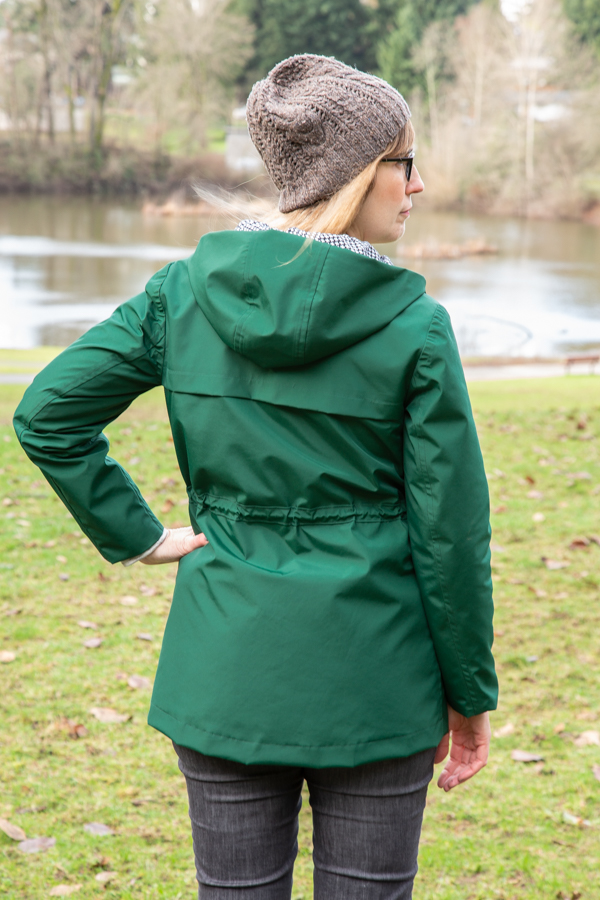
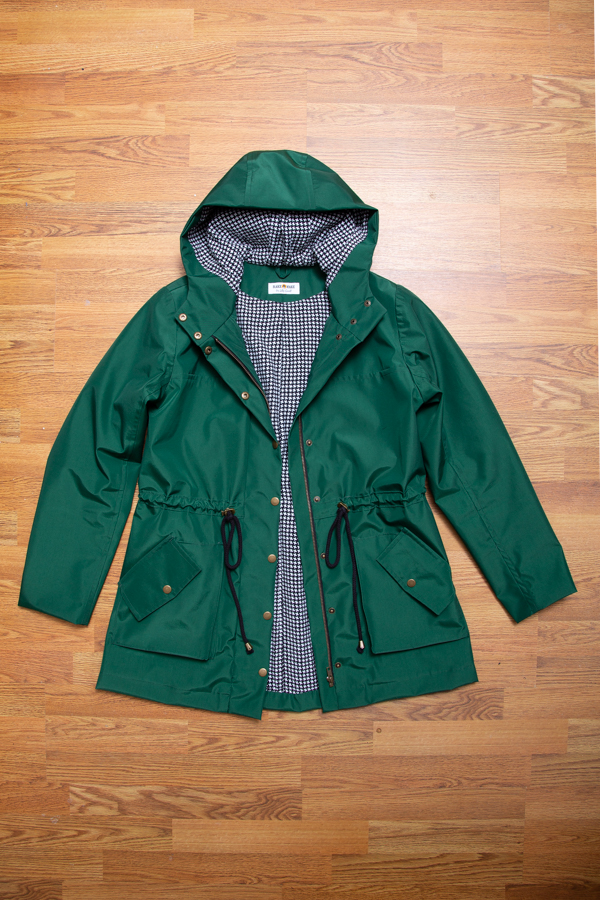
Forest Green Waterproof Kelly Anorak
A review of Closet Core Patterns Kelly Anorak
Reviewed by Lilly Everett on 8th March, 2020
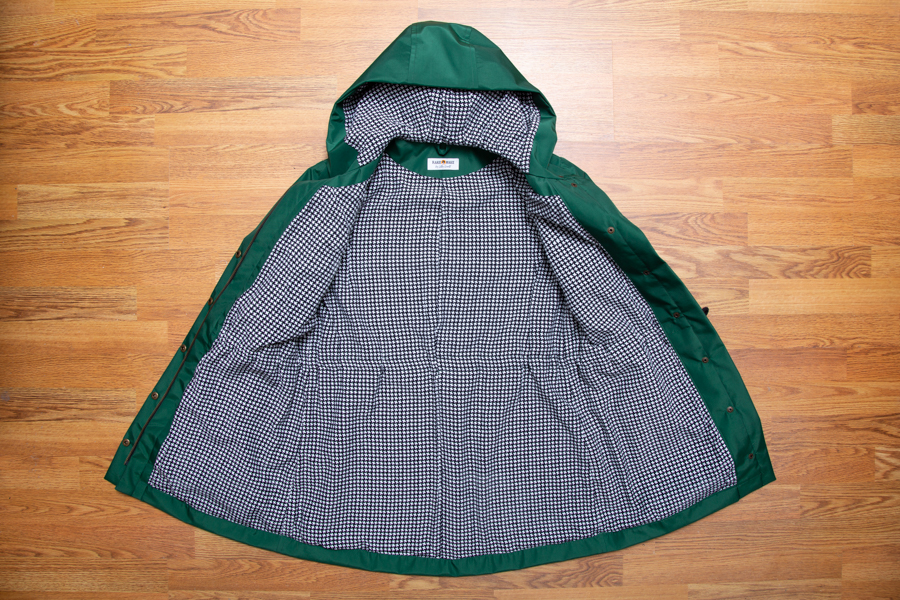
I sewed the lined Kelly Anorak with the waterproof pockets. Something to note is that if you are using the lining expansion, both the outer and lining pattern pieces for the sleeves come from the lining expansion pattern. The outer sleeves will not fit with the lining right if you cut that piece out from the main pattern.

Fabric used:
Main fabric: 3-ply Ultrex in Forest Green from Seattle Fabrics
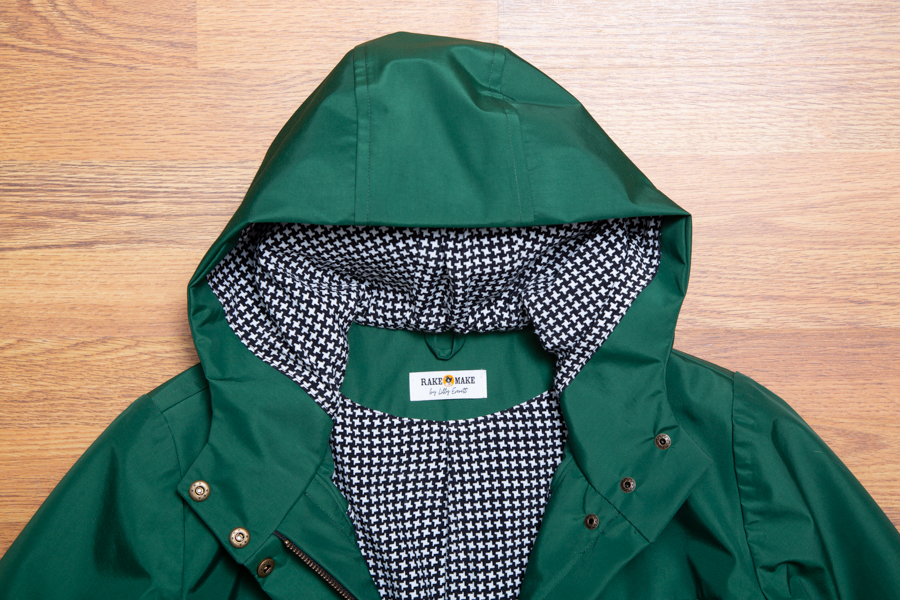
Lining fabric: from my stash
Size traced and sewn
Graded from a size 12 at the bust to a size 14 at the hips.

Alterations*
- Did a 1″ bicep adjustment
- Lengthened sleeve by 1″
- Lengthened body by 1″
*Made all adjustments to the lining as well.
Construction Notes
Here are some of my key take-aways:
- I didn’t find the Ultrex difficult to sew, but I did have to get a special microtex needle and finish all the seams with iron-on seam tape to keep it truly waterproof.
- The Ultrex fabric is available in 2 and 3-ply and what makes it 3-ply is an attached tricot lining (the idea is that this fabric could be sewn unlined). I learned not to use steam when interfacing this fabric as it seemed to melt the attached lining and cause wrinkles. This didn’t really matter as the insides end up completely enclosed in the lined version, so when it was all said and done you couldn’t see any wrinkles from the outside.
- Use Wonderclips and lots of them! I had to use pins in a couple of places, such as pinning the lining to the body to sew the drawstring casing on and when encasing the bottom of the lining. Other than that, I did not use pins, even on the sleeves.
- Use Wondertape for placing and basting on the drawstring casing (before attaching the lining).
- For the size jacket I made, I used about six yards of seam tape.
- Ironing on the seam tape at the armholes made the sleeve seams pucker. Stretching the fabric as much as possible around a tailor’s ham and sleeve roll helped.
- Don’t be tricked into thinking this jacket is too difficult to make by the fancy hardware. I realize that is a big part of what makes this jacket so impressive, but I just used the hardware kit from Closet Case Patterns. Everything I needed was in there and I just followed the installation directions on the Kelly Anorak sewalong on the Closet Case Patterns blog.
- The only dumb thing I did was to hammer one of the snaps against the fabric, which made a tiny mark in the fabric that I can’t get out. After that, I made sure to place the outer part of the snap directly against my cutting mat before hammering.
- My total sewing time was about 45 hours. This does not include the time it took to trace the pattern, do a muslin, or make pattern adjustments.
Fit
After wearing this jacket for a bit—with a lot of bulky sweaters underneath since it’s been winter—I’m thinking I maybe should have done a broad back adjustment or sized up. The back feels a smidge restrictive. I added an inch to the sleeves, and even pressed the sleeves in a way that gave me a bit more length, but I could have benefitted from another inch. Speaking of which, when I put the jacket on, the lining rolls way out with my hand and I have to tuck it back in. I have no idea if this is because of the lining fabric I chose (which is rayon) and either it is not slick enough for my arm to slide in or it stretched out a bunch during sewing or if this is also a size issue. Is it because the arm is made too tight with all the layers I have been wearing? It doesn’t really feel too tight. I used a rayon lining with my Ellsworth Coat and the sleeve is constructed in much the same way and I don’t have this problem with that jacket, even when I am wearing multiple layers under it. Anyway, my solution was to stitch in the ditch a few inches up along the sleeve seams at the cuff, which keeps it from pulling way out of the sleeve like it was, but it still feels a little weird when I put it on.
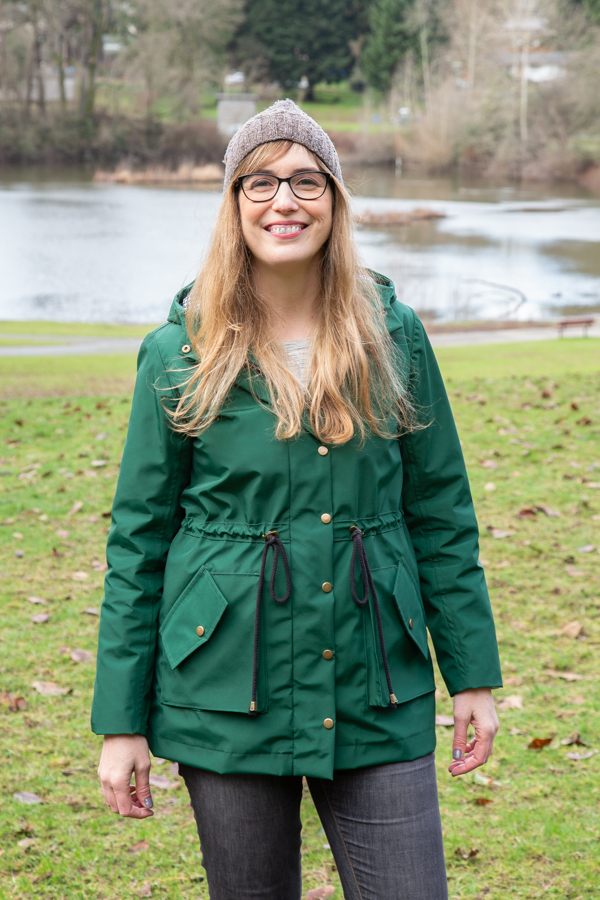
This jacket has been great in the rainy Seattle winter weather. It keeps me dry and there have been zero leaks! I could see this jacket not being warm enough if it got unusually cold for this region, but the fabric by its nature seems to have great wind-breaking properties. As long as I layer sufficiently and zip it up, I am quite comfortable.

Overall, I am very happy with this jacket and sewing it was a lot of fun. Between sewing mostly without pins and having to enclose all of the seams with seam tape, this project was a great one for slowing down and focusing on getting it right, not doing it quickly.
More on my blog at www.rakeandmake.com/waterproof-kelly-anorak/