Merchant and Mills

Merchant & Mills Shepherd Skirt

Regular price £16.50 GBP
Sale price £16.50 GBP Regular price £16.50
Copyshop

We print out the A0 pattern sheets, but you’ll need to download the digital instructions, as we don’t print these. The PDF files will be emailed immediately after purchase, and the printed A0 pattern sheets will be dispatched next working day.

(What is Copyshop?)
Tax included.
Earn 1 Point on this purchase. Learn more

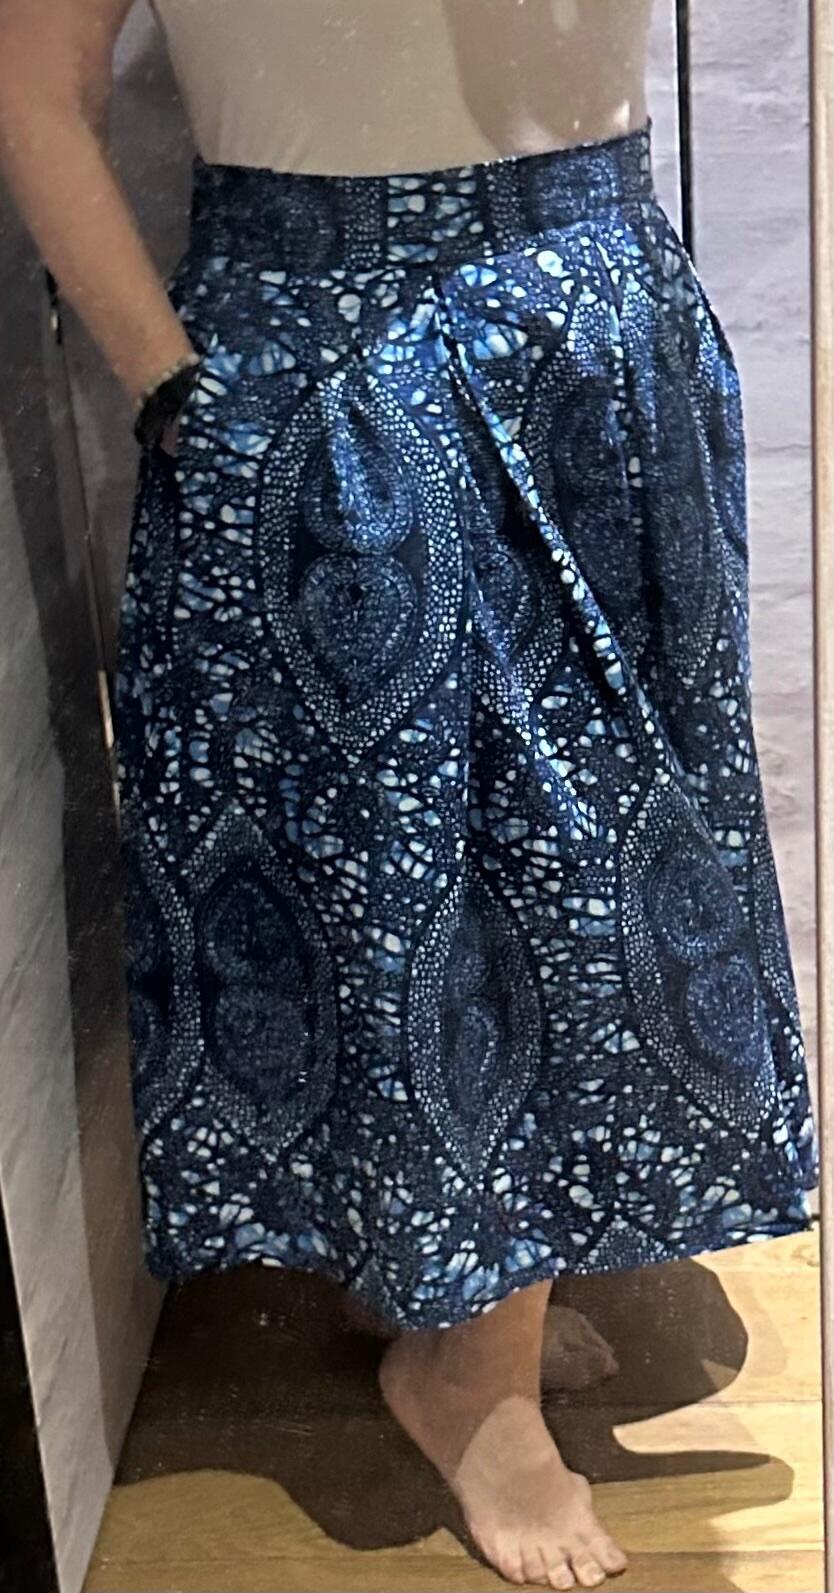
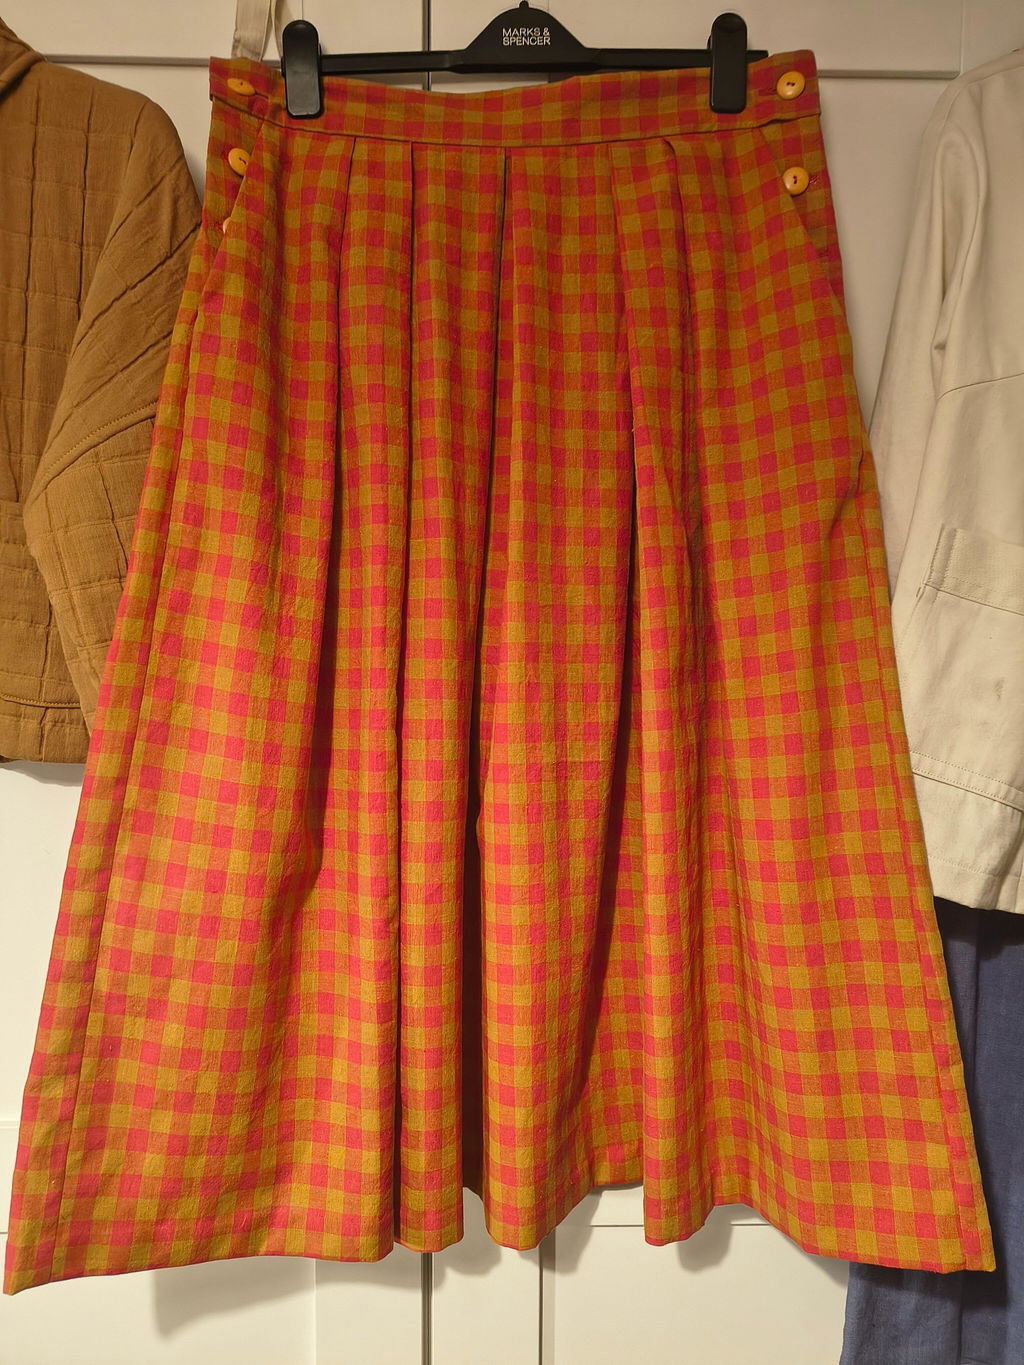
Buy the Shepherd Skirt sewing pattern from Merchant & Mills. A pleated A-line skirt with slanted pockets and side button fastenings. Soft and floaty in linen, or smart and hardy in cotton twill. Can be made lined or unlined.

This sewing pattern is available to buy in the following formats:

– PAPER (next working day dispatch on orders and FREE UK delivery over £50)

– PDF (available to download immediately after purchase). What is a PDF?

– PDF pattern + Printed A0 copy shop (We print out the A0 pattern sheets, but you’ll need to download the digital instructions, as we don’t print these. The PDF files will be emailed immediately after purchase, and the A0 pattern sheets will be dispatched next working day). What is Copy Shop?

Suggested fabrics: Linen, cotton poplin, cotton voile, cotton sanded twill, hemp blends, tencel/linen, needlecord, 4-8 oz. denim, lightweight wool, Indian handlooms (if narrow you may have to piece).

Fabric requirements: 

Sizes 6 – 18

Self: 110 cm (43 1/2″) wide fabric (with nap): 4.3 m (4 3/4 yd) // 110 cm (43 1/2″) wide fabric (without nap)*: 4 m (4 1/2 yd) // 120 cm (47″) wide fabric: 2.4 – 4.3 m (2 3/4 – 4 3/4 yd) // 140 cm (55″) wide fabric: 2.1 – 2.3 m (2 1/4 – 2 1/2 yd) // 150 cm (60″) wide fabric: 2.1 m (2 1/4 yd).

Lining (lined version): 110 cm (43 1/2″) wide fabric: 3.8 m (4 yd) // 120 cm (47″) wide fabric: 3.8 m (4 yd) // 140-150 cm (55″-60″) wide fabric: 2.3 m (2 1/2 yd).

Lining (unlined version): 100-150 cm (39″-60″) wide fabric: 0.4 m (1/2 yd).

Sizes 18 – 28

Self: 110 cm (43 1/2″) wide fabric (with nap): 4.1 m (4 1/2 yd) // 110 cm (43 1/2″) wide fabric (without nap)*: 3.9 m (4 1/4 yd) // 120 cm (47″) wide fabric (with nap): 4.1 m (4 1/2 yd) // 120 cm (47″) wide fabric (without nap)*: 3.9 m (4 1/4 yd) // 140 cm (55″) wide fabric (with nap): 2.3 – 4.1 m (2 1/2 – 4 1/2 yd) // 140 cm (55″) wide fabric (without nap)*: 2.3 – 3.9 m (2 1/2 – 4 1/4 yd) // 150 cm (60″) wide fabric (with nap): 2.3 – 4.1 m (2 1/2 – 4 1/2 yd) // 150 cm (60″) wide fabric (without nap)*: 2.3 – 3.9 m (2 1/2 – 4 1/4 yd).

Lining (lined version): 110-120 cm (43 1/2″-47″) wide fabric: 3.8 m (4 1/4 yd) // 140 cm (55″) wide fabric: 2.5 – 3.8 m (2 3/4 – 4 1/4 yd) // 150 cm (60″) wide fabric: 2.5 – 3.8 m (2 3/4 – 4 1/4 yd).

Lining (unlined version): 100-150 cm (39″-60″) wide fabric: 0.35 m (1/2 yd).

* Waistband parallel to the selvedge

Sizing: UK 6 – 18 or UK 18 – 28 (approx. UK 6 – 16/18 or UK 18 – 30, based on our standardised size chart). Please also check the designer’s size charts and finished garment measurements.

Notions: Eight 15 mm (3/4″) buttons; 0.35 m (1/2 yd) interfacing.

PDF pattern includes: Instructions; A4/US letter print-at-home pattern (42 pages for either size range); A0 copy shop pattern (2 sheets for either size range).

If you’re looking for more maker inspiration, check out the latest sewing pattern reviews from the sewing community. We also have a sewing blog to keep you up to date with all the news from the world of sewing.

Share

If you’re looking for maker inspiration check out our blog. With weekly updates on new patterns, styling ideas and maker inspiration, it's not to be missed.

Customer Reviews

Based on 7 reviews
100%
(7)
0%
(0)
0%
(0)
0%
(0)
0%
(0)
M
Milie Holliday
Lovely skirt - Merchant & Mills

I love this skirt. The overlaid pleats and button details give it real elegance. I made my trial version in brushed cotton and didn’t get the small checks quite in line. The pattern is easy to follow although see my notes below about the waistbands. 
To avoid dealing with so much bulk, it’s completely possible to make the skirt in reverse order, finishing with the long side seams. First, I folded the pleats on each separate piece. The order (1 to 4) is given. Two pleats are marked with notches and two with tailor tacks. Each has a direction; the second goes the opposite way to the other three and is overlaid by the third making part of the top of the skirt quite thick. You need to fix the pleats with machine basting or industrial strength tacking and make sure they are lined up exactly.
I then did all the work on the pockets. I loved the nifty French seam on the bags. There is a facing on the back of the skirt and all the rest is joined to the front of the skirt. Lining the pieces up and matching the facings required accuracy and attention to seam detail. There is a reinforced tack with a slit which appears numerous times and all must be matched. Lots of tacks to come out at the end. I kept finding them!
I attached the waistbands with the front and back still separate. I did find the waistbands a bit short and, at this stage, went back and redid the pleats. Even so I had to take in a bit more than prescribed in order to make the band fit. The front pattern piece does include an extra seam allowance for joining pieces cut on narrower fabric but I’m pretty sure I didn’t include that. I cut a size 14 which should have been roomy but, with the waistband issue, it came up pretty snug.
I joined the front to the back last, before hemming and making button holes. I was taught to hang a finished garment and hem at the end so stuck with that once front and back were joined.
The skirt hangs really well, moves beautifully and is flattering. (I think so anyway!) On my next make, I shall use the thinnest of thin interlining.

h
hsalthouse
Great pattern, unusual construction.

(Apologies for copy & paste text!)

I've made three of these, with varying degrees of success.  It's a great pattern.

The first version was a stretch twill, which I lined because I have lining fabric to use up. This hangs really nicely although I only had room for one button on the waistband, not two. This practice version came out best of the three. Annoyingly.

The second was in a beautiful soft Merchant & Mills linen, unlined. The construction was easier but not the fabric (see below!).

The third is in a wool Challis. I lined this, too.

Pros: As always, the instructions are excellent. Pay careful attention to the wording when attaching pocket facings and plackets - I made the same error twice!  I also like the idea of hemming at the start of construction.  It's not a difficult pattern, but see below. If in doubt, use a nice stable fabric like a twill or poplin.

Cons: These are entirely to do with fabrication.  Basically, an unstable fabric adds considerable challenges, as does lining. This is mainly because the first step is to attach the lining to the skirt, after which they are both hemmed. From that point, therefore, you're working with the whole piece. It gets unwieldy and if lined, slippery. By the time the pockets are done, an unstable fabric will be frayed at the waistband. With both the linen and wool challis, this made finding the pleat notches a bit tricky.

Lining adds to the problem, particularly if it's cheap. The challis waistband was a nightmare of cobwebby fibres and fabric threads.

Also, if you're anxious about 3D stuff as I am, something like a fine wool won't stand up well to repeated manipulation or unpicking.  I did something odd with the lining on one side, and despite very carefully lining up/stopping at notches, I had bunching which I couldn't fiddle with any more as the challis was looking stressed at the multiple seam point.

I will make this again - it's a lovely skirt and for once I don't need to lengthen (I'm 5'8" but the shape of this makes the below-knee length perfect).  I will only line stable fabrics, though - and I might try putting the pleats in first to reduce the vast flappiness while working on the pockets!


L
Liz
A fun make, even for a newbie sewist

I embarked on this with some trepidation given the intermediate marking on the pattern. However, I needn’t have worried as the instructions are pretty through. The only places I struggled were when it didn’t explicitly say to press the understitched facing back, and when to remove the tailor’s tacks, which would have both been helpful given my limited experience. My main note to other beginners is it’s really important to line up all the snips for the pockets as perfectly as you can! I worked around my imperfectly lined up pockets ok but you’d be better off lining them up better to start with. And do believe the pattern when it tells you to grade the internal seams in a couple of places.

All that said I really enjoyed this make and am thoroughly pleased with the end result! The pockets are the perfect size and I’d highly recommend it.

S
Salva..aka @sewingunlimited
A perfect skirt!

 I really love this skirt, it’s just so comfortable and it’s perfect with trainers, which these days I wear pretty much with anything.
A beautiful pattern and I’d definitely want one in linen

I had some challenges with the pockets and the pleats…

POCKETS - there are 6 pattern pieces and together with the minimal instructions I got lost and very confused along the way, also leaving weeks between one sewing session to the next didn’t do me any favour.
So all I can say make sure that you mark all your pieces, paying attention to the button/buttonholes marking, and take your time with reading the instructions.
PLEATS - there are loads of them, front and back! I used chalk and by the time I got to the pleats all my marking had gone so had to use the pattern pieces to try and mark all over again…if like me it takes you a while to sew a garment then I’d recommend you use those markers that wash off!

I went up a size and made a 12, simply because I wanted the pleats to drop straight down, without sticking out and leaving gaps in between pleats, so I think this way you can see how the pleats fit nicely within each other.