Jennifer Lauren Handmade

Jennifer Lauren Handmade Mayberry Dress

Regular price £12.00 GBP
Sale price £12.00 GBP Regular price £12.00
Copyshop

We print out the A0 pattern sheets, but you’ll need to download the digital instructions, as we don’t print these. The PDF files will be emailed immediately after purchase, and the printed A0 pattern sheets will be dispatched next working day.

(What is Copyshop?)
Tax included.
Earn 1 Point on this purchase. Learn more

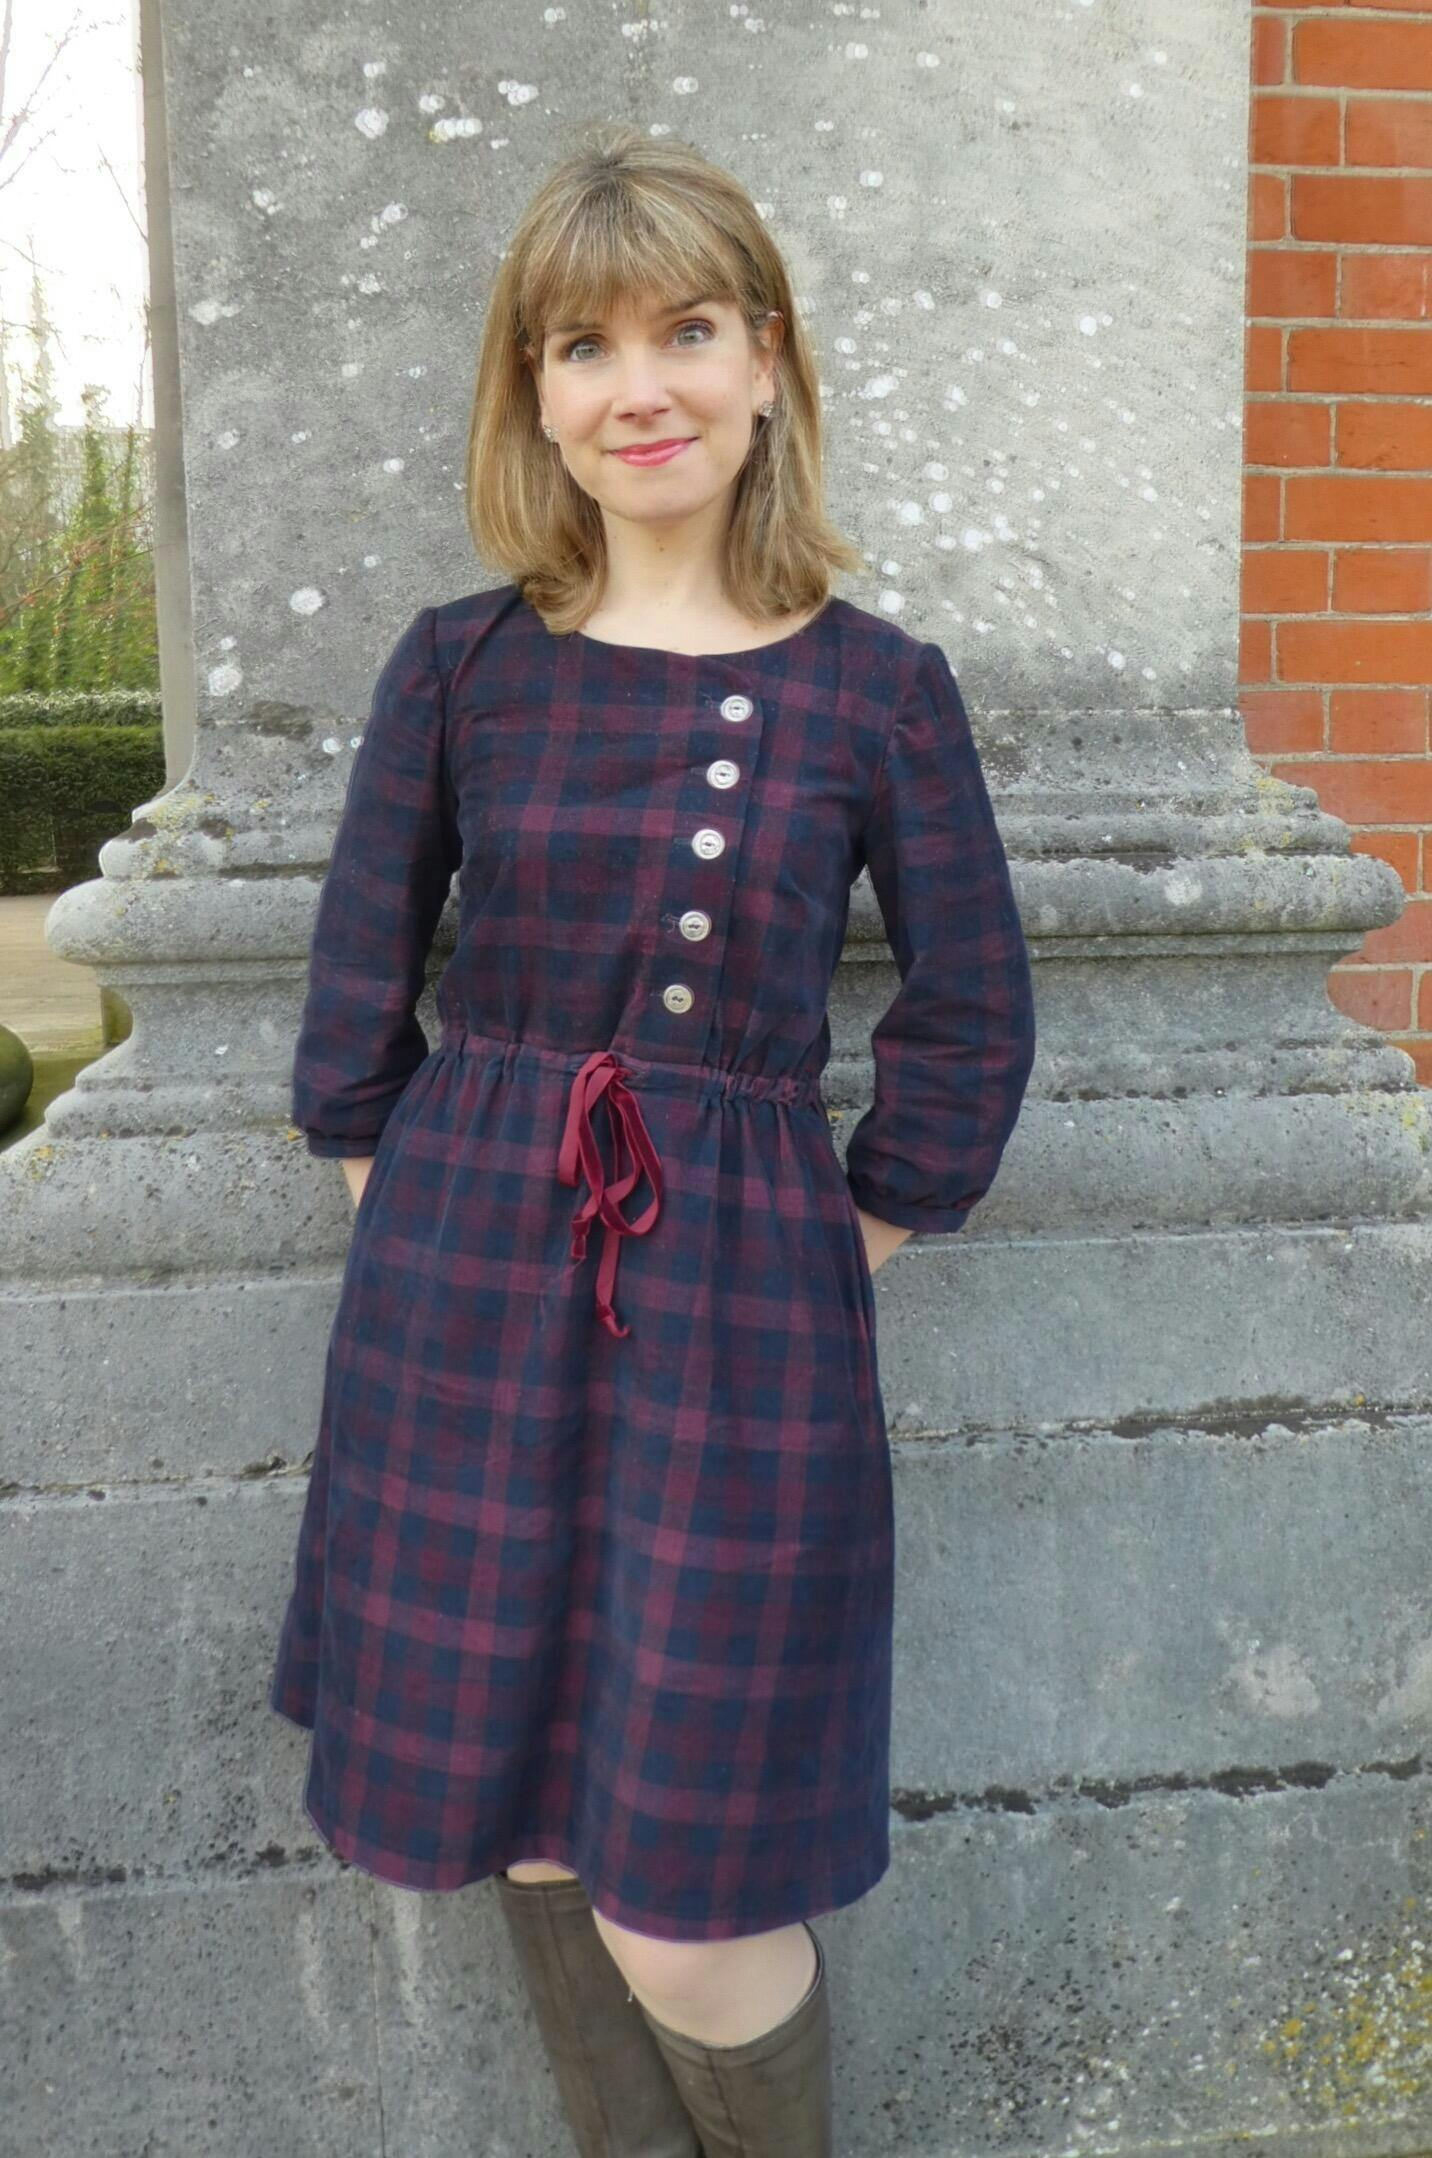
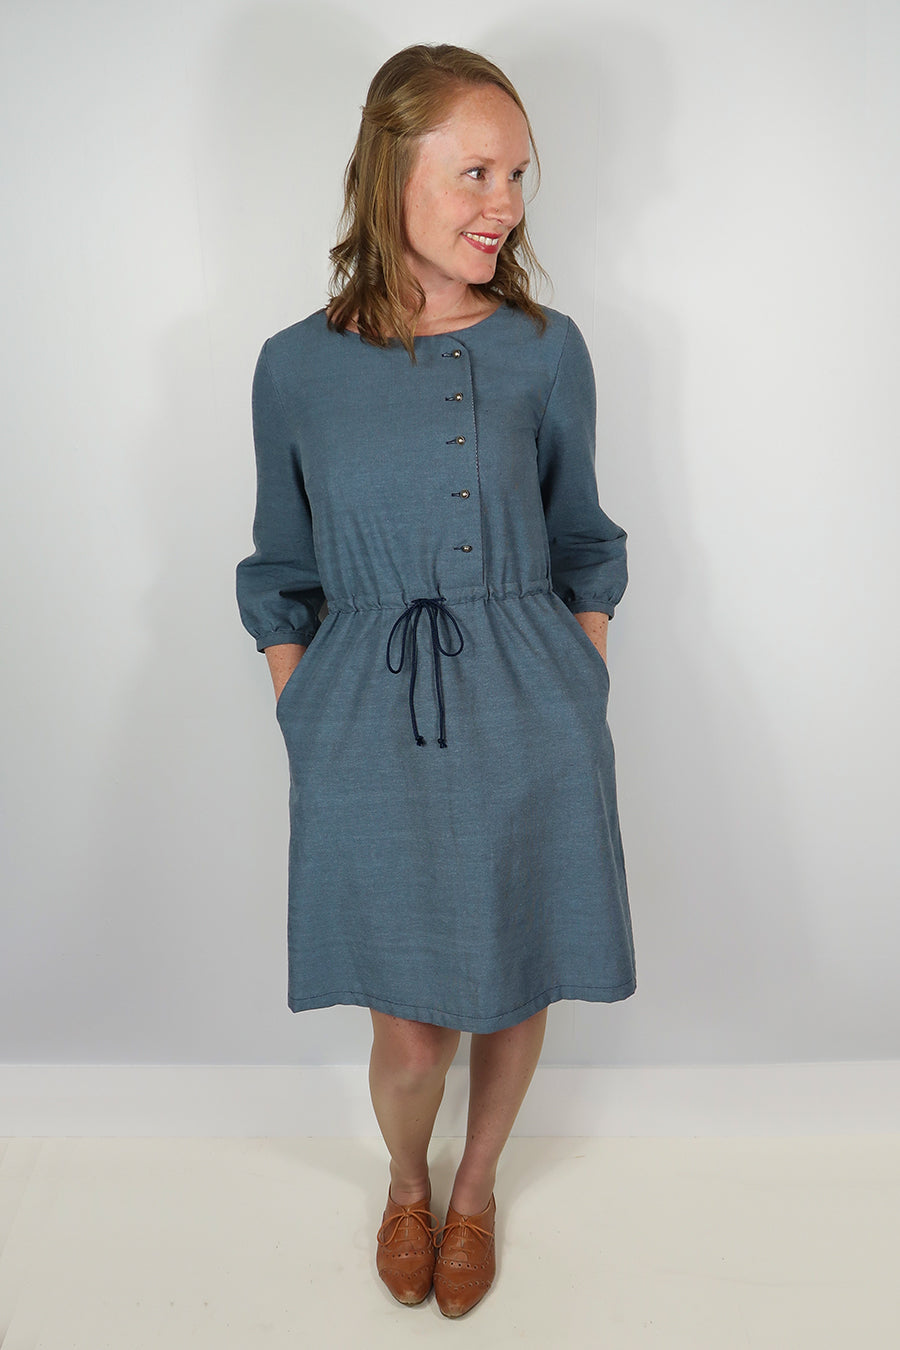
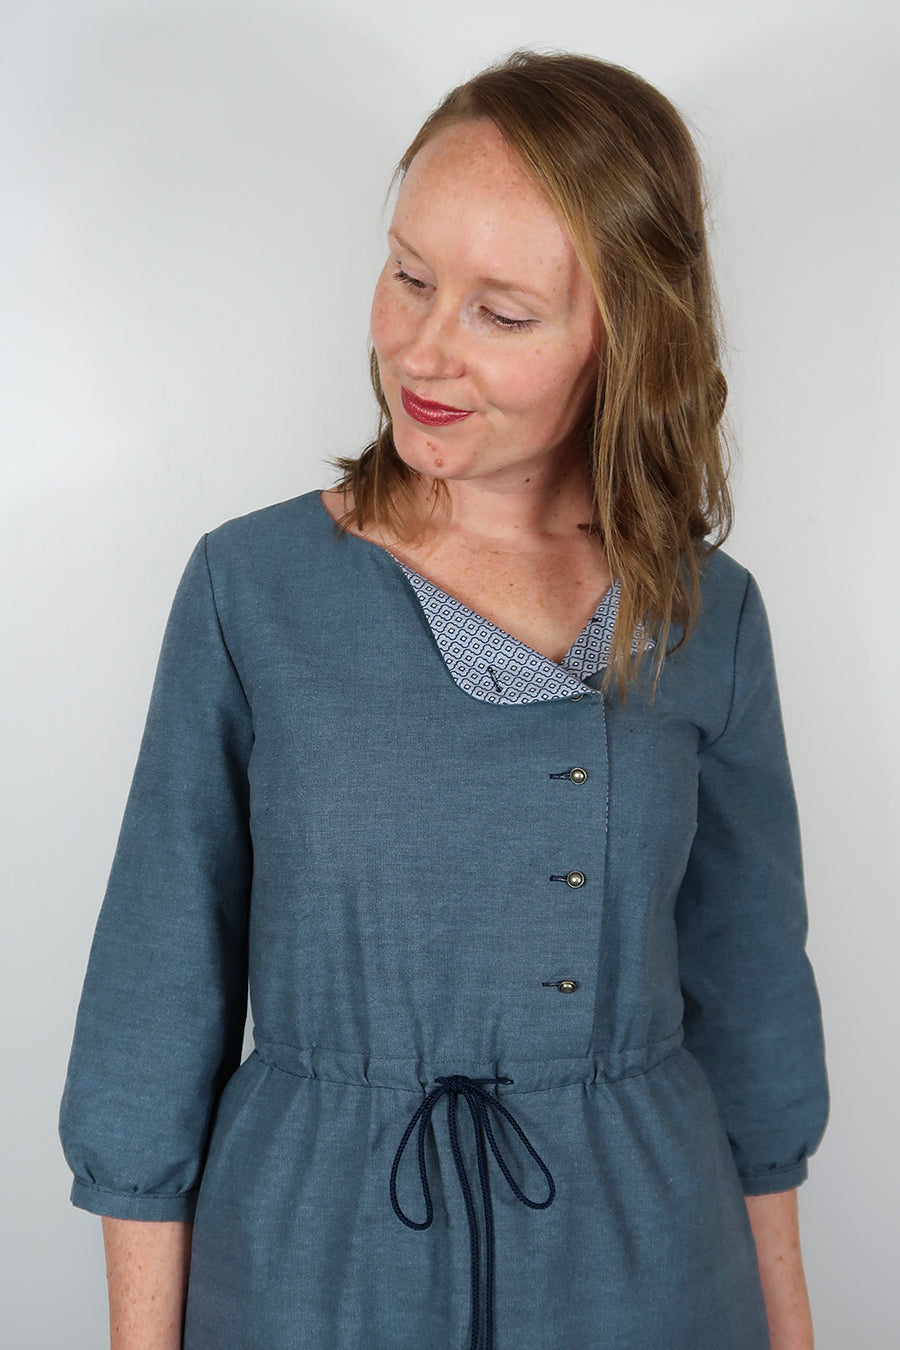
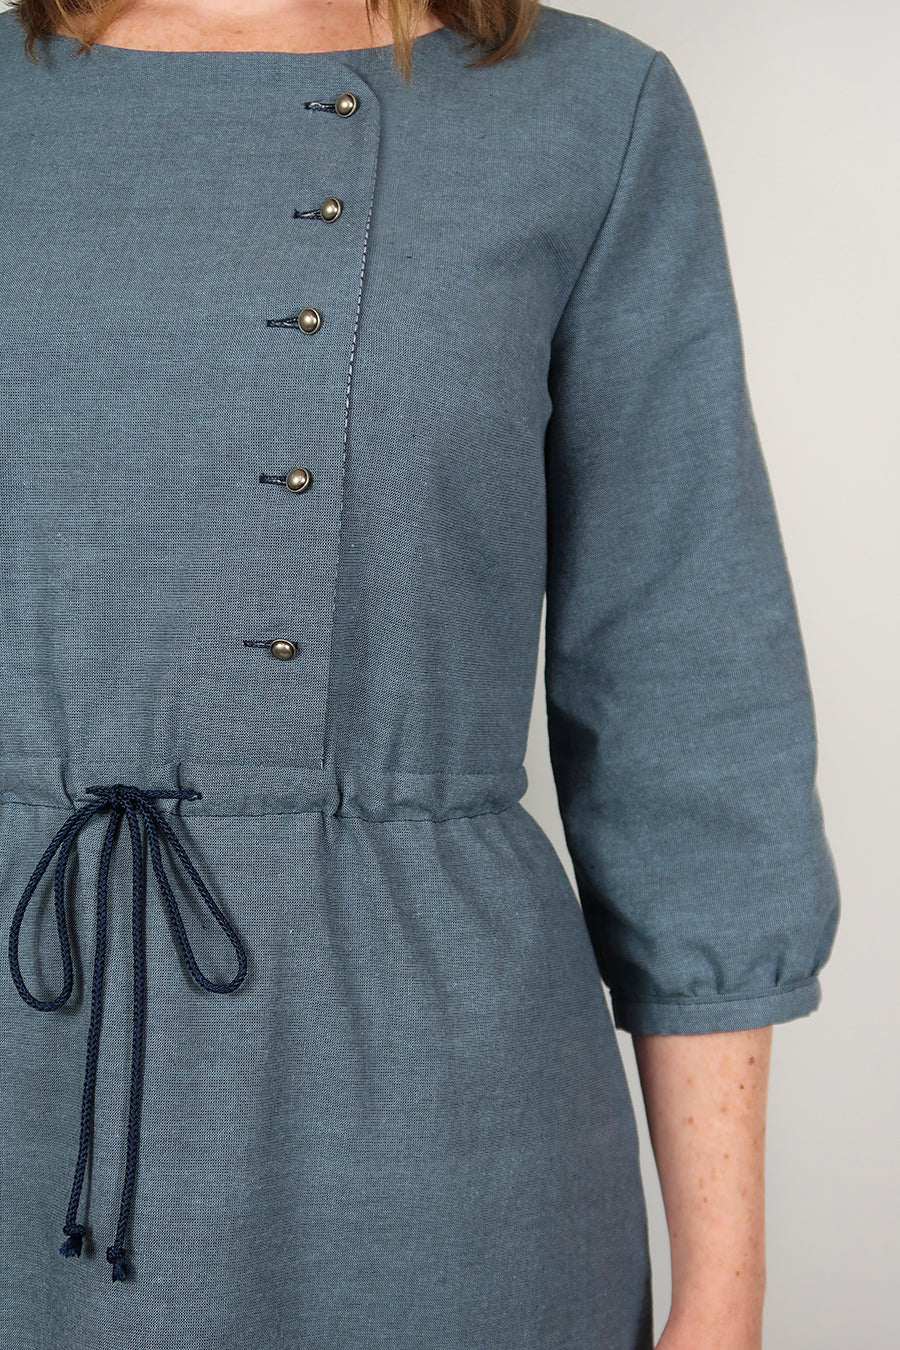
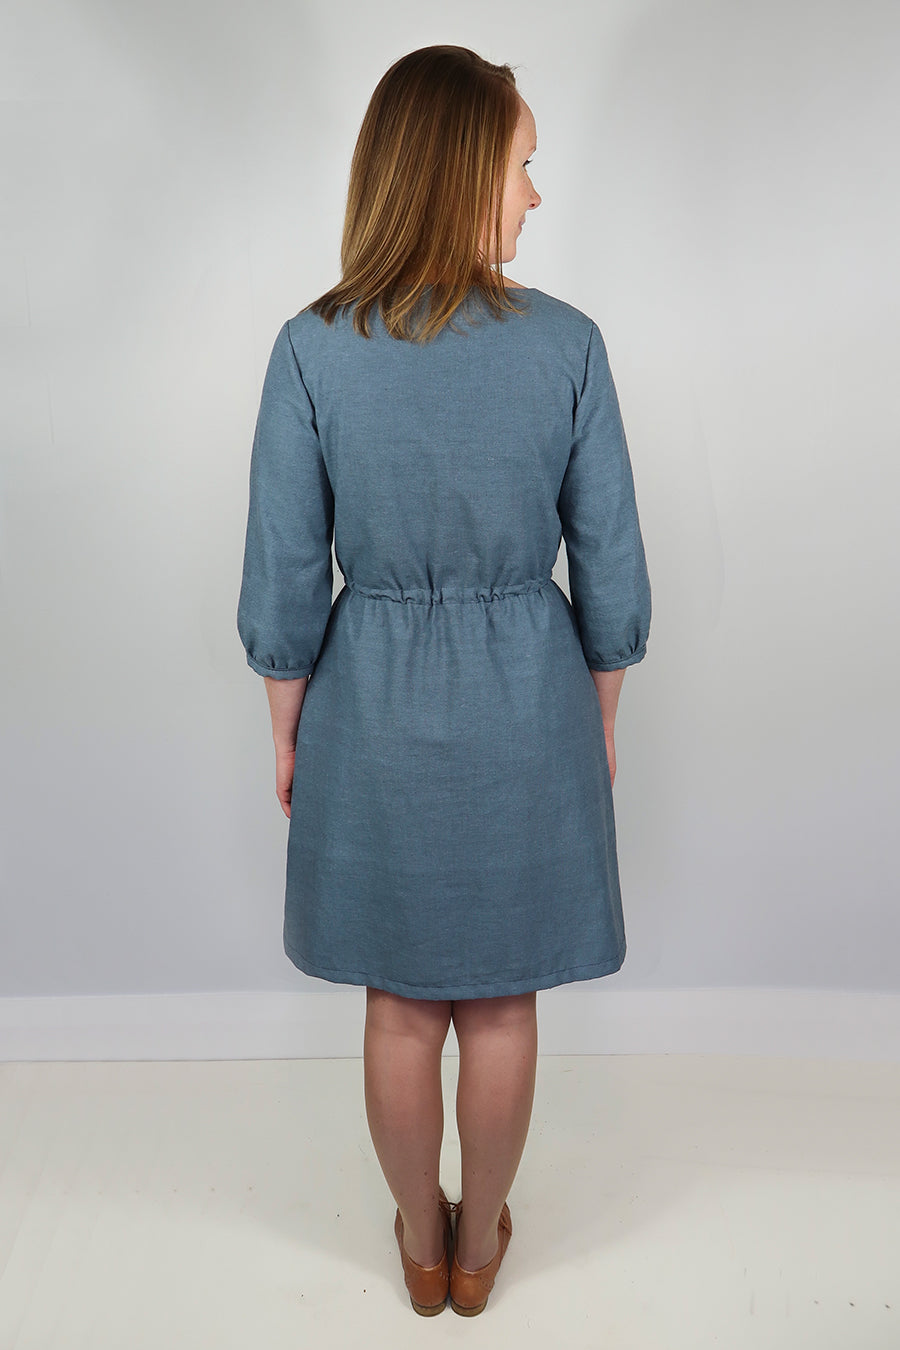
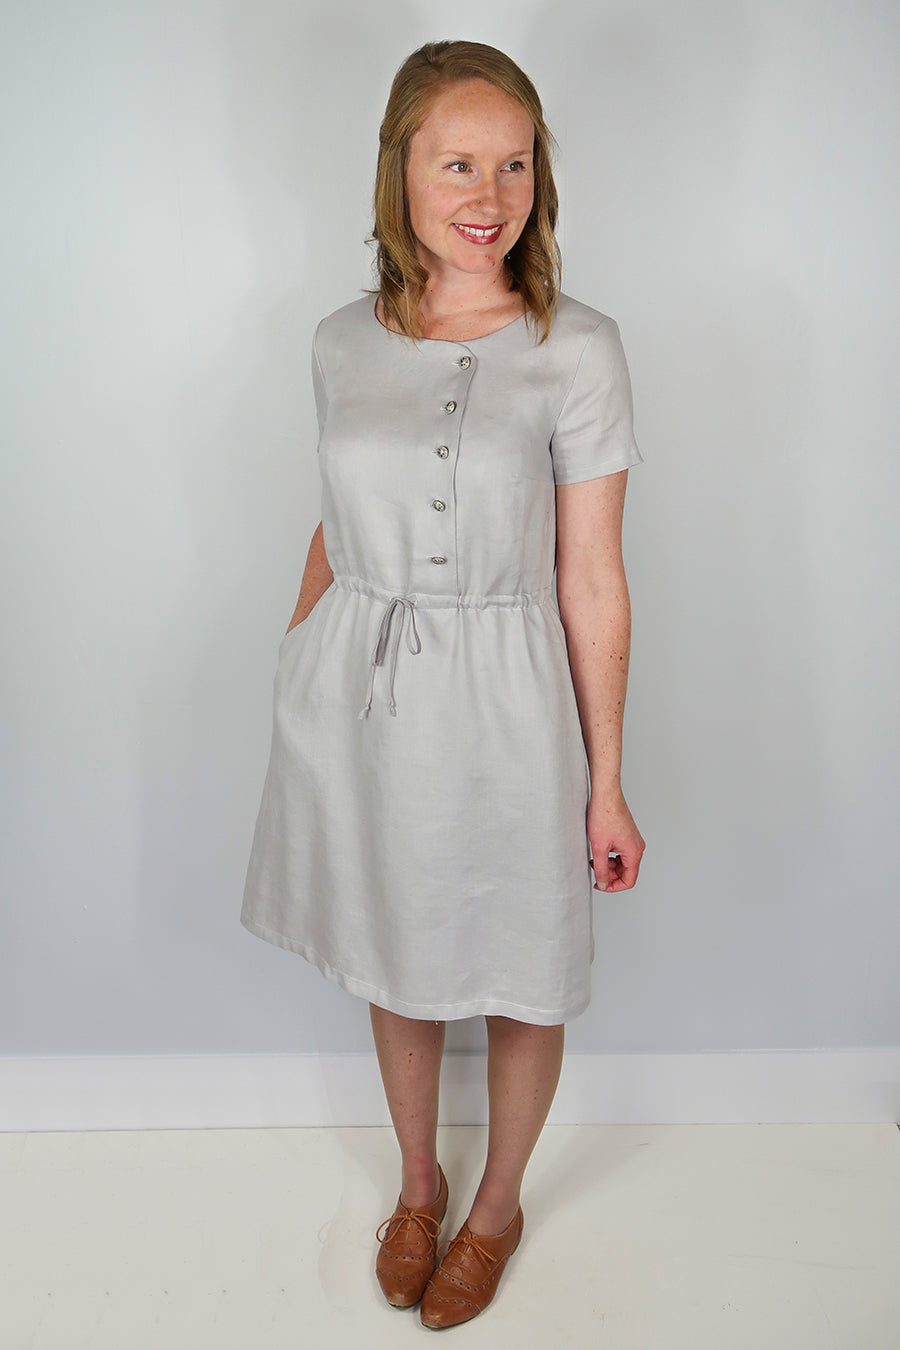
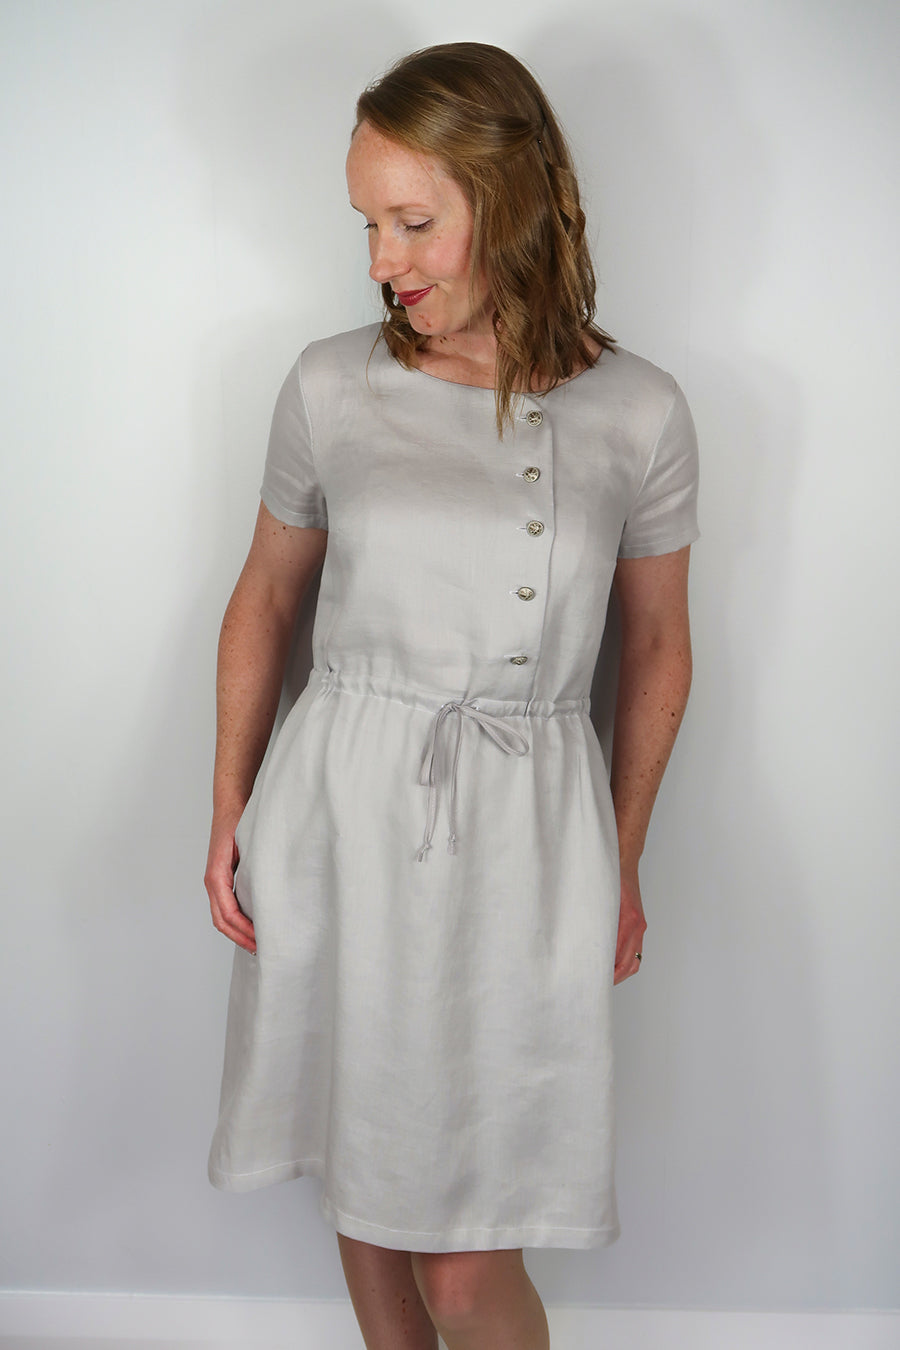
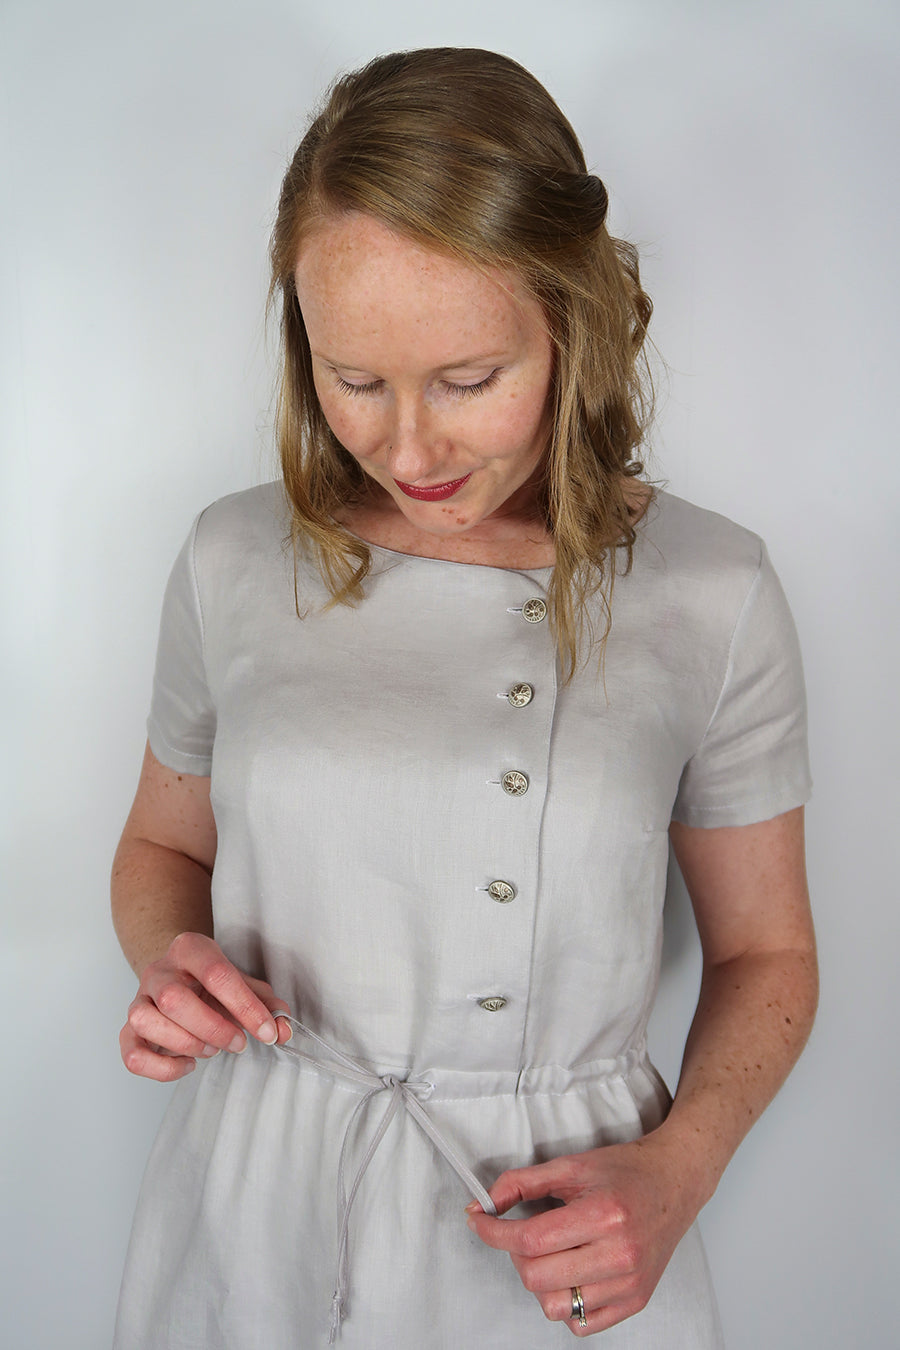
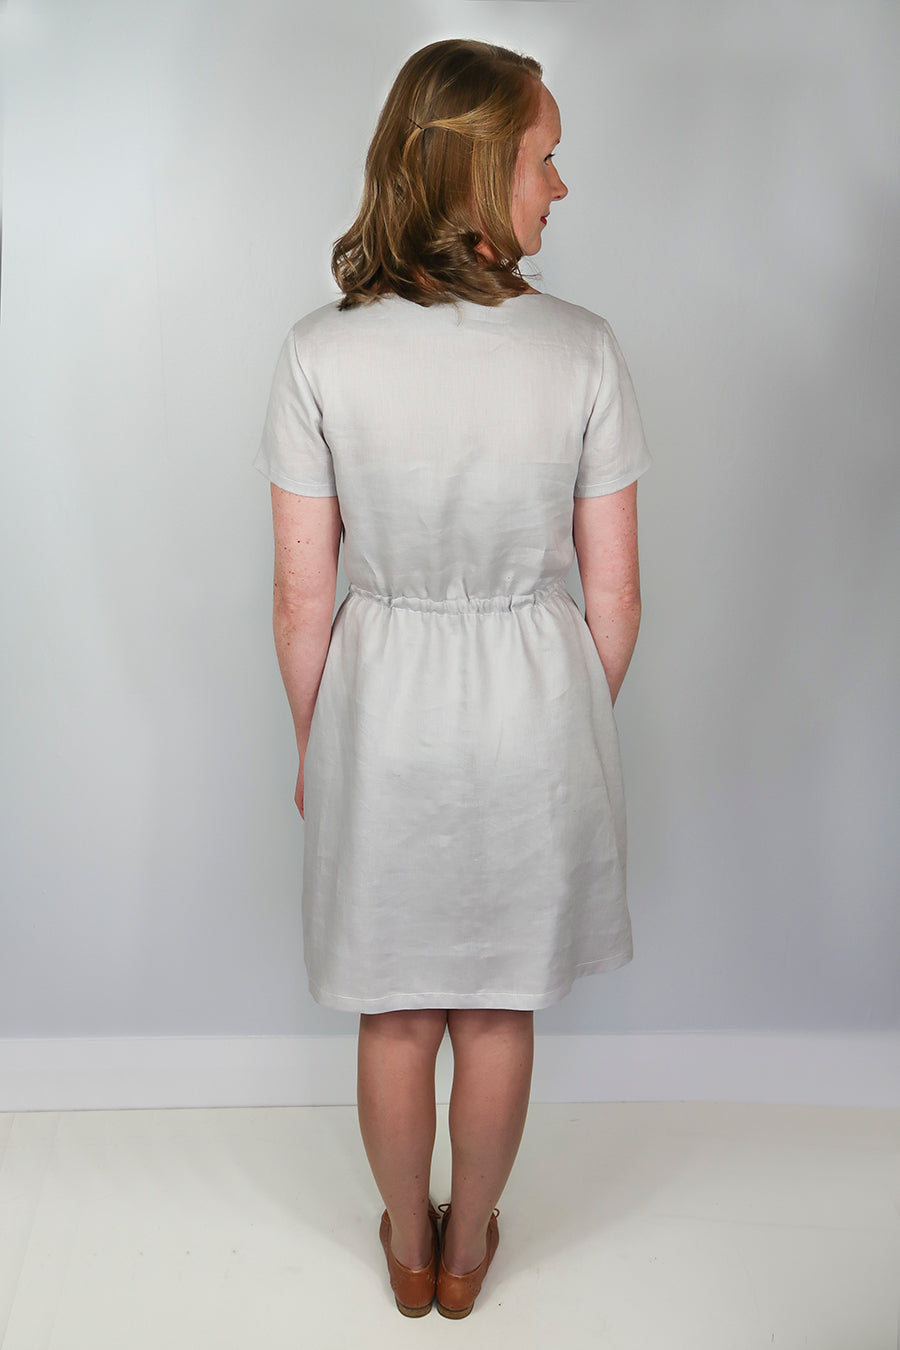
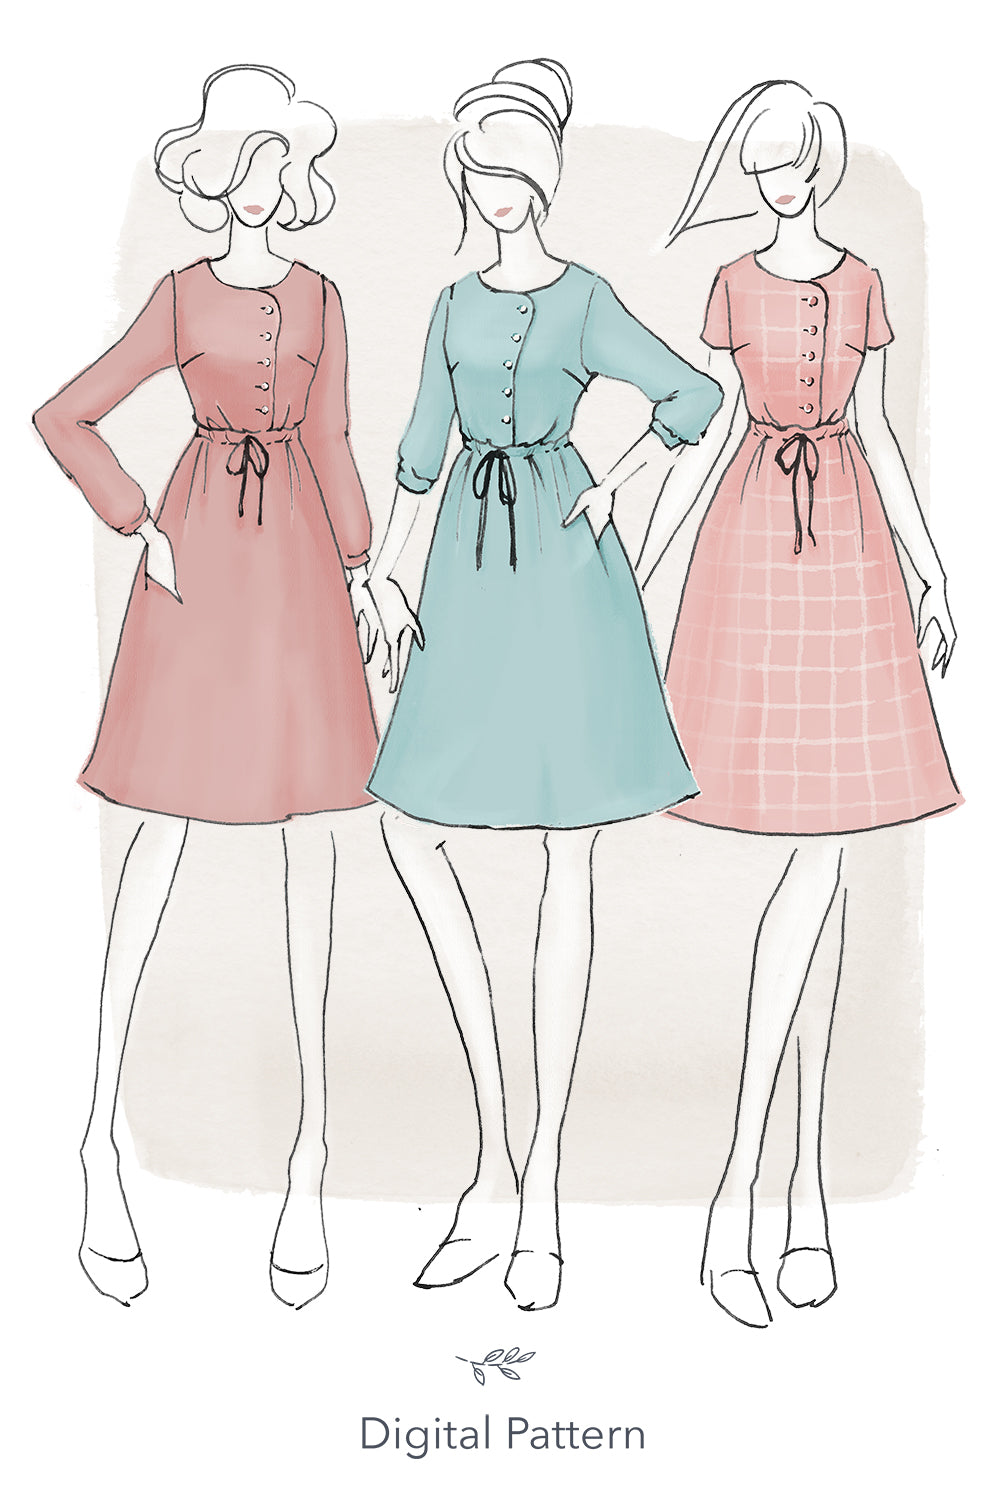
Buy the Mayberry Dress sewing pattern from Jennifer Lauren Handmade, a vintage-inspired button-front dress with a gathered waist. The pattern features an off-centre button placket, bust darts and a drawstring waist with ties at the front. There are inset sleeves that come in three different lengths: choose sweet turn and hem short sleeves, or add a little drama with 3/4 or long sleeves that gather gently at a narrow cuff. With A, B, C and D cups as well as clever inset pockets, Mayberry is a perfect project for confident beginner seamstresses.

You can also mix and match pattern pieces with the Quincy Dress and Farris Jumpsuit and Playsuit. Become your own designer by mixing and matching tops and bottoms between all three, creating an almost endless number of perfect dresses, jumpsuits and playsuits!

This sewing pattern is available to buy in the following formats:

- PDF (available to download immediately after purchase). What is a PDF?

- PDF pattern + Printed A0 copy shop (We print out the A0 pattern sheets, but you'll need to download the digital instructions, as we don't print these. The PDF files will be emailed immediately after purchase, and the A0 pattern sheets will be dispatched next working day). What is Copy Shop?

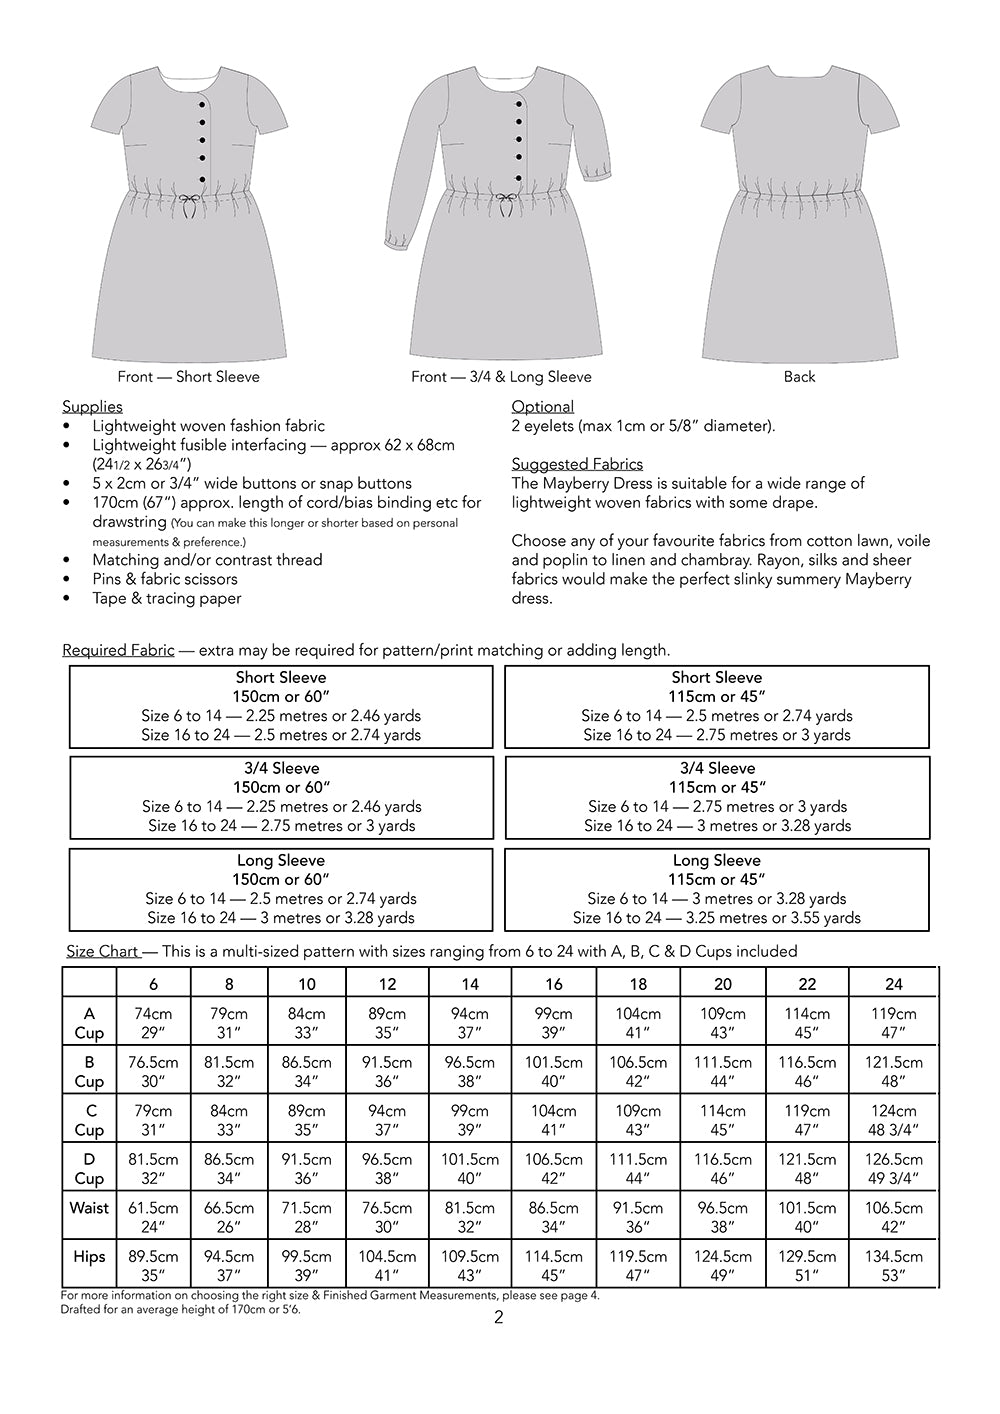
Suggested fabrics: Lightweight woven fabrics with some drape. Choose any of your favourite fabrics from cotton lawn, voile and poplin to linen and chambray. Rayon, silks and sheer fabrics would make the perfect slinky summery Mayberry Dress.

Fabric requirements:

Short Sleeve: 150 cm (60") wide fabric: Sizes 6-14, 2.25 m (2.46 yd) / Sizes 16-24, 2.5 m (2.74 yd) // 115 cm (45") wide fabric: Sizes 6-14, 2.5 m (2.74 yd) / Sizes 16-24, 2.75 m (3 yd).

3/4 Sleeve: 150 cm (60") wide fabric: Sizes 6-14, 2.25 m (2.46 yd) / Sizes 16-24, 2.75 m (3 yd) // 115 cm (45") wide fabric: Sizes 6-14, 2.75 m (3 yd) / Sizes 16-24, 3 m (3.28 yd).

Long Sleeve: 150 cm (60") wide fabric: Sizes 6-14, 2.5 m (2.74 yd) / Sizes 16-24, 3 m (3.28 yd) // 115 cm (45") wide fabric: Sizes 6-14, 3 m (3.28 yd) / Sizes 16-24, 3.25 m (3.55 yd).

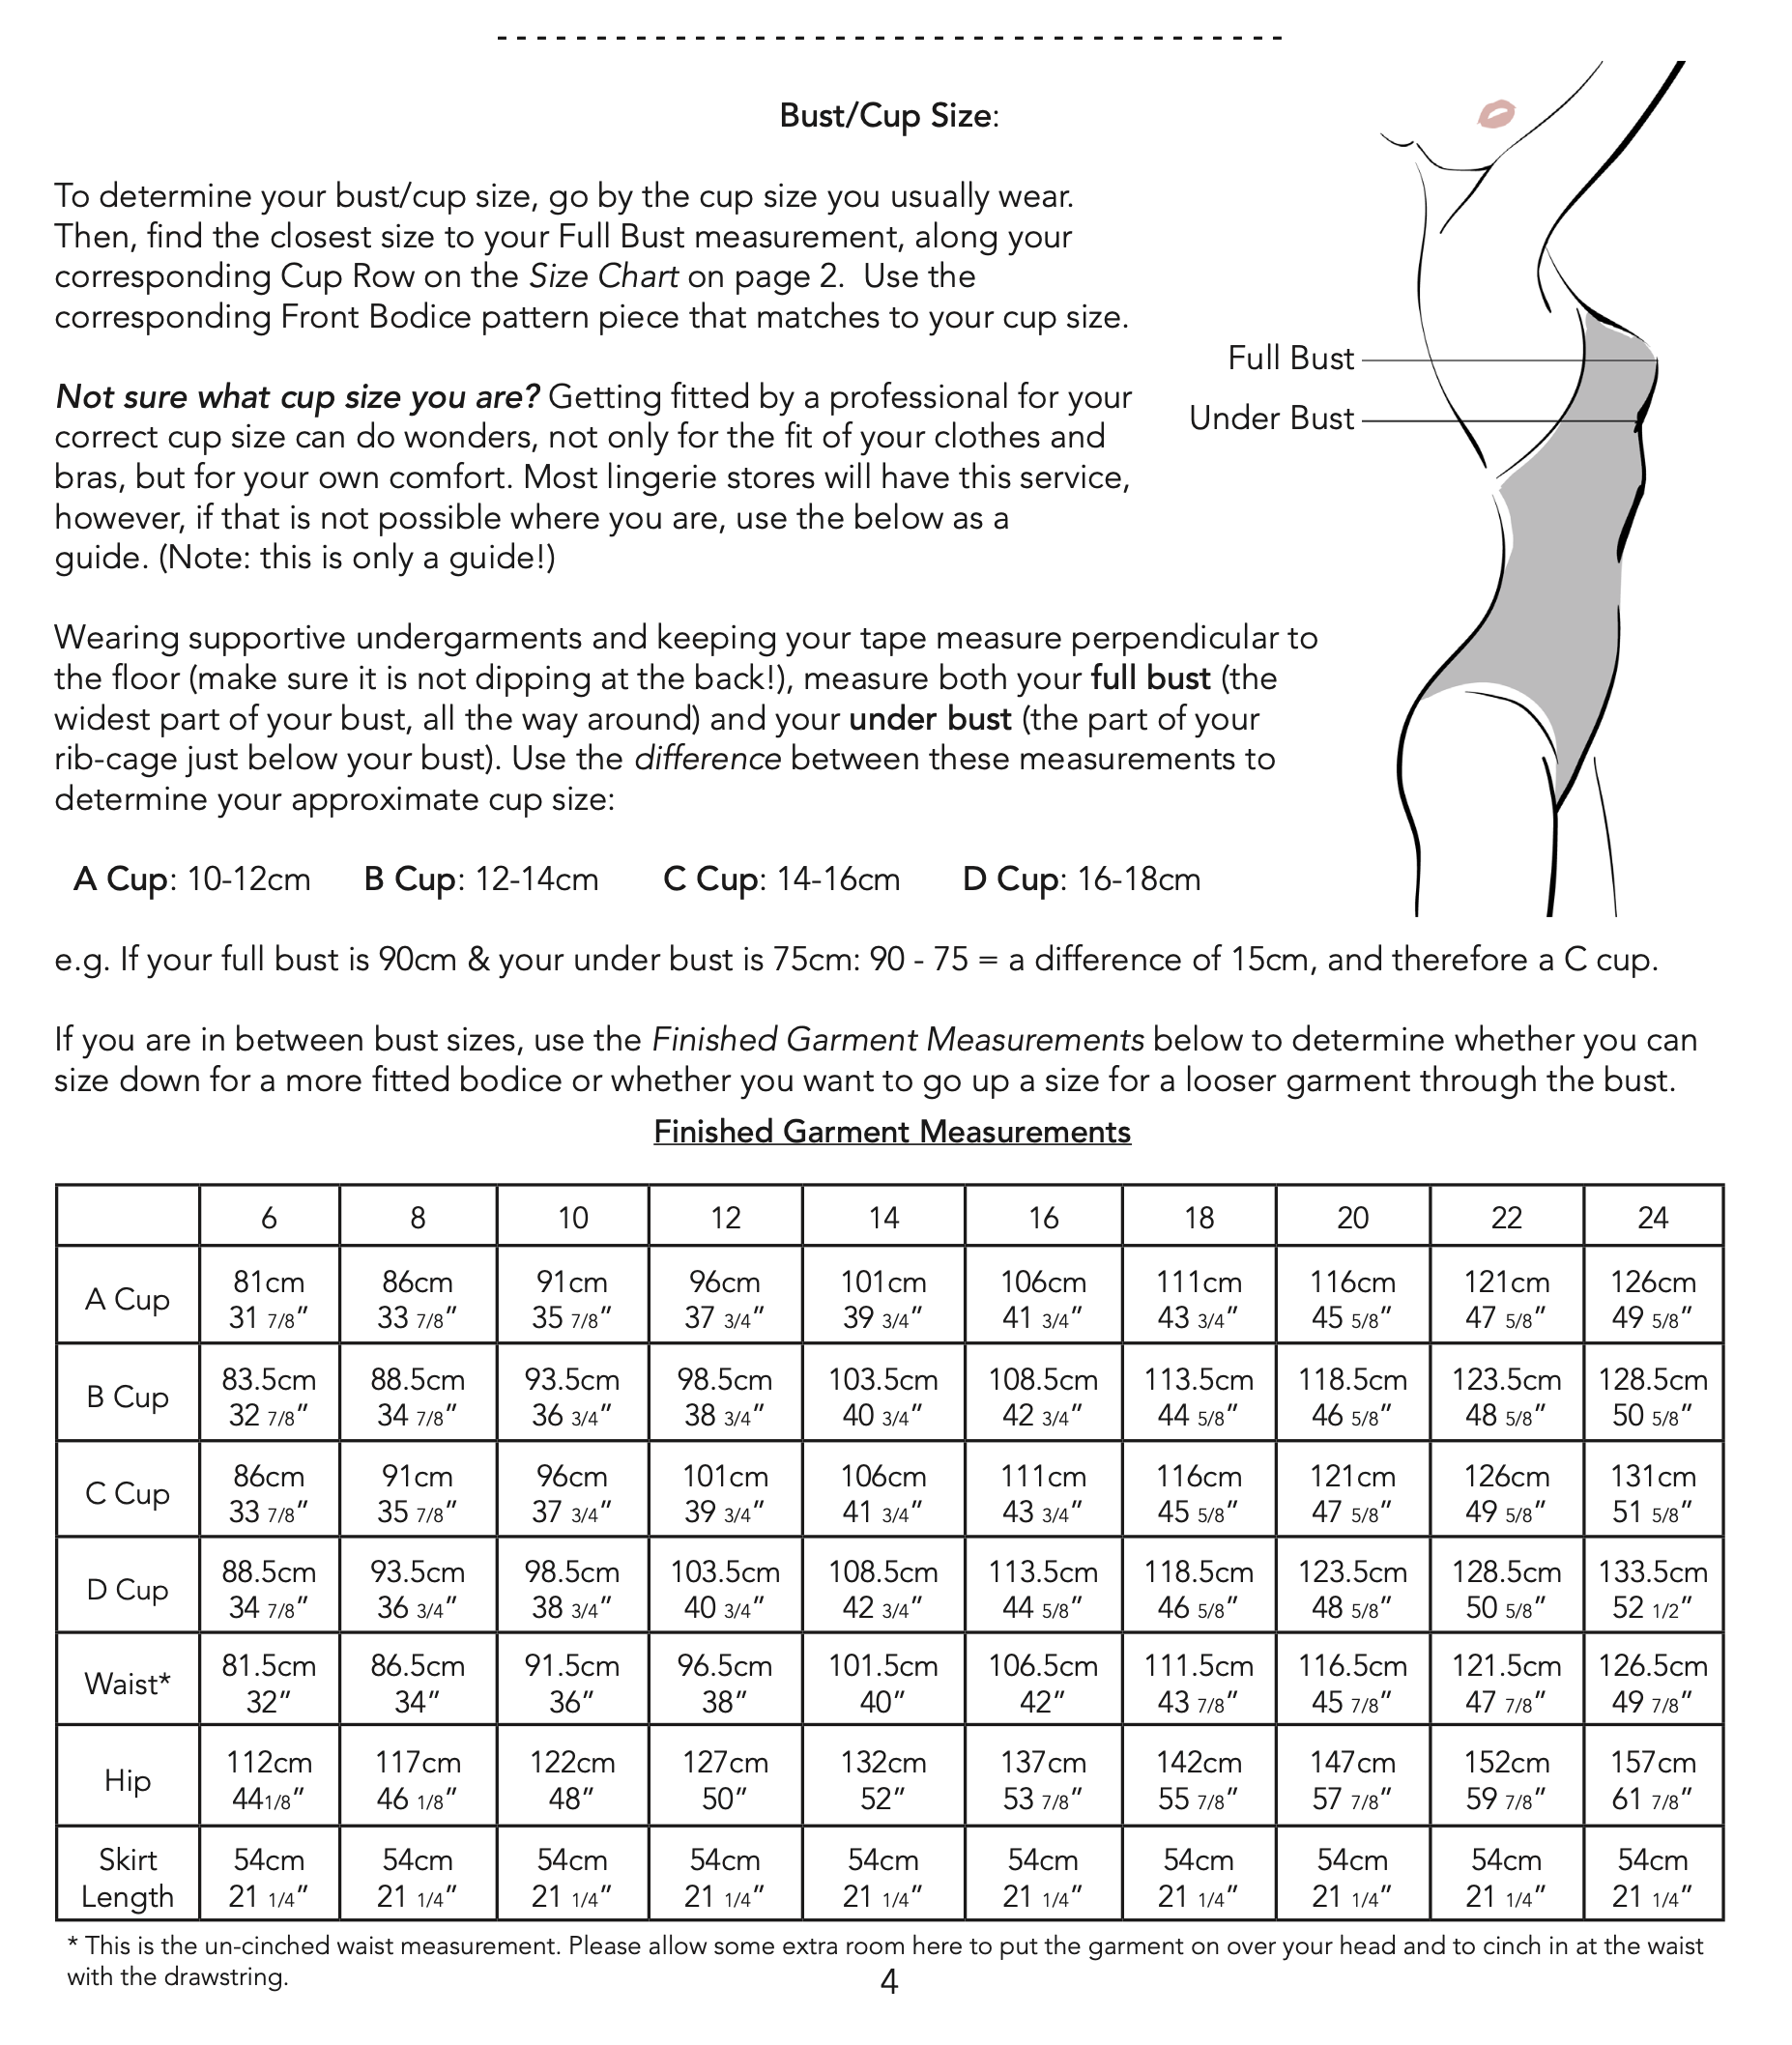
Sizing: UK 6 - 24 with A, B, C and D cups. Please check the size chart and finished garment measurements.

To determine your cup size, go by the bra cup size you usually wear.

If you are unsure, wearing supportive undergarments and keeping your tape measure parallel to the floor (make sure it is not dipping at the back), measure both your full bust (the widest part of your bust, all the way around) and your under bust (the part of your rib cage just below your bust). Use the difference between these measurements to determine your approximate cup size: A cup = 10-12 cm, B cup = 12-14 cm, C cup = 14-16 cm, D cup = 16-18 cm.

Notions: Lightweight fusible interfacing, approx. 62 x 68 cm (24 1/2" x 26 3/4"); five 2 cm (3/4") wide buttons or snap buttons; approx. 170 cm (67") of cord/bias binding for drawstring; matching and/or contrast thread.

PDF pattern includes: Instructions; A4/US letter print-at-home pattern (100 pages, but you only need to print the pages for your cup size); A0 copy shop pattern (6 sheets, but you only need to print the sheets for your cup size).

If you're looking for more maker inspiration, check out the latest sewing pattern reviews from the sewing community. We also have a sewing blog to keep you up to date with all the news from the world of sewing.

Share

If you’re looking for maker inspiration check out our blog. With weekly updates on new patterns, styling ideas and maker inspiration, it's not to be missed.

Customer Reviews

Based on 3 reviews
100%
(3)
0%
(0)
0%
(0)
0%
(0)
0%
(0)
@
@goingtoneedstitches
A needlecord Mayberry

The Mayberry dress by Jennifer Lauren Handmade is a companion dress to the Quincy- meaning all pieces can be interchanged! I love this concept and wish more companies did this- owning both patterns means you get a choice of pocket types (in-seam or slanted) , panelled or simple A line skirt, bodices (V-front or asymmetrical closure) sleeves (short, 3/4 or long) and plain and yoked back. I actually wish the concept had been pushed a little further- perhaps with an alternative to drawstring closure or a different skirt shape?

As I’ve made a few Quincy dresses this time I decided to make the straight Mayberry dress- overlapping front, 3/4 cuffed sleeve, simple skirt and back. The pattern includes multiple cup size which is such a bonus. I made a 6B grading out a little at the waist. I’ve made a lot of JLH patterns so I know this size combination fits me really well with no adjustments needed. The dress is quite simple to construct and the instructions are very good. The only thing I didn’t love was the way the sleeve cuff was sewn on- it seemed really fiddly and quite hard to get even gathers. Having said that I do love the result and the sleeve.

I used a plaid needlecord from Seasalt and it was such a great fabric for this dress- the dress is cosy and perfect for winter. It was my first time pattern matching plaid and it went well across the front overlap (one of the skirt side seams is a different story but as the fabric is quite dark I don’t think non-sewists notice at all!). I really love the finished dress, in particular I like the interesting neckline with the overlap! I will definitely make this dress again in the future- it’s pretty but very effortless to wear.

I
I Sew You See
The Mayberry Dress

This was my first pattern from Jennifer Lauren Handmade and I loved her instructions, so easy to understand and it was a really fun make. Having cup sizes is a beautiful thing and it meant I had no trouble with the fit. I love that this pattern can look so different with fabric choice and has multiple sleeve lengths, and the gathered sleeve are so pretty. I’m definitely going to make another for the summer! If you want anymore details, check out my instagram @isewyousee

D
Denbeesewswhat
The Mayberry Dress

The Mayberry Dress by JenniferLaurenHandmade

I bought the PDF version of this dress during one of the flash sales, if I recall correctly, before Christmas but had to wait for my sewjo to come back after the festivities before I actually got around to sewing it. This is a lovely casual everyday summer dress with the essential pockets that most of us love in our dresses, with 3 sleeve variations - I chose to make the short sleeved option. Having made the Laneway Dress I knew that Jennifer’s instructions would be spot on and the pattern layout and printing (if printing yourself at home) would be straightforward. Again the pattern is sized for 6 - 24 and gives the option for A, B, C or D busts in the bodice and I knew that I would be a size 8 with a D bust. I am 5’1” and a size 8 and I made absolutely no changes to the pattern at all and it fit like a dream. It took me a while to decide on what fabric to use but I finally settled on a lightweight, very soft viscose which has worked really well and gives a lovely drape to the skirt and bodice. I had a bit of a black out when it came to cutting the facings and bodice front pieces and so ended up with the button placket on the opposite side to the pattern itself however this doesn’t bother me at all. As you can see from the pictures I used shiny black buttons and black ribbon for the waist tie – although I may swap this out for black woven tape at a future date as the ribbon has no give in it which means it cuts in a bit when I sit down. The construction is very straightforward and although the off centre button up section on the bodice looks complicated it isn’t at all and in fact the dress is so easy to get on and off over my head that I will probably miss off the buttonholes and just sew the buttons on through both bodice pieces next time. The channel for the tie at the waist is made by leaving a larger seam allowance when joining the bodice to the skirt and this again was an extremely easy process to follow. I feel this would be great for an intermediate beginner or indeed a beginner who has already inserted sleeves and added buttonholes. I can definitely see myself making a few more of these.