Sew Liberated

Sew Liberated Lichen Duster

Prix régulier £24.00 GBP
Prix de vente £24.00 GBP Prix régulier £24.00
Copyshop

We print out the A0 pattern sheets, but you’ll need to download the digital instructions, as we don’t print these. The PDF files will be emailed immediately after purchase, and the printed A0 pattern sheets will be dispatched next working day.

(What is Copyshop?)
Taxes incluses.
Earn 1 Point on this purchase. Learn more

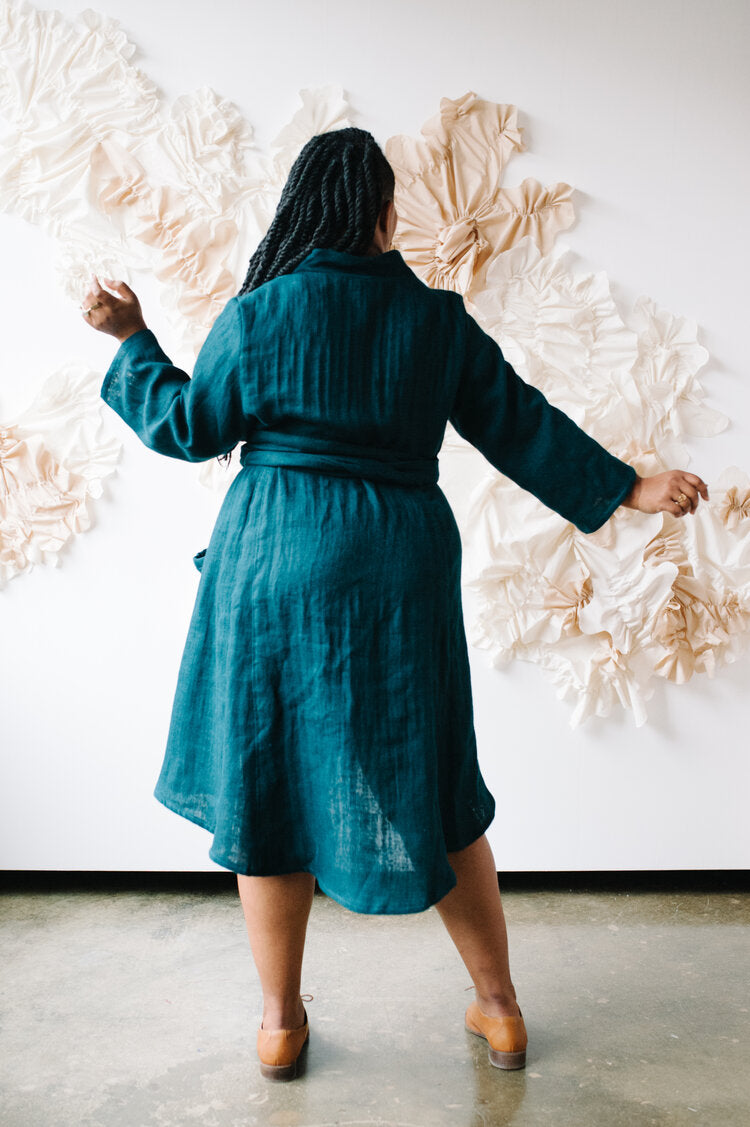
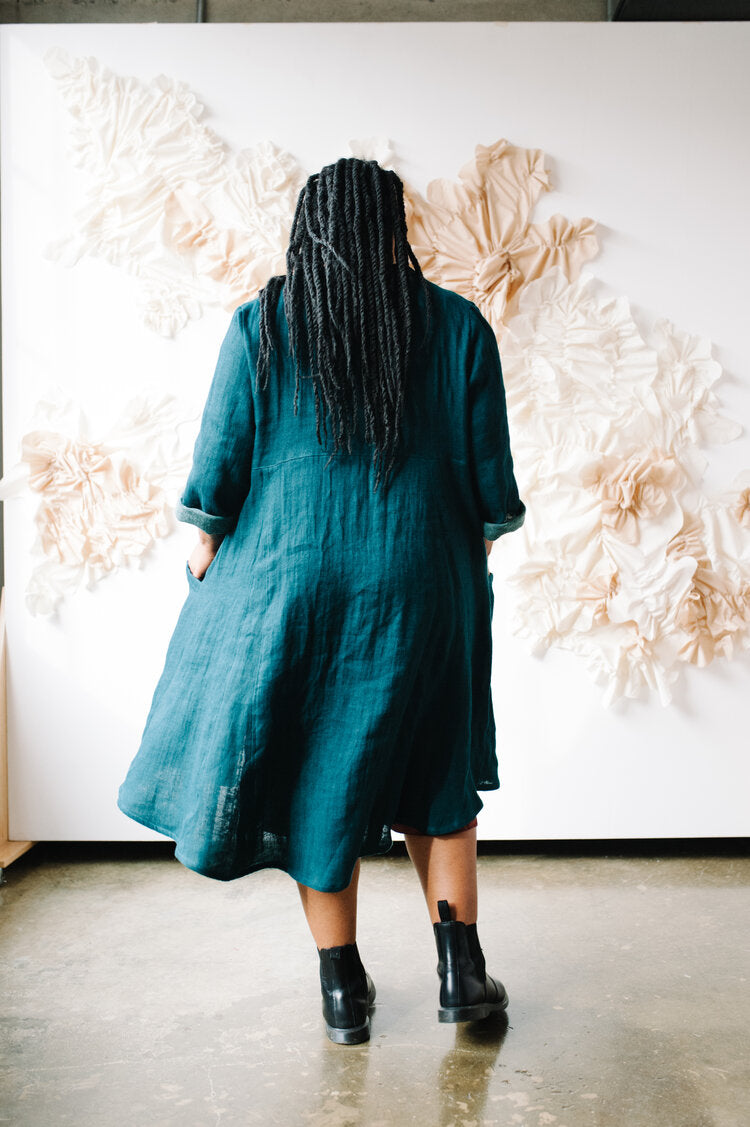
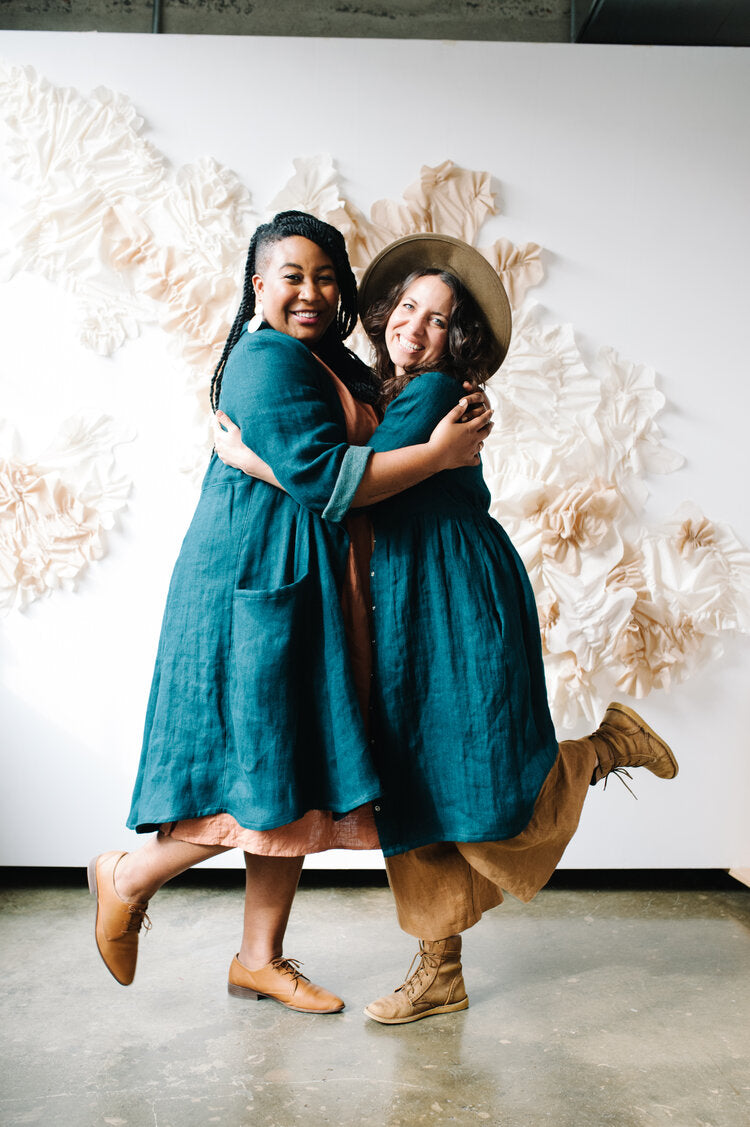
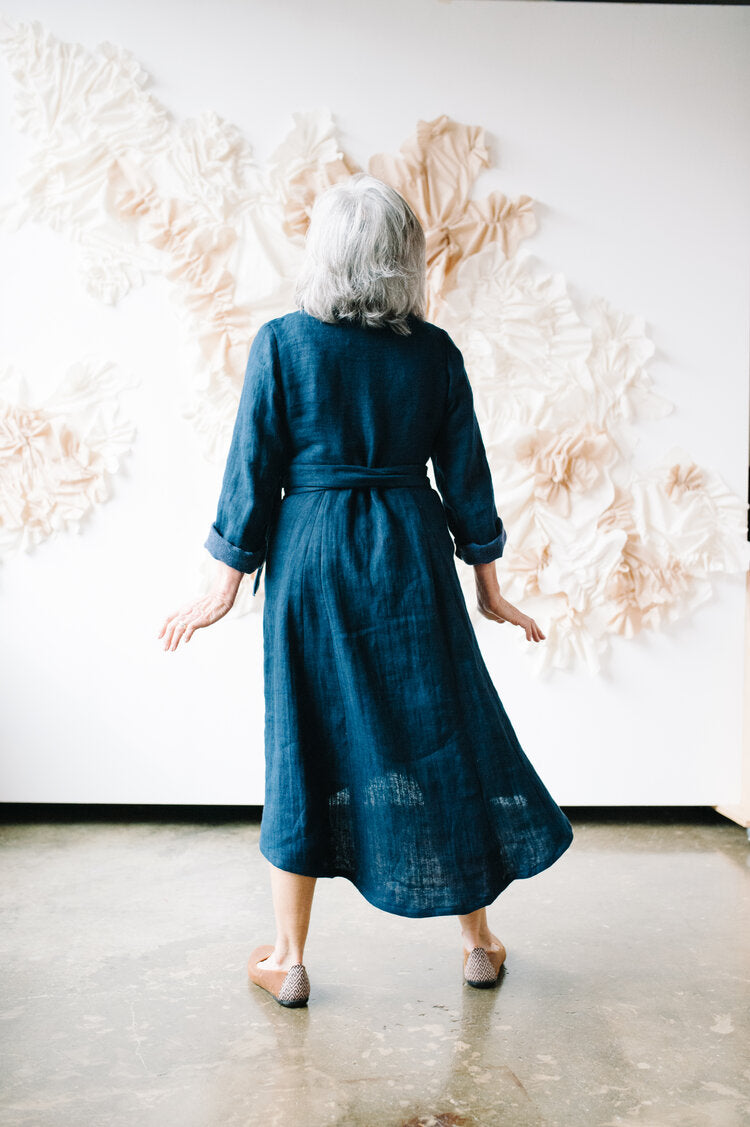
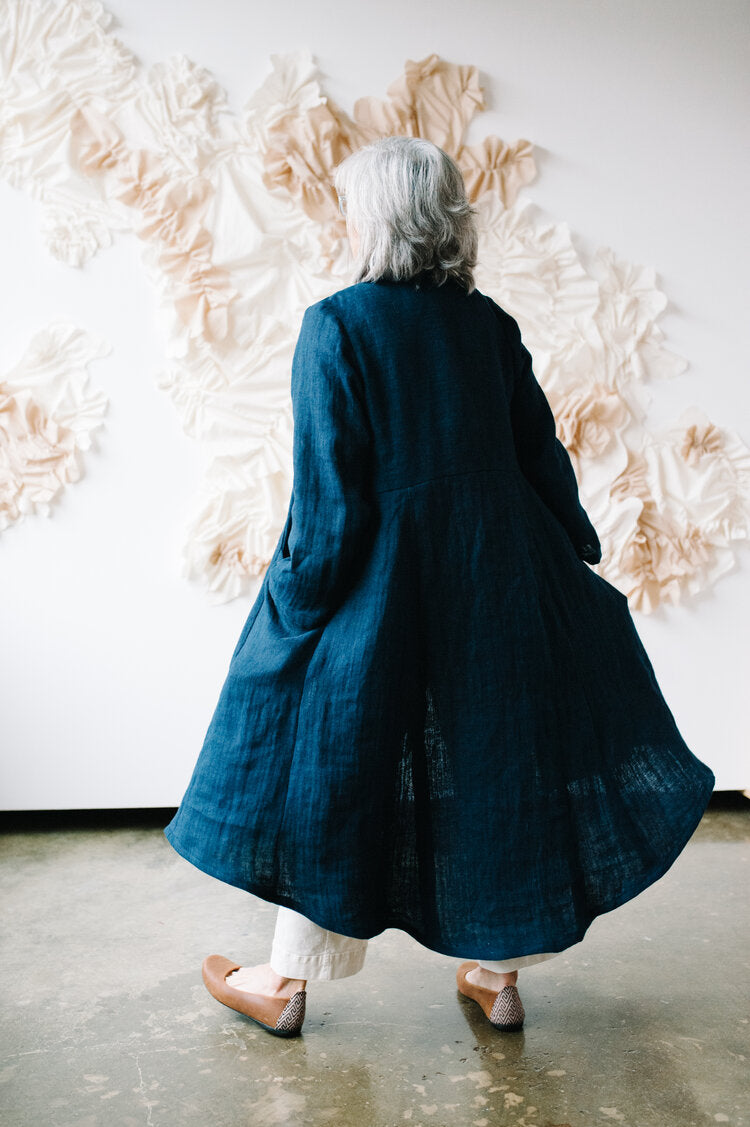
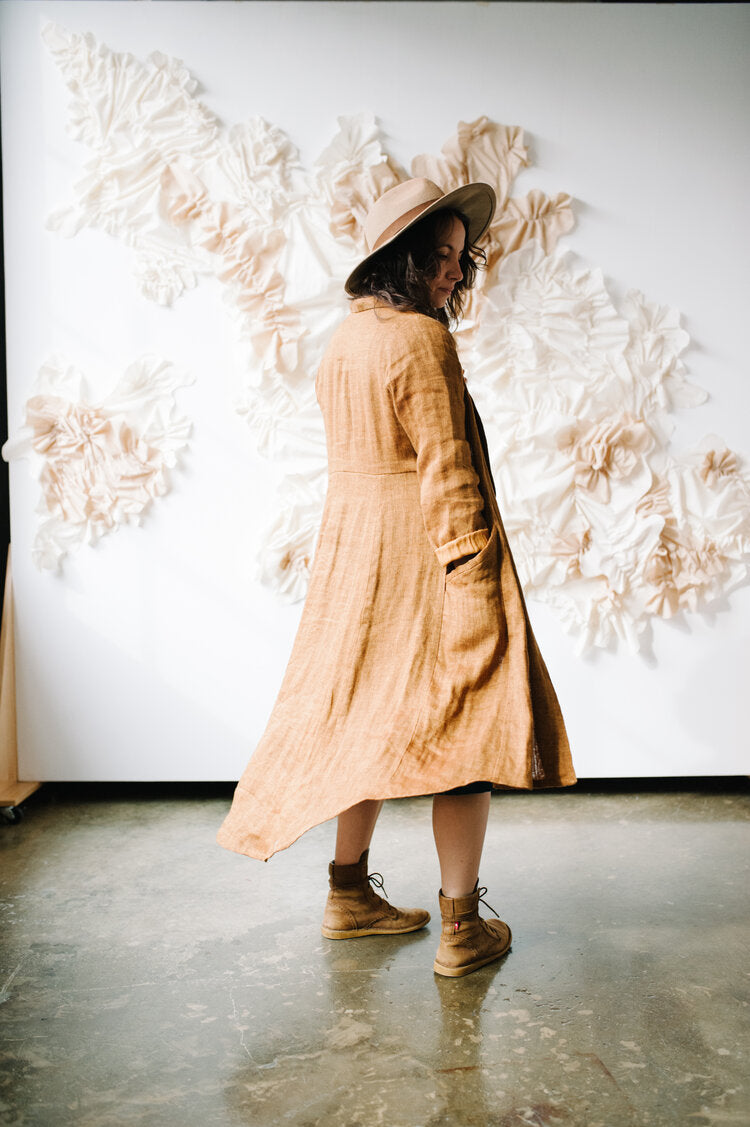
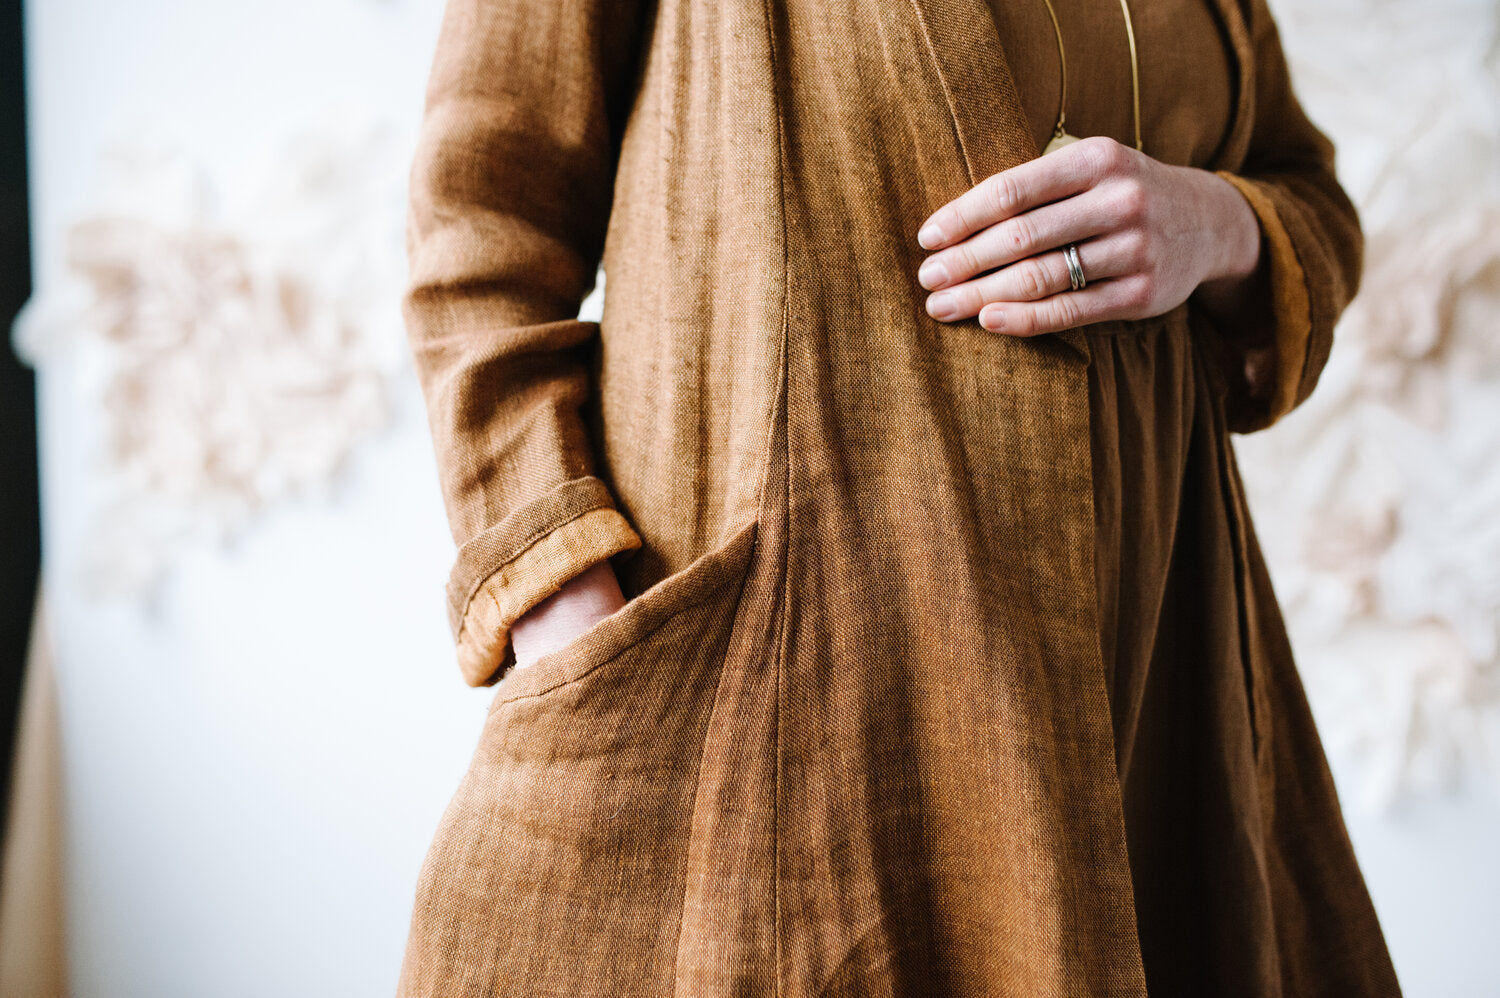
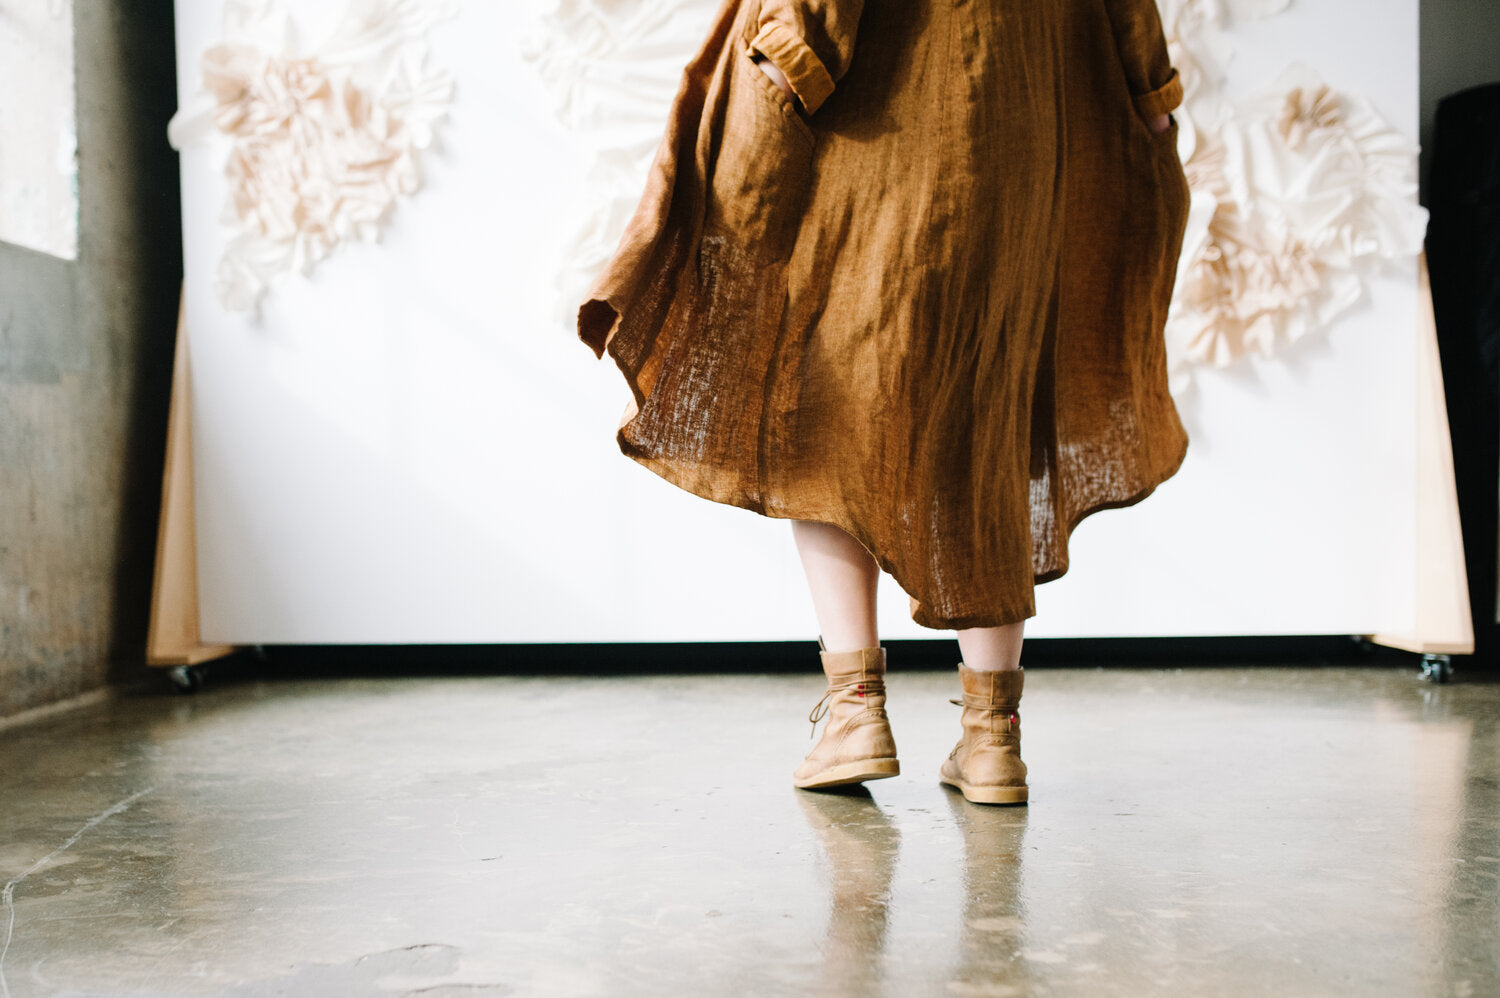
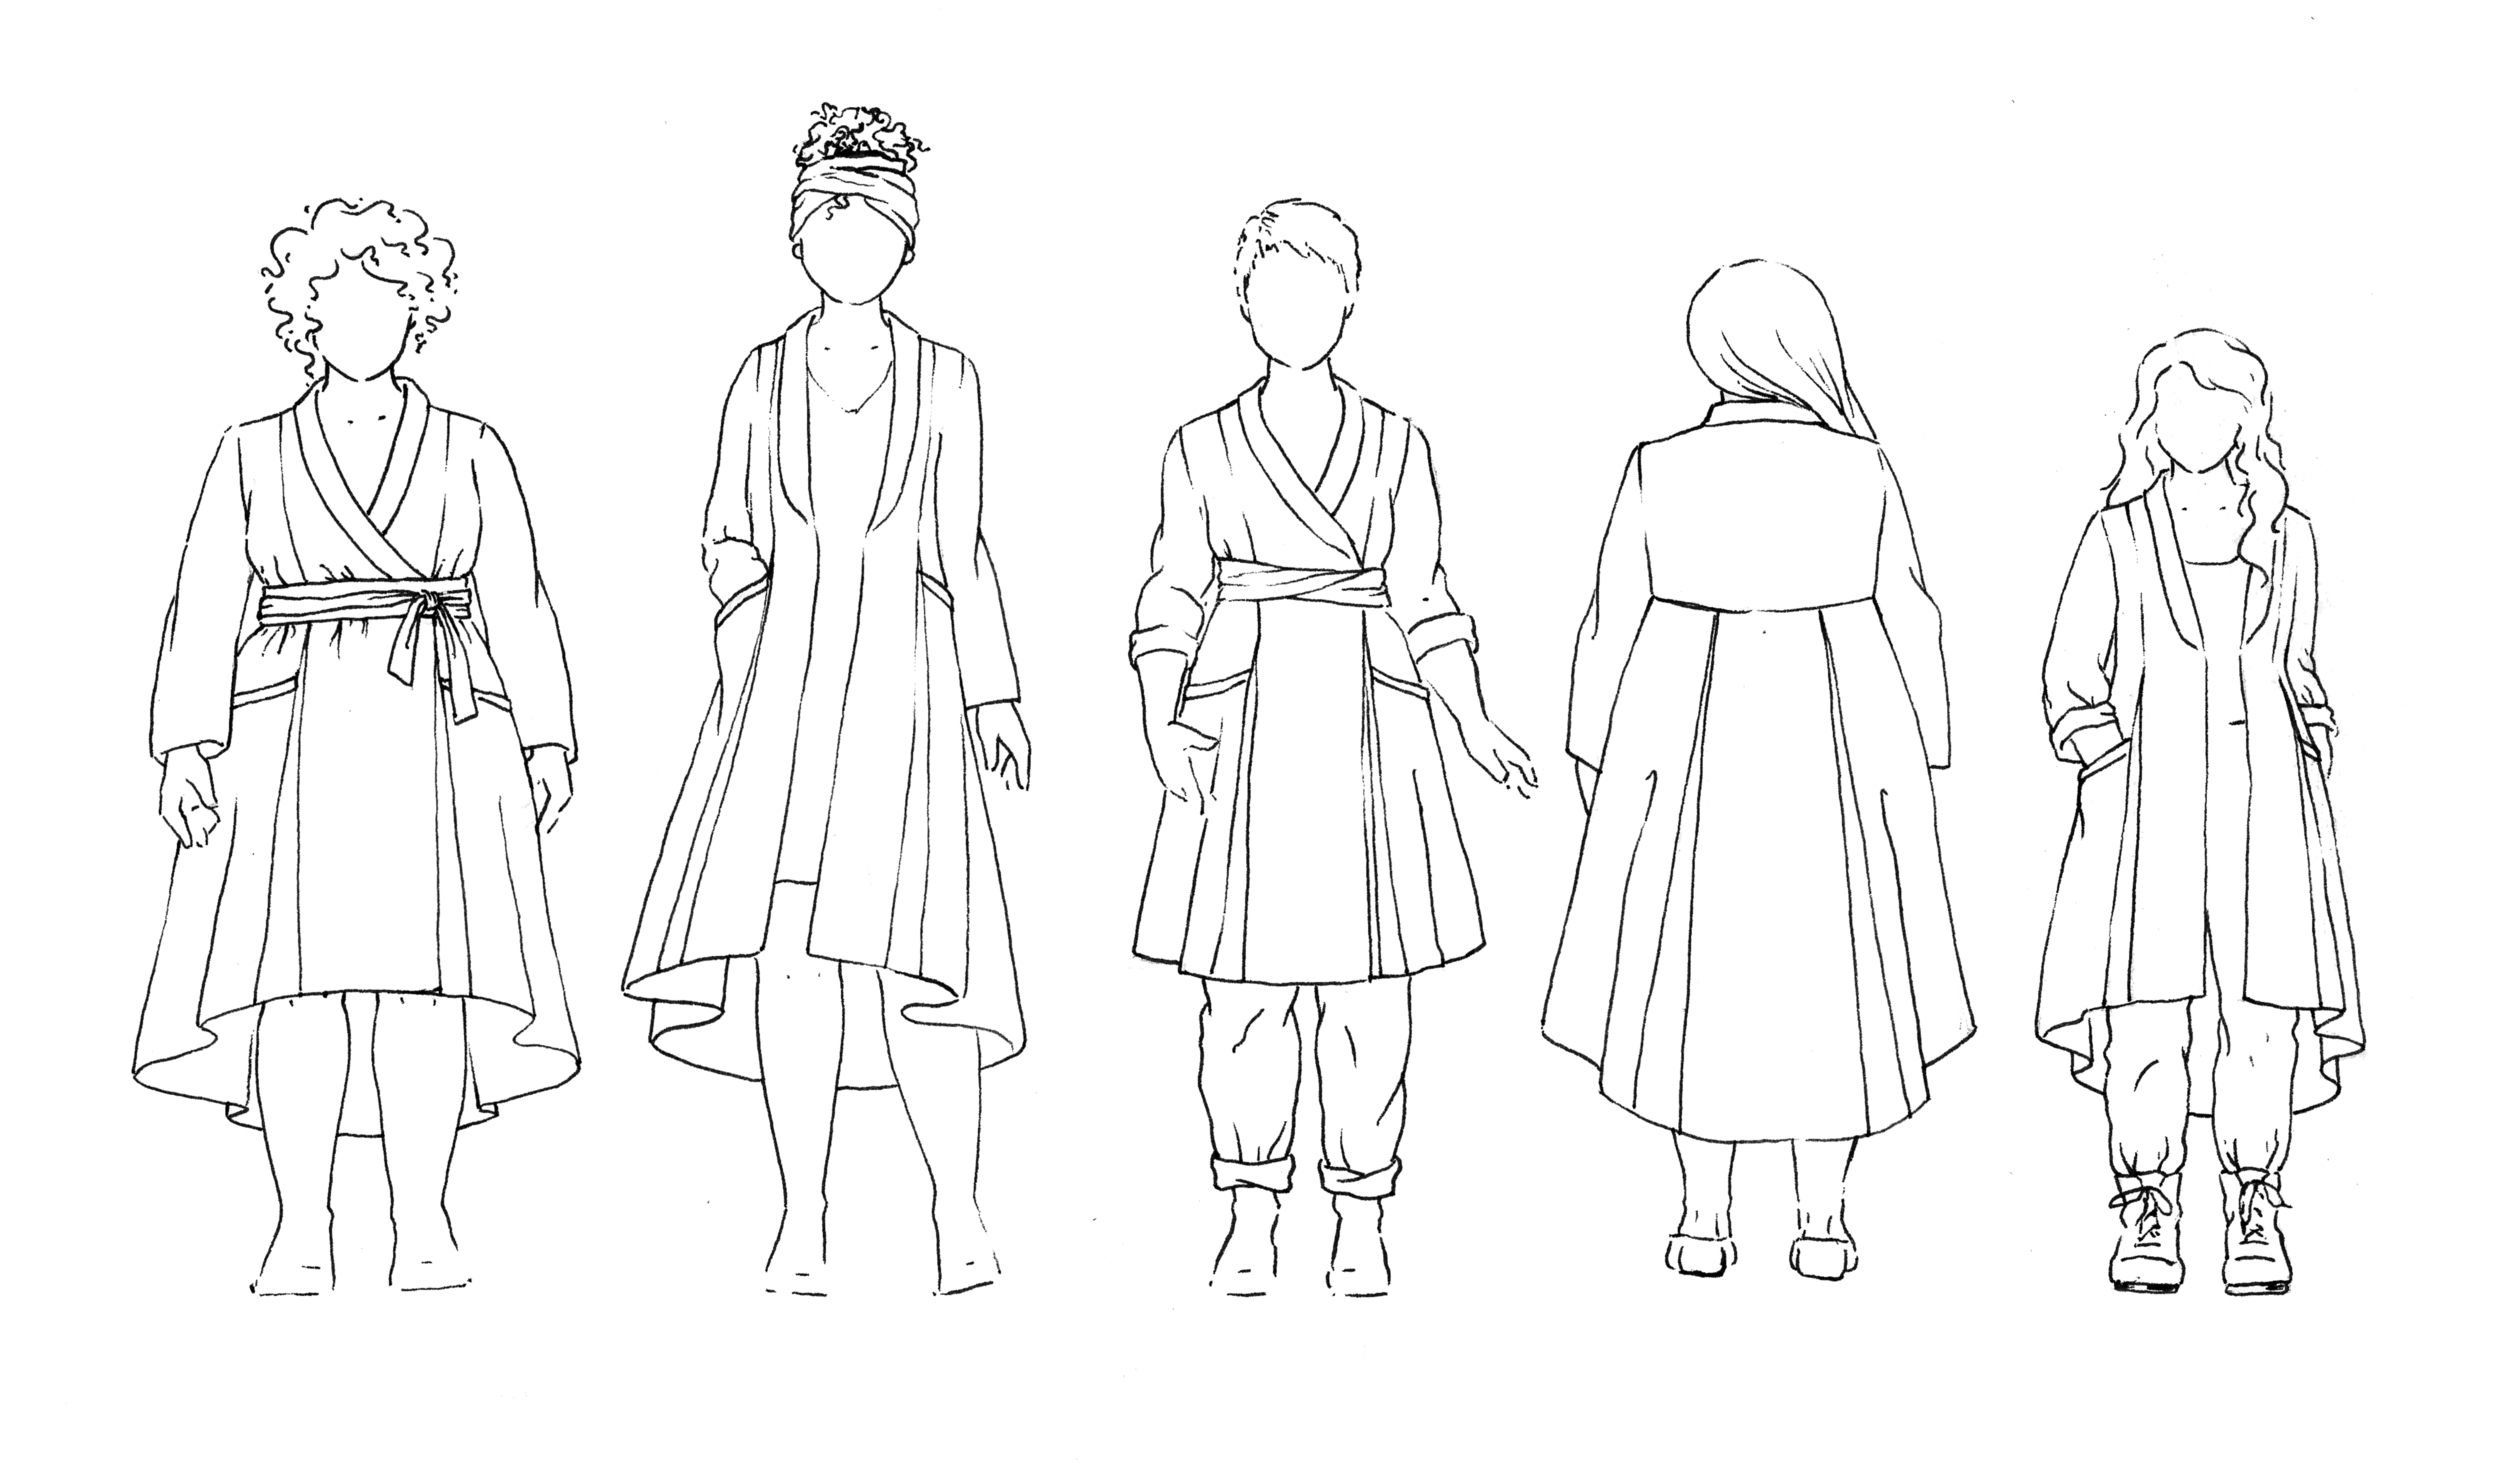
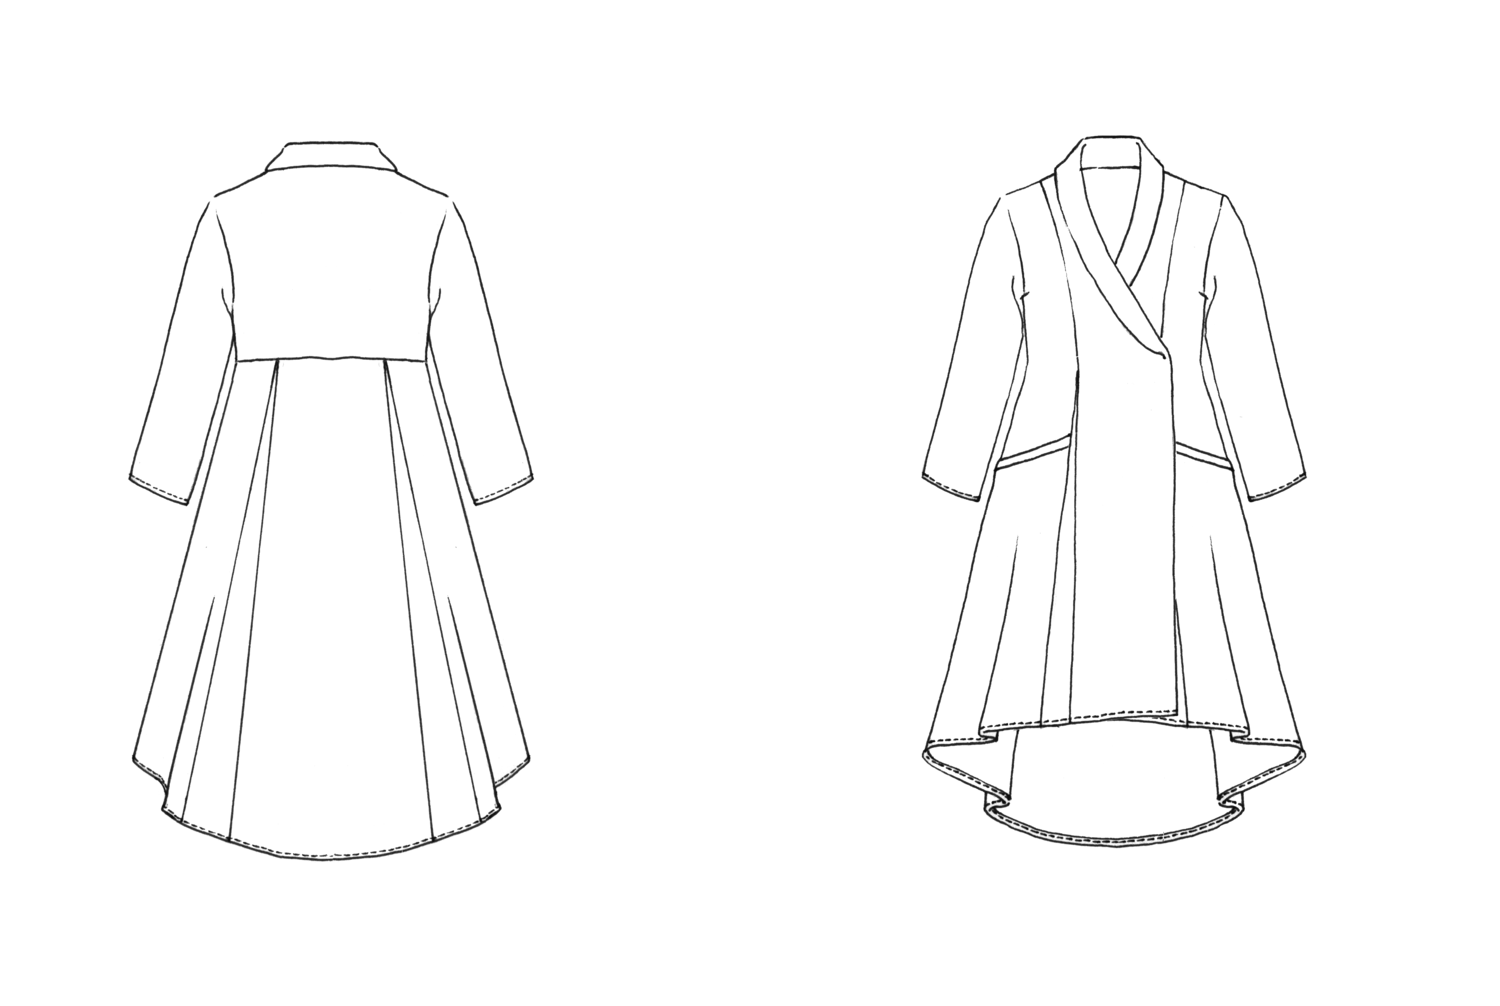
Buy the Lichen Duster sewing pattern from Sew Liberated. The versatile Lichen Duster can be worn as a lightweight coat, wrap dress, or robe – a true capsule wardrobe workhorse! Its shawl collar, princess seams, unique pockets, four skirt gores and hand-stitched facings make it a beautiful heirloom piece. Style it over dresses and jumpsuits, or jeans and tees. Use your own belt or wrap the included fabric belt around your waist, tucking in the ends, for a chic morning-to-evening dress. The Lichen can be made with a sweeping high-low hem or a straight hem. Depending on the fabric you choose, the Lichen Duster can be worn in cold or warm weather. It is unlined, constructed with front and back facings of the same fabric.

This sewing pattern is available to buy in the following formats:

– PAPER (next working day dispatch on orders and FREE UK delivery over £50)

– PDF (available to download immediately after purchase). What is a PDF?

– PDF pattern + Printed A0 copy shop (We print out the A0 pattern sheets, but you’ll need to download the digital instructions, as we don’t print these. The PDF files will be emailed immediately after purchase, and the A0 pattern sheets will be dispatched next working day). What is Copy Shop?

Suggested fabrics: Mid-weight linen or yarn-dyed cotton for all-season wear. More advanced sewists can branch out and choose mid-weight wool or even silk or silk velvet.

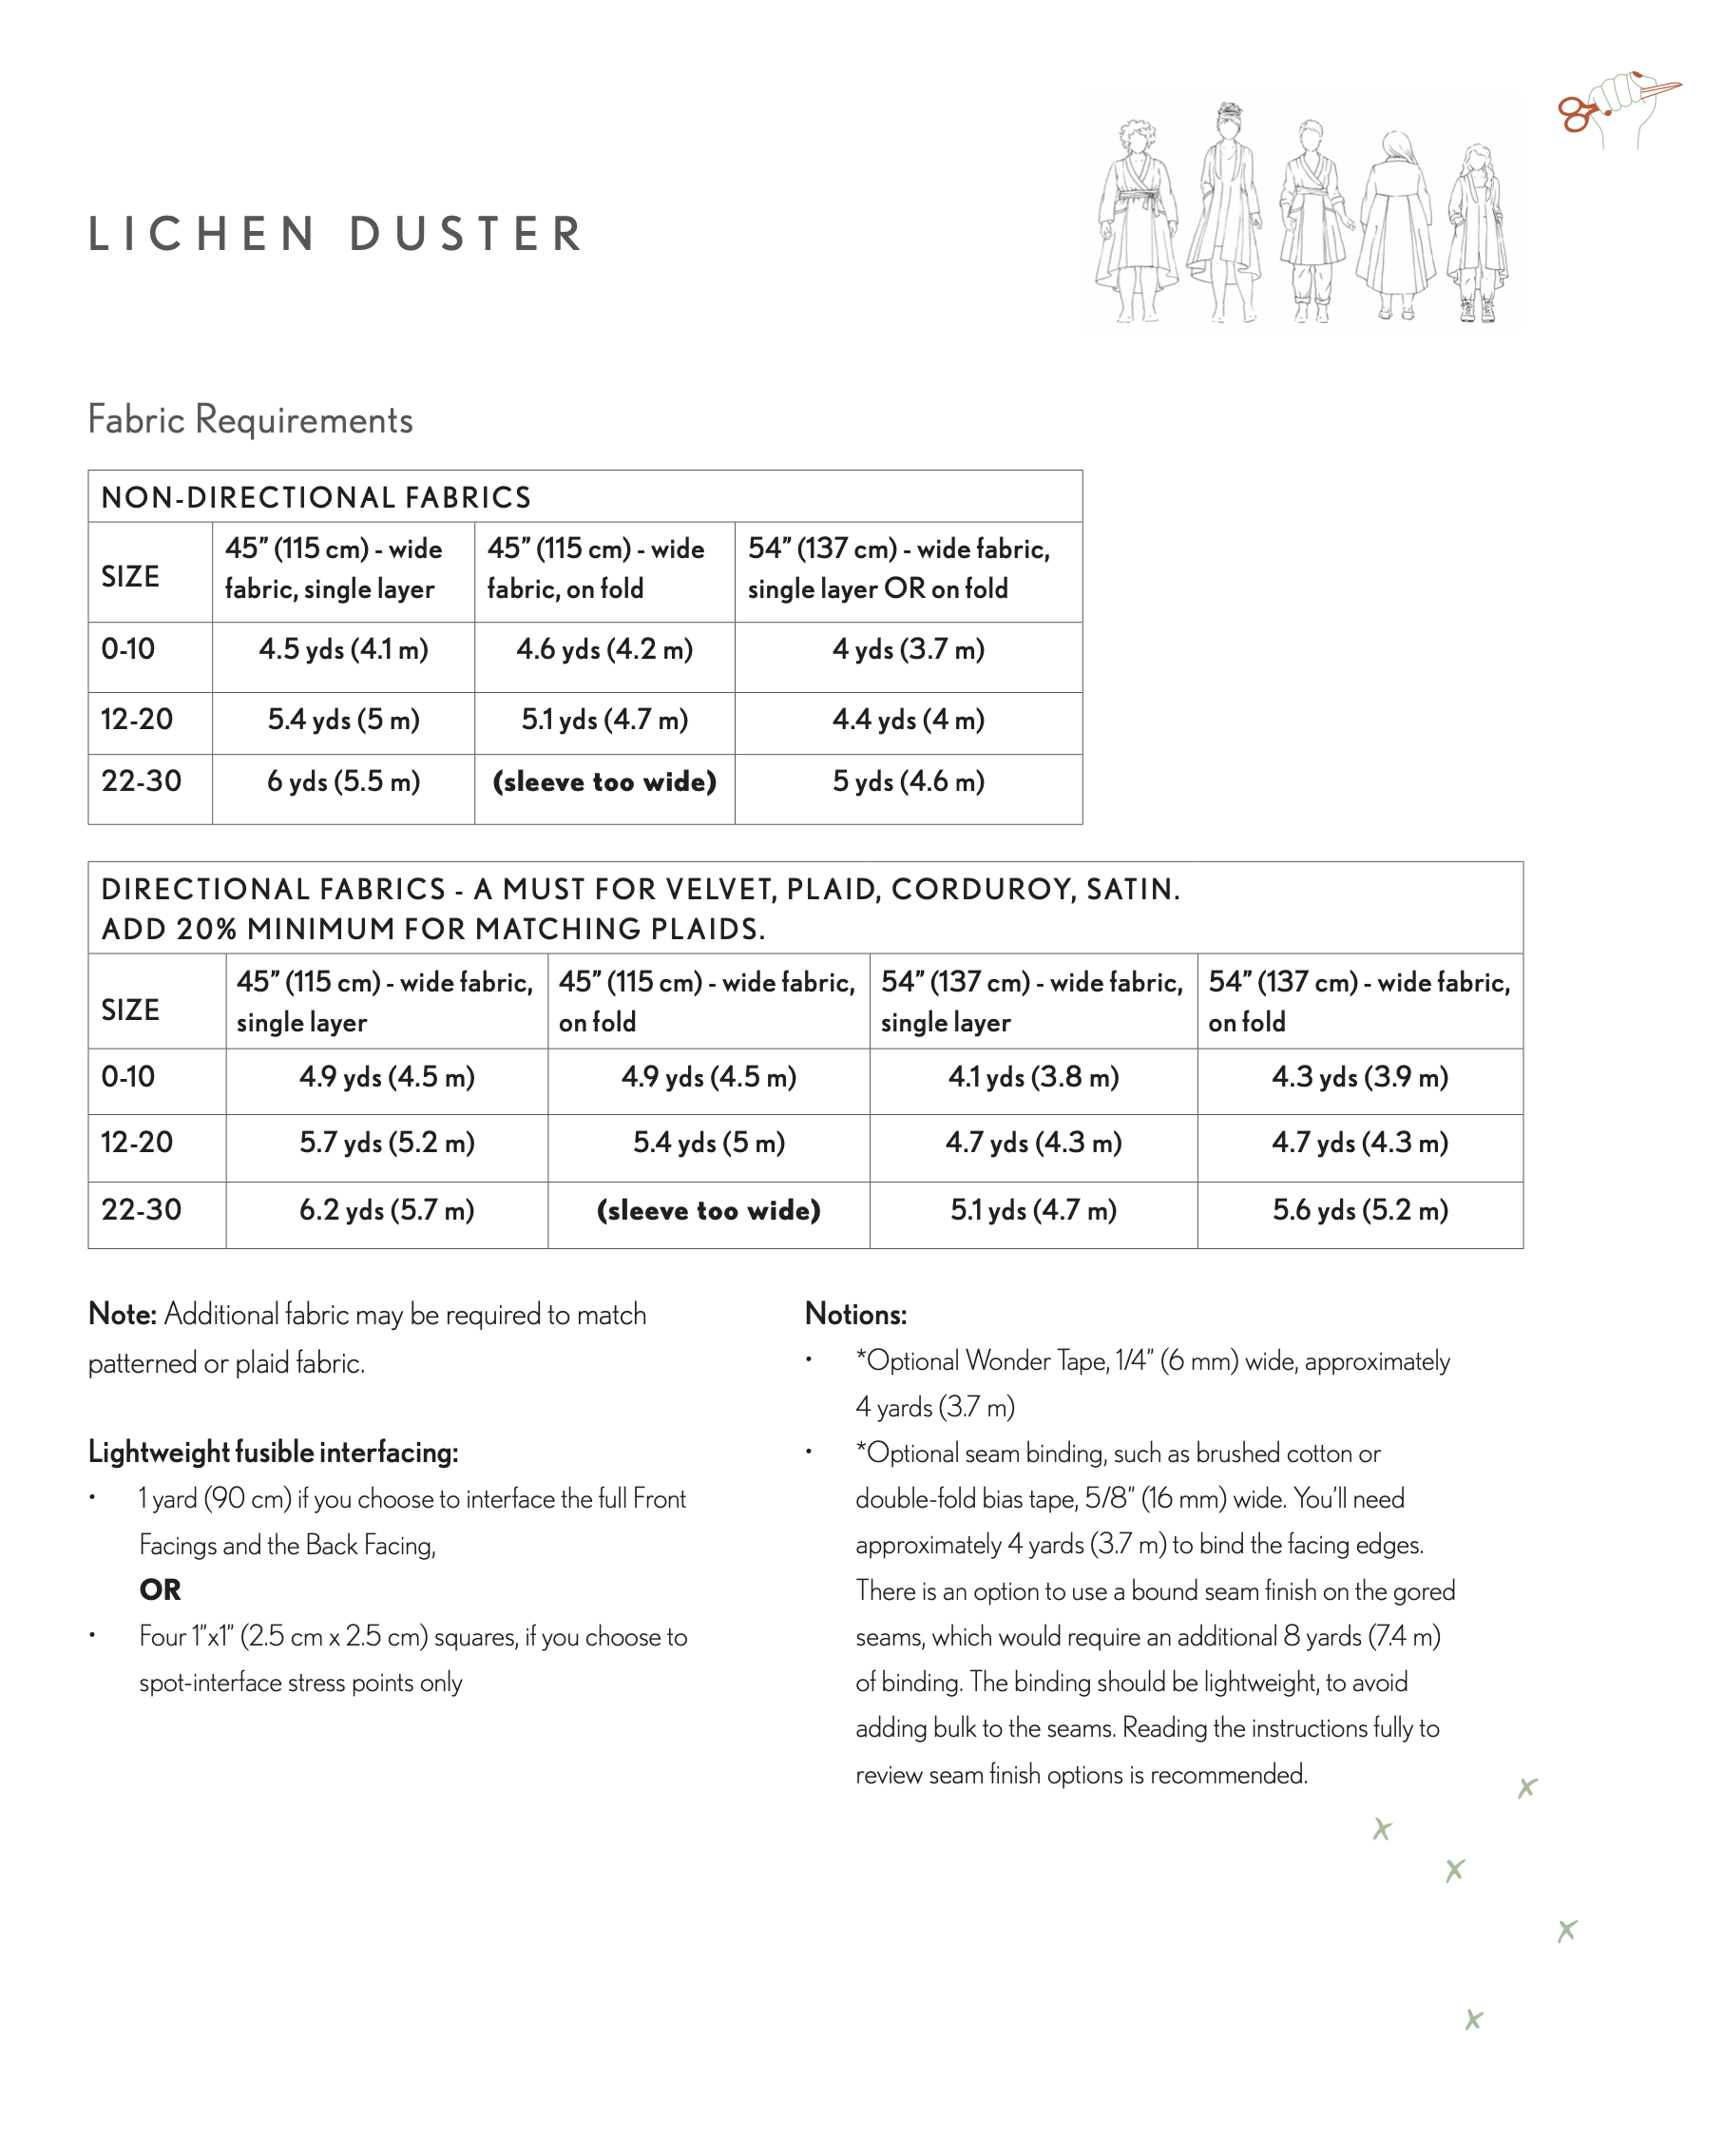
Fabric requirements:

Non-directional fabrics: 45" (115 cm) wide fabric, single layer: 4.5 - 6 yd (4.1 - 5.5 m) // 45" (115 cm) wide fabric, on fold (sizes 0-20 only): 4.6 - 5.1 yd (4.2 - 4.7 m) // 54" (137 cm) wide fabric, single layer or on fold: 4 - 5 yd (3.7 - 4.6 m).

Directional fabrics (velvet, plaid, corduroy, satin): 45" (115 cm) wide fabric, single layer: 4.9 - 6.2 yd (4.5 - 5.7 m) // 45" (115 cm) wide fabric, on fold (sizes 0-20 only): 4.9 - 5.4 yd (4.5 - 5 m) // 54" (137 cm) wide fabric, single layer: 4.1 - 5.1 yd (3.8 - 4.7 m) // 54" (137 cm) wide fabric, on fold: 4.3 - 5.6 yd (3.9 - 5.2 m).

Additional fabric may be required to match patterned or plaid fabric - add 20% minimum for matching plaids.

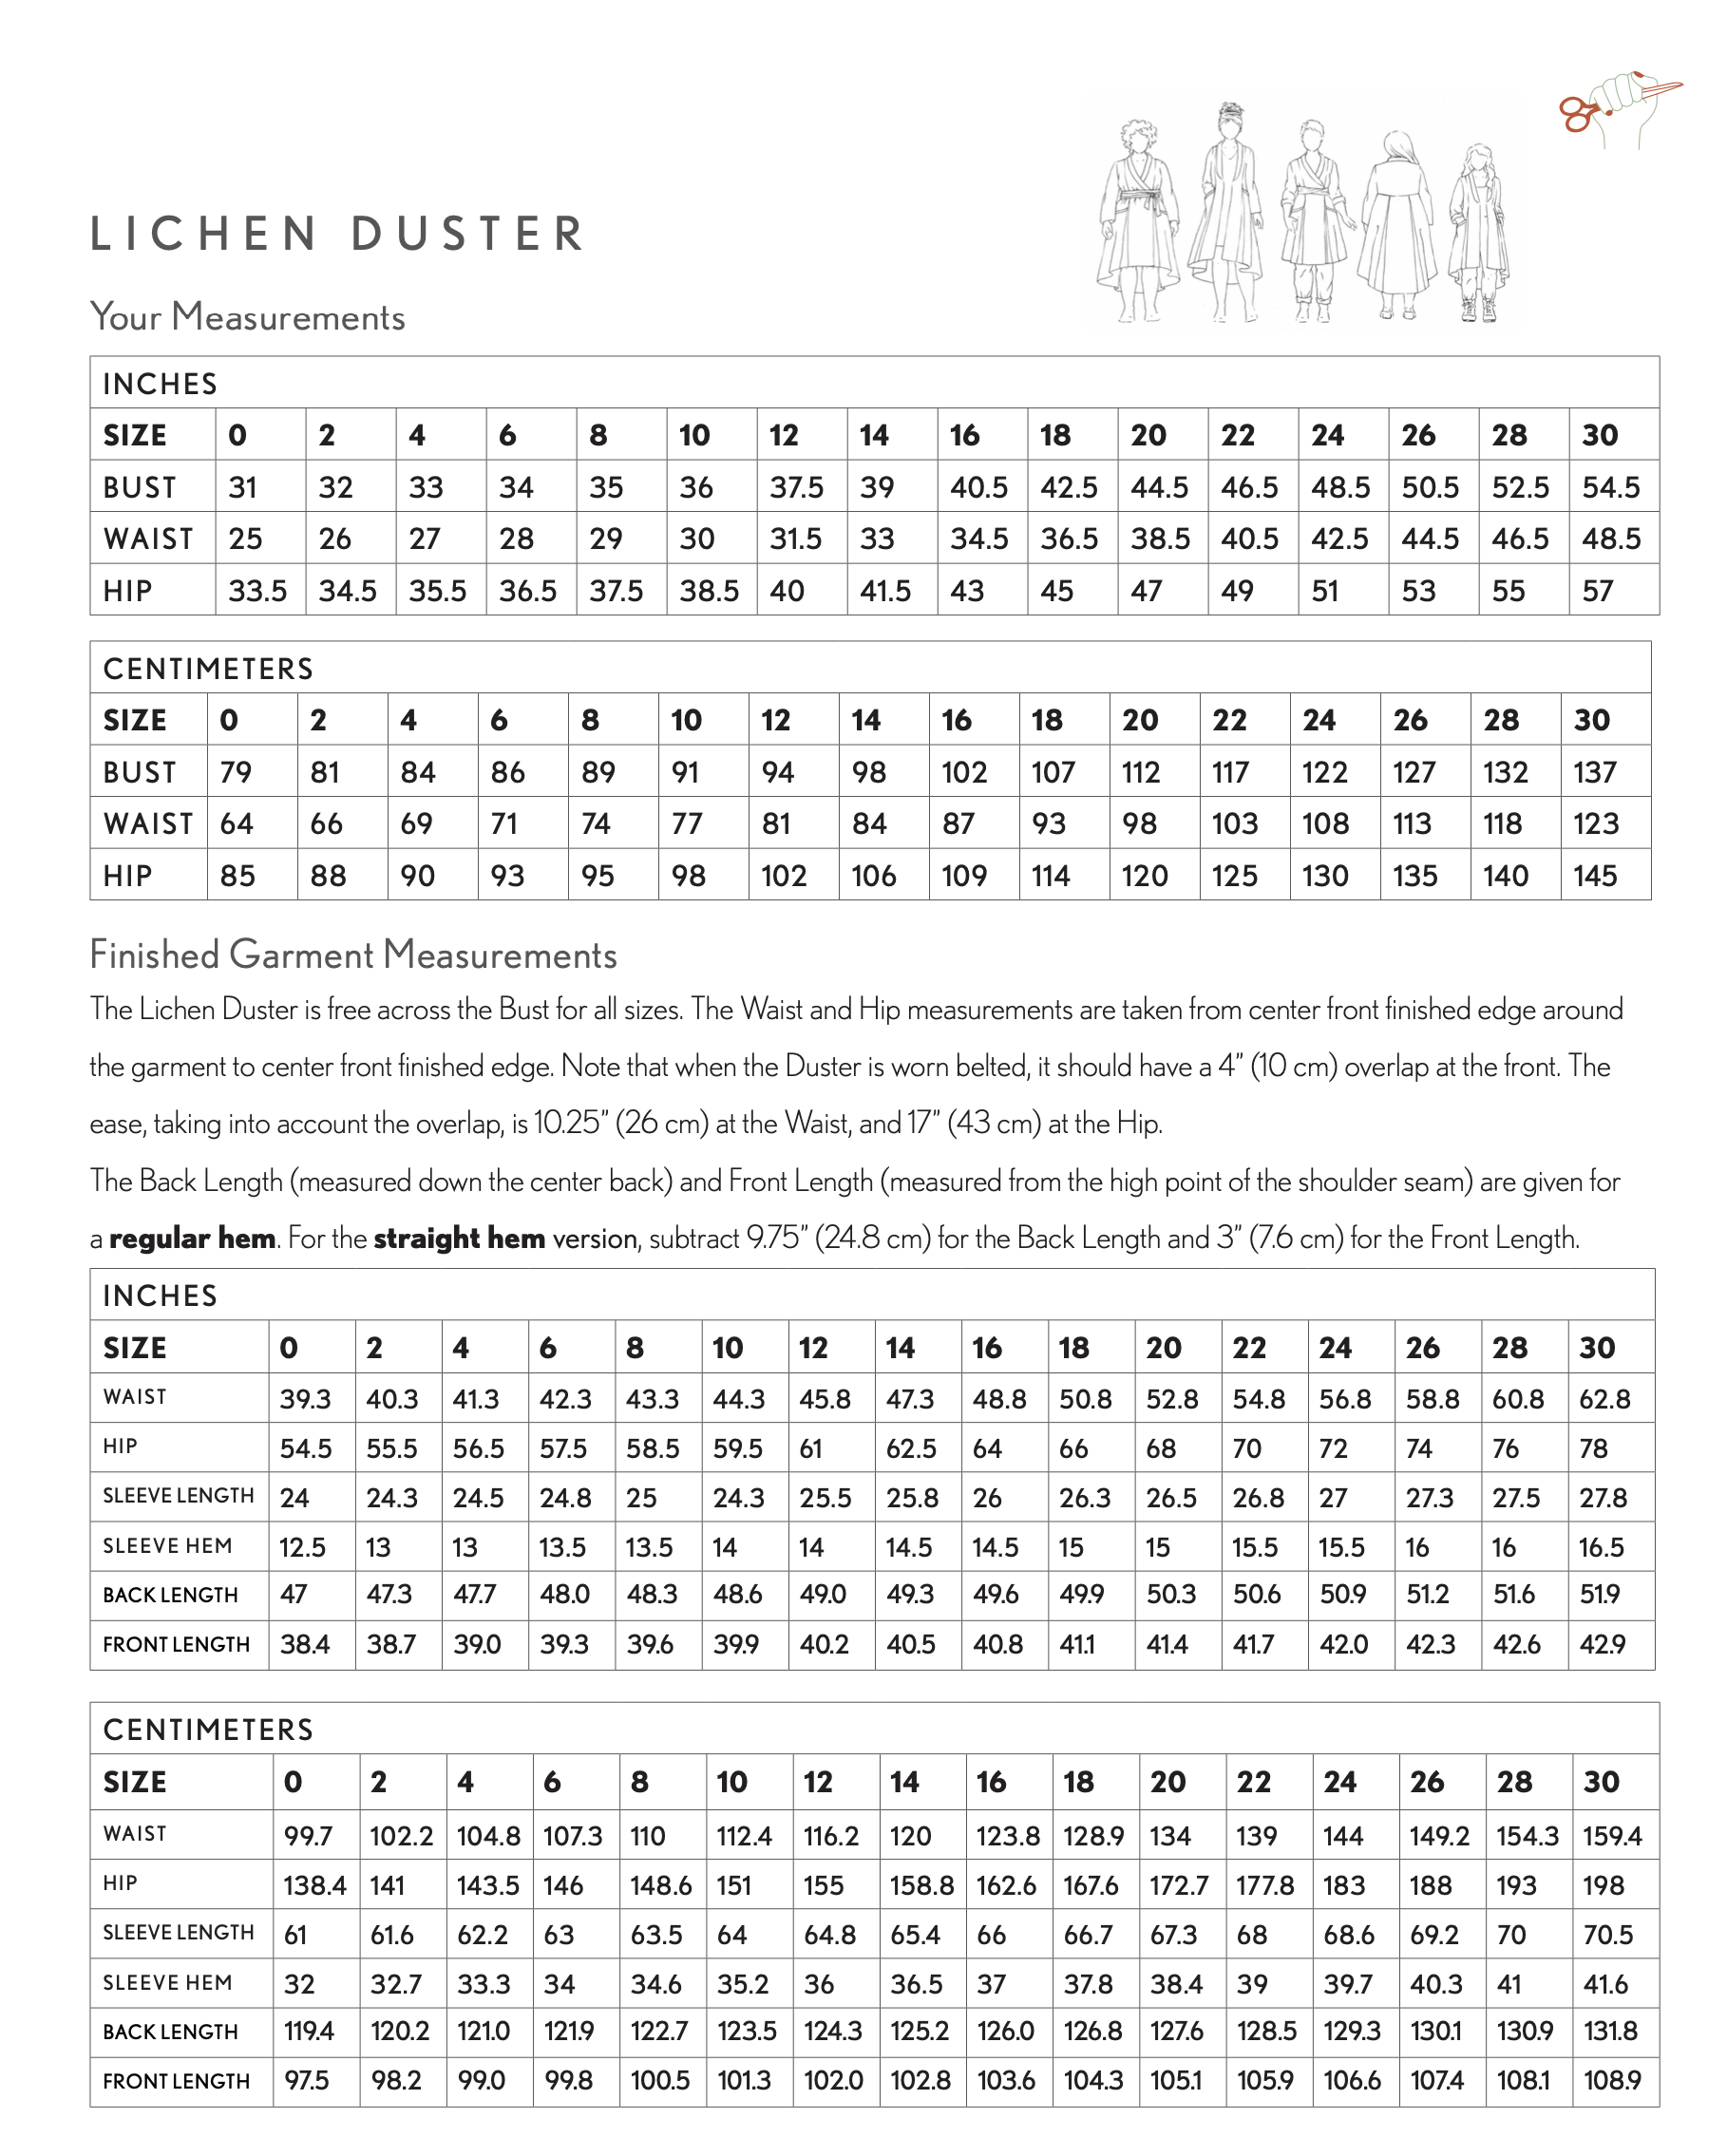
Sizing: US 0 – 30 (approx. UK 6/8 – 28/30). Please check the size chart and finished garment measurements.

Notions: Lightweight fusible interfacing, 1 yd (90 cm) if you choose to interface the full front facings and the back facing OR four 1" x 1" (2.5 cm x 2.5 cm) squares if you choose to spot-interface stress points only // Optional: Wonder Tape, 1/4" (6 mm) wide, approx. 4 yd (3.7 m); seam binding, such as brushed cotton or double-fold bias tape, 5/8" (16 mm) wide, approx. 4 yd (3.7 m) to bind the facing edges, an additional 8 yd (7.4 m) to bind the gored seams.

PDF pattern includes: Instructions; US letter/A4 print-at-home pattern (66 pages); A0 copy shop pattern (3 sheets); US copy shop pattern (36" x 125") // Layers: Yes // Projector file: No.

If you’re looking for more maker inspiration, check out the latest sewing pattern reviews from the sewing community. We also have a sewing blog to keep you up to date with all the news from the world of sewing.

Share

If you’re looking for maker inspiration check out our blog. With weekly updates on new patterns, styling ideas and maker inspiration, it's not to be missed.

Customer Reviews

Based on 1 review
0%
(0)
0%
(0)
0%
(0)
100%
(1)
0%
(0)
A
Ali
Deeply disappointing Lichen Duster

I bought this pattern 2 years ago to use the most beautiful and expensive piece of fabric I have ever bought, some Indian cotton velvet.

I bought a pdf copy of the pattern and also had it printed out by a printing company in A0 format.

Over the past 2 years I have got out the pattern and read through it and remembered why I have never made this beautiful coat. This has the most frightening and complicated instructions I have ever seen on a pattern. I am a very experienced dressmaker and have been making clothes for 48 years now and my mum was a professional seamstress and this pattern made me feel that I was a novice. The instructions stripped me of all my confidence in my ability to sew.

Lets start from the beginning!


There is a fundamental flaw in the difference between the A0 copy and the pdf A4 copy. The pdf has no map or diagram so you have to lay the whole thing out on the floor to see where all the pieces are but they are complete. The A0 copy is not complete. By this I mean that there are 2 extra pieces of pattern with tiny writing on them telling you to join them to the front and front facing. There is no label on them saying that they are part of the front and front facing.  Furthermore, there is no mention of this in the instructions.

The instructions are  a booklet of 26 pages and  looks very normal and straightforward. The first page gives you the instructions for printing out the pattern and links to the guides for using the patterns which is brilliant. There is suggested workflow which is good and a support email for any problems.  the next page gives you general information and a suitable fabric guide – all excellent. There is also a detailed online sew along. For this be sure to go to the blog on the Sew Liberated website and do not google the sew along because you get an abridged version.


The next  page is dedicated to your measurements and the finished garment measurements and this is where it starts to get a little complicated.


My bust measurement is 47.5 inches so that fits into the size 22-24 category  and there you have the quandary. Do you make a smaller size and put in a full bust adjustment or just make a larger size.  At this stage I decided to    look at the sew along. Each stage tackles a different part of the process – the first one being sizing.  Apparently you should measure yourself daily – very scary thought. The author gives 3 case studies of three women with different sizes and builds. The one closest to my bust size has small shoulders so the author suggests either a full bust adjustment or using a smaller size – fair enough!  However, when you look at the measurement chart and the finished garment measurement, there is no shoulder measurement. In the measurements, there is a bust, waist and hips and in the finished garment section there is only a waist, hip, sleeve length, sleeve hem and back and front hem. There is also a section of notes that gives you the amount of ease in the waist and hip but not in the bust. This is very confusing so I contacted the support team giving my measurements and asked for help as to the bust sizing and asked why it wasn’t in the finished garment measurements. The reply I got back was truly astounding. They told me that because everyone’s bust measurement was different, they couldn’t’ put it in. Surely they could have given you the ease so that you would be able to calculate your bust size, measure the pattern pieces and see if you had enough ease in your pattern to fit you properly . They also sent me an anatomical diagram of an acremonium so that I could measure my shoulder correctly even though there is no shoulder measurement in the actual pattern.  This i actually found offensive.

My conclusion is that the support is even more condescending than the irritating American instructions.

At this point I decided to make a cotton muslin just to try the actual construction out.

I made a size 22.

There are gores which are additional triangular shaped inserts to give the garment more body and swing. There are suggestions as to which type of seams you should use. For the back a flat fell seam is suggested.  However, the instructions for this seam are very confusing – please refer to You tube for suitable instructions on the 3 types of flat fell seam and choose the one you think is best for this project.

I did none.  I decided to make bias binding and use that.  I have never done this before but bought some bias binding set and this has changed my life.  I loved making it and it worked.

The pockets are brilliant but if you follow the instructions and don’t use thin cotton, you end up with 9 layers on the pocket edge with the binding to sew into the front gore.  This is very bulky and because it is a muslin, I didn’t even overlock the edges of the seams. An easier way to construct the pockets is to put the top edges of the pockets together wrong sides together, sew together, press, turn out and top stitch – much less bulk...