Prix régulier
£21.00 GBP
Prix de vente
£21.00 GBP
Prix régulier
£21.00
Check out our latest patterns and get free UK delivery on orders over £50.

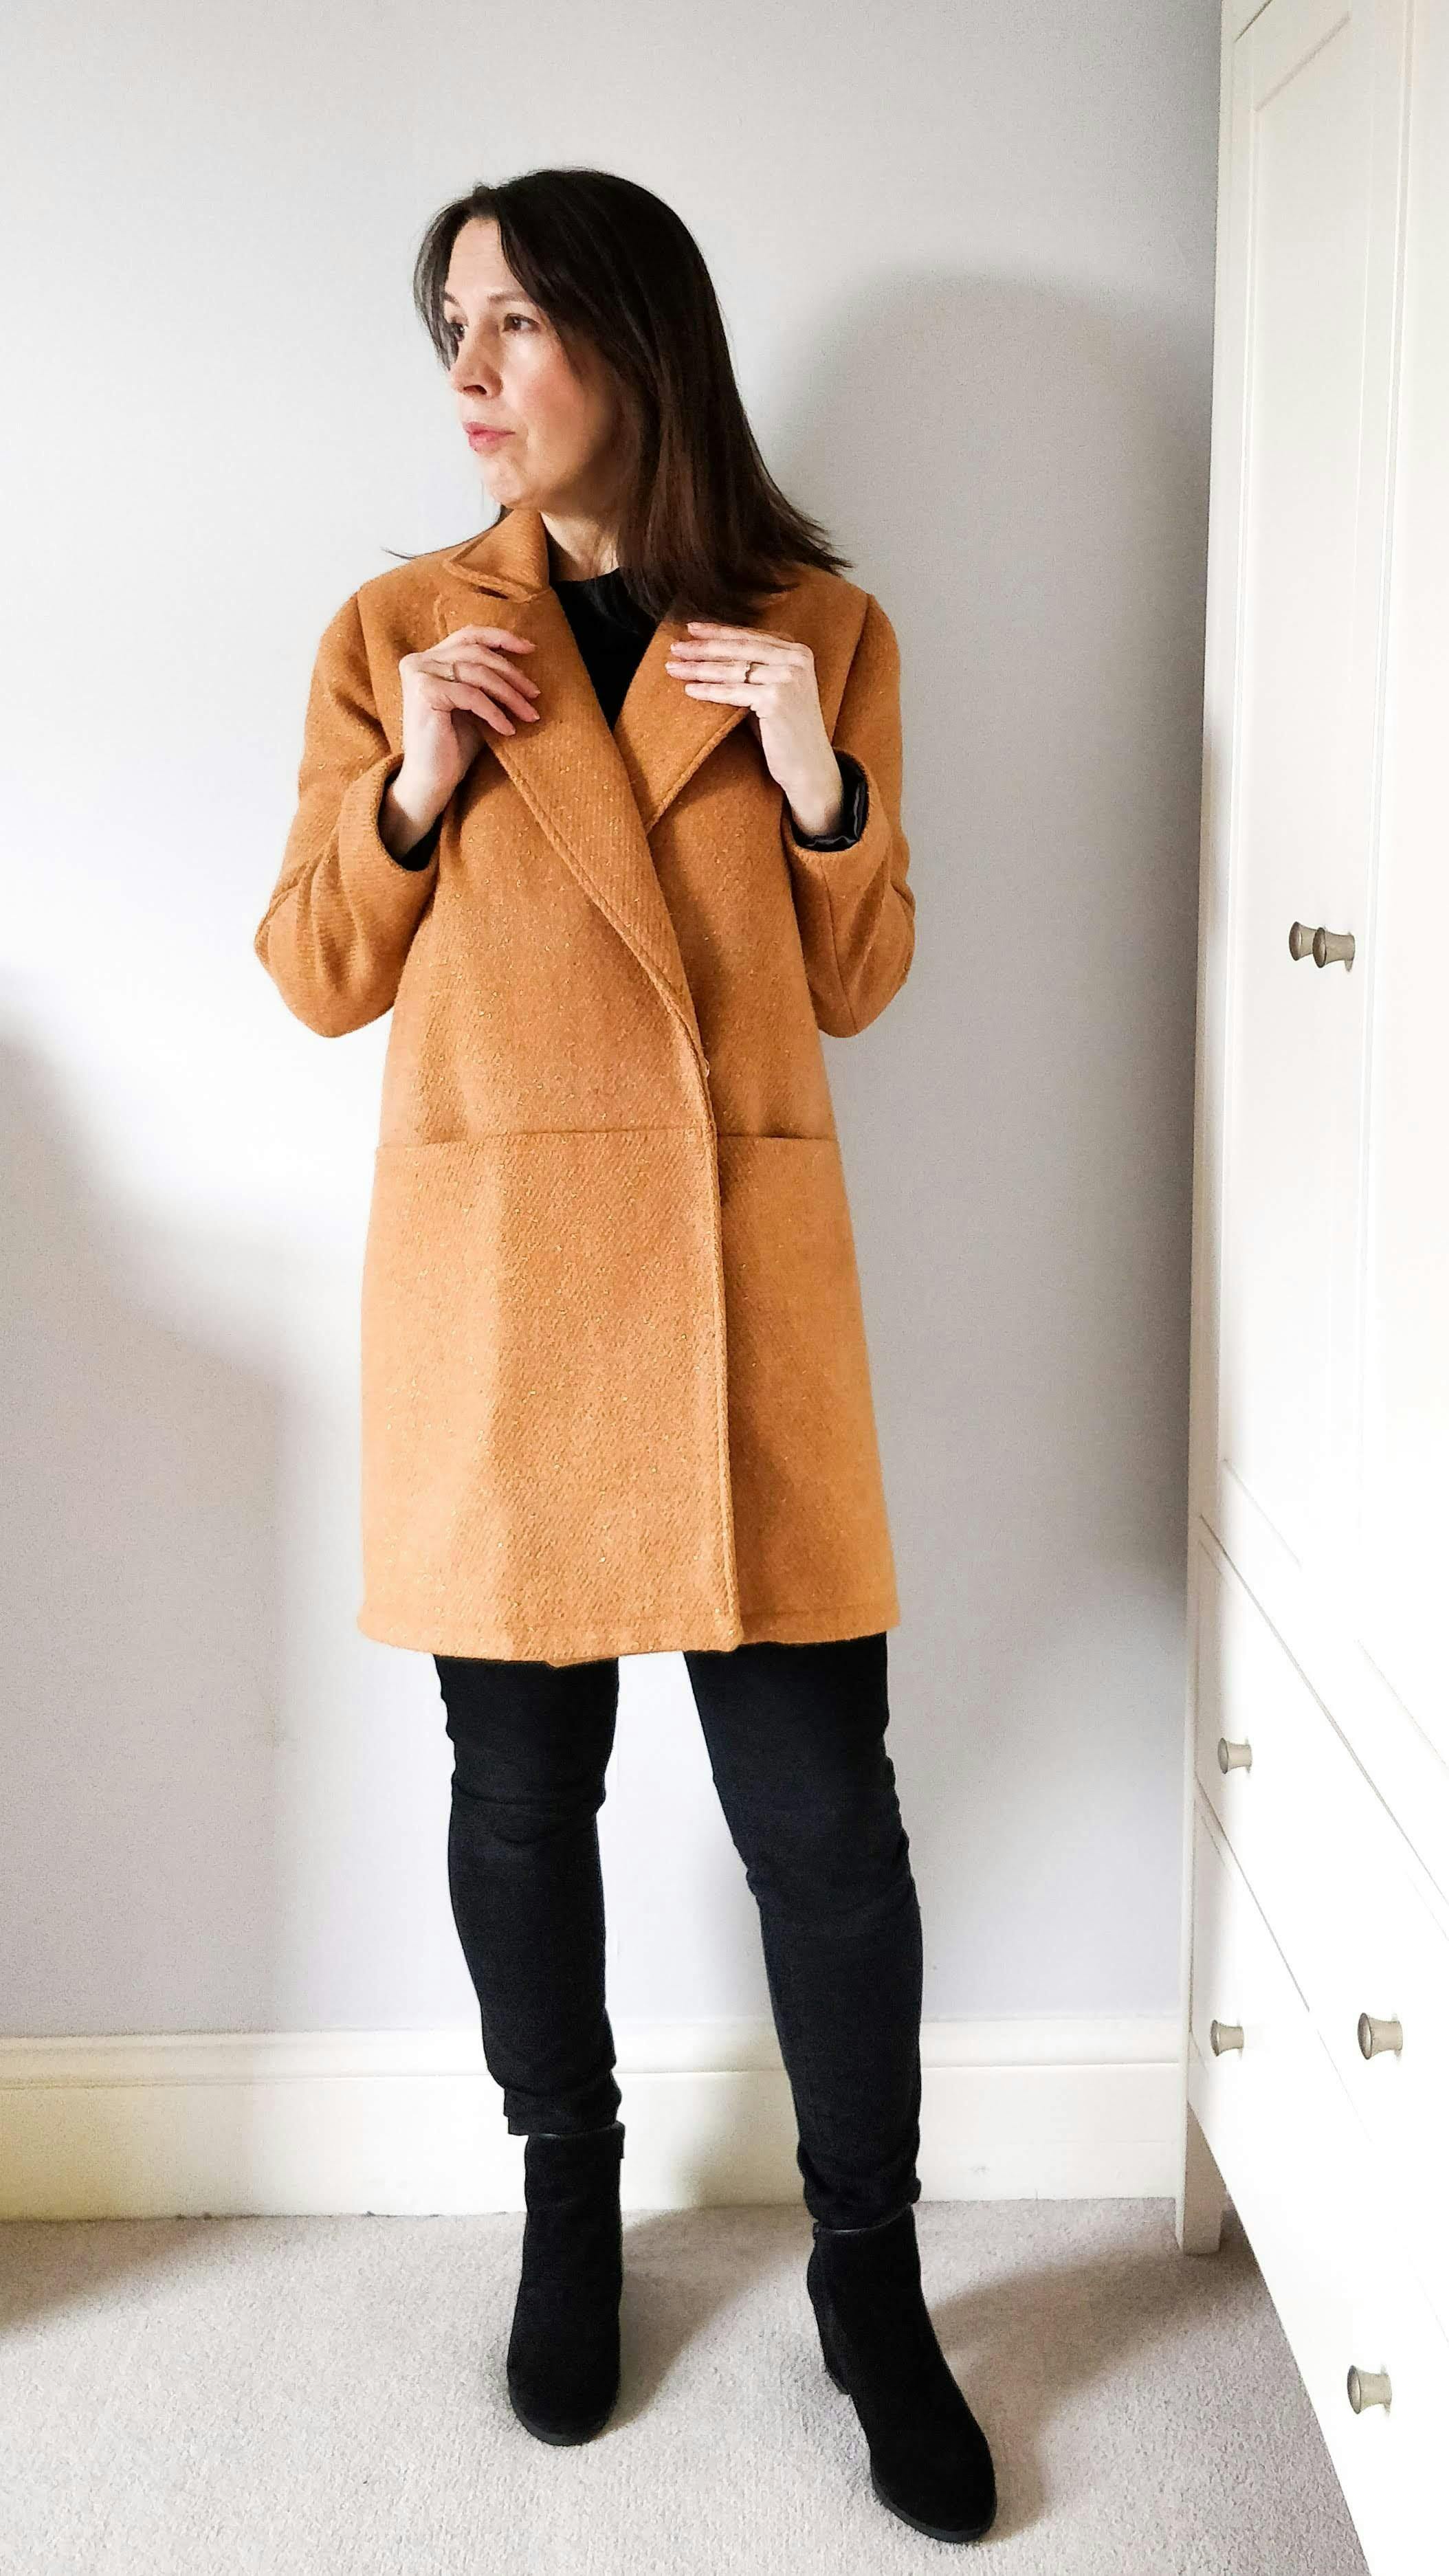
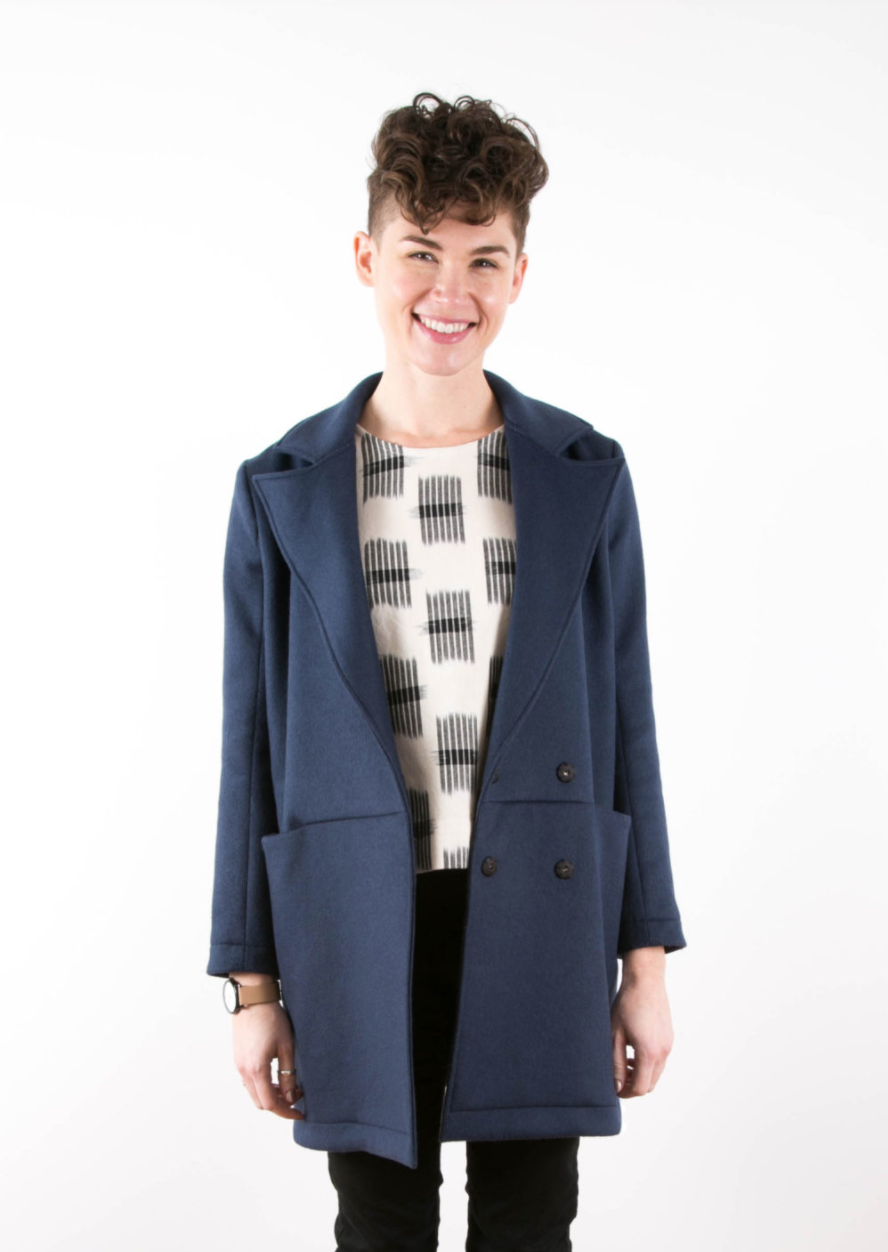
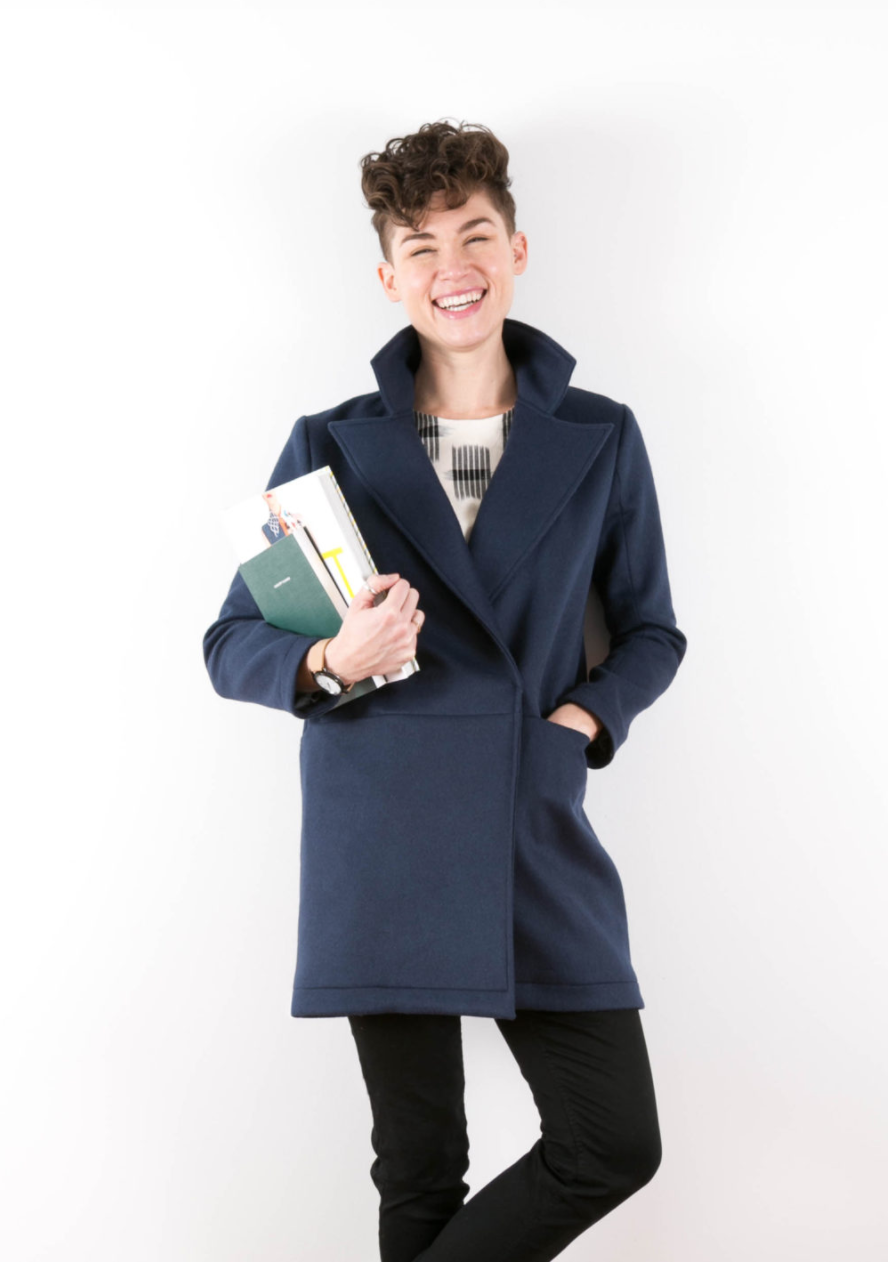
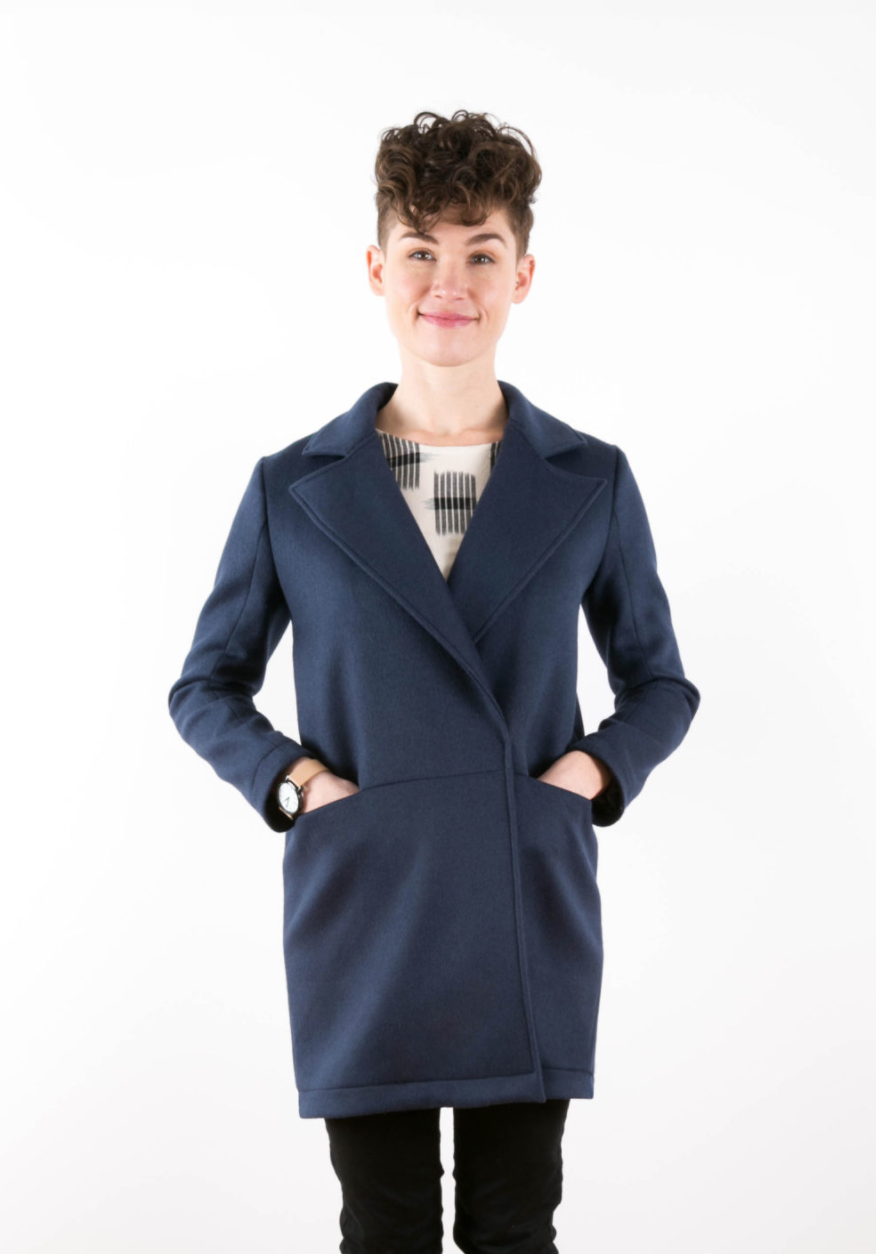
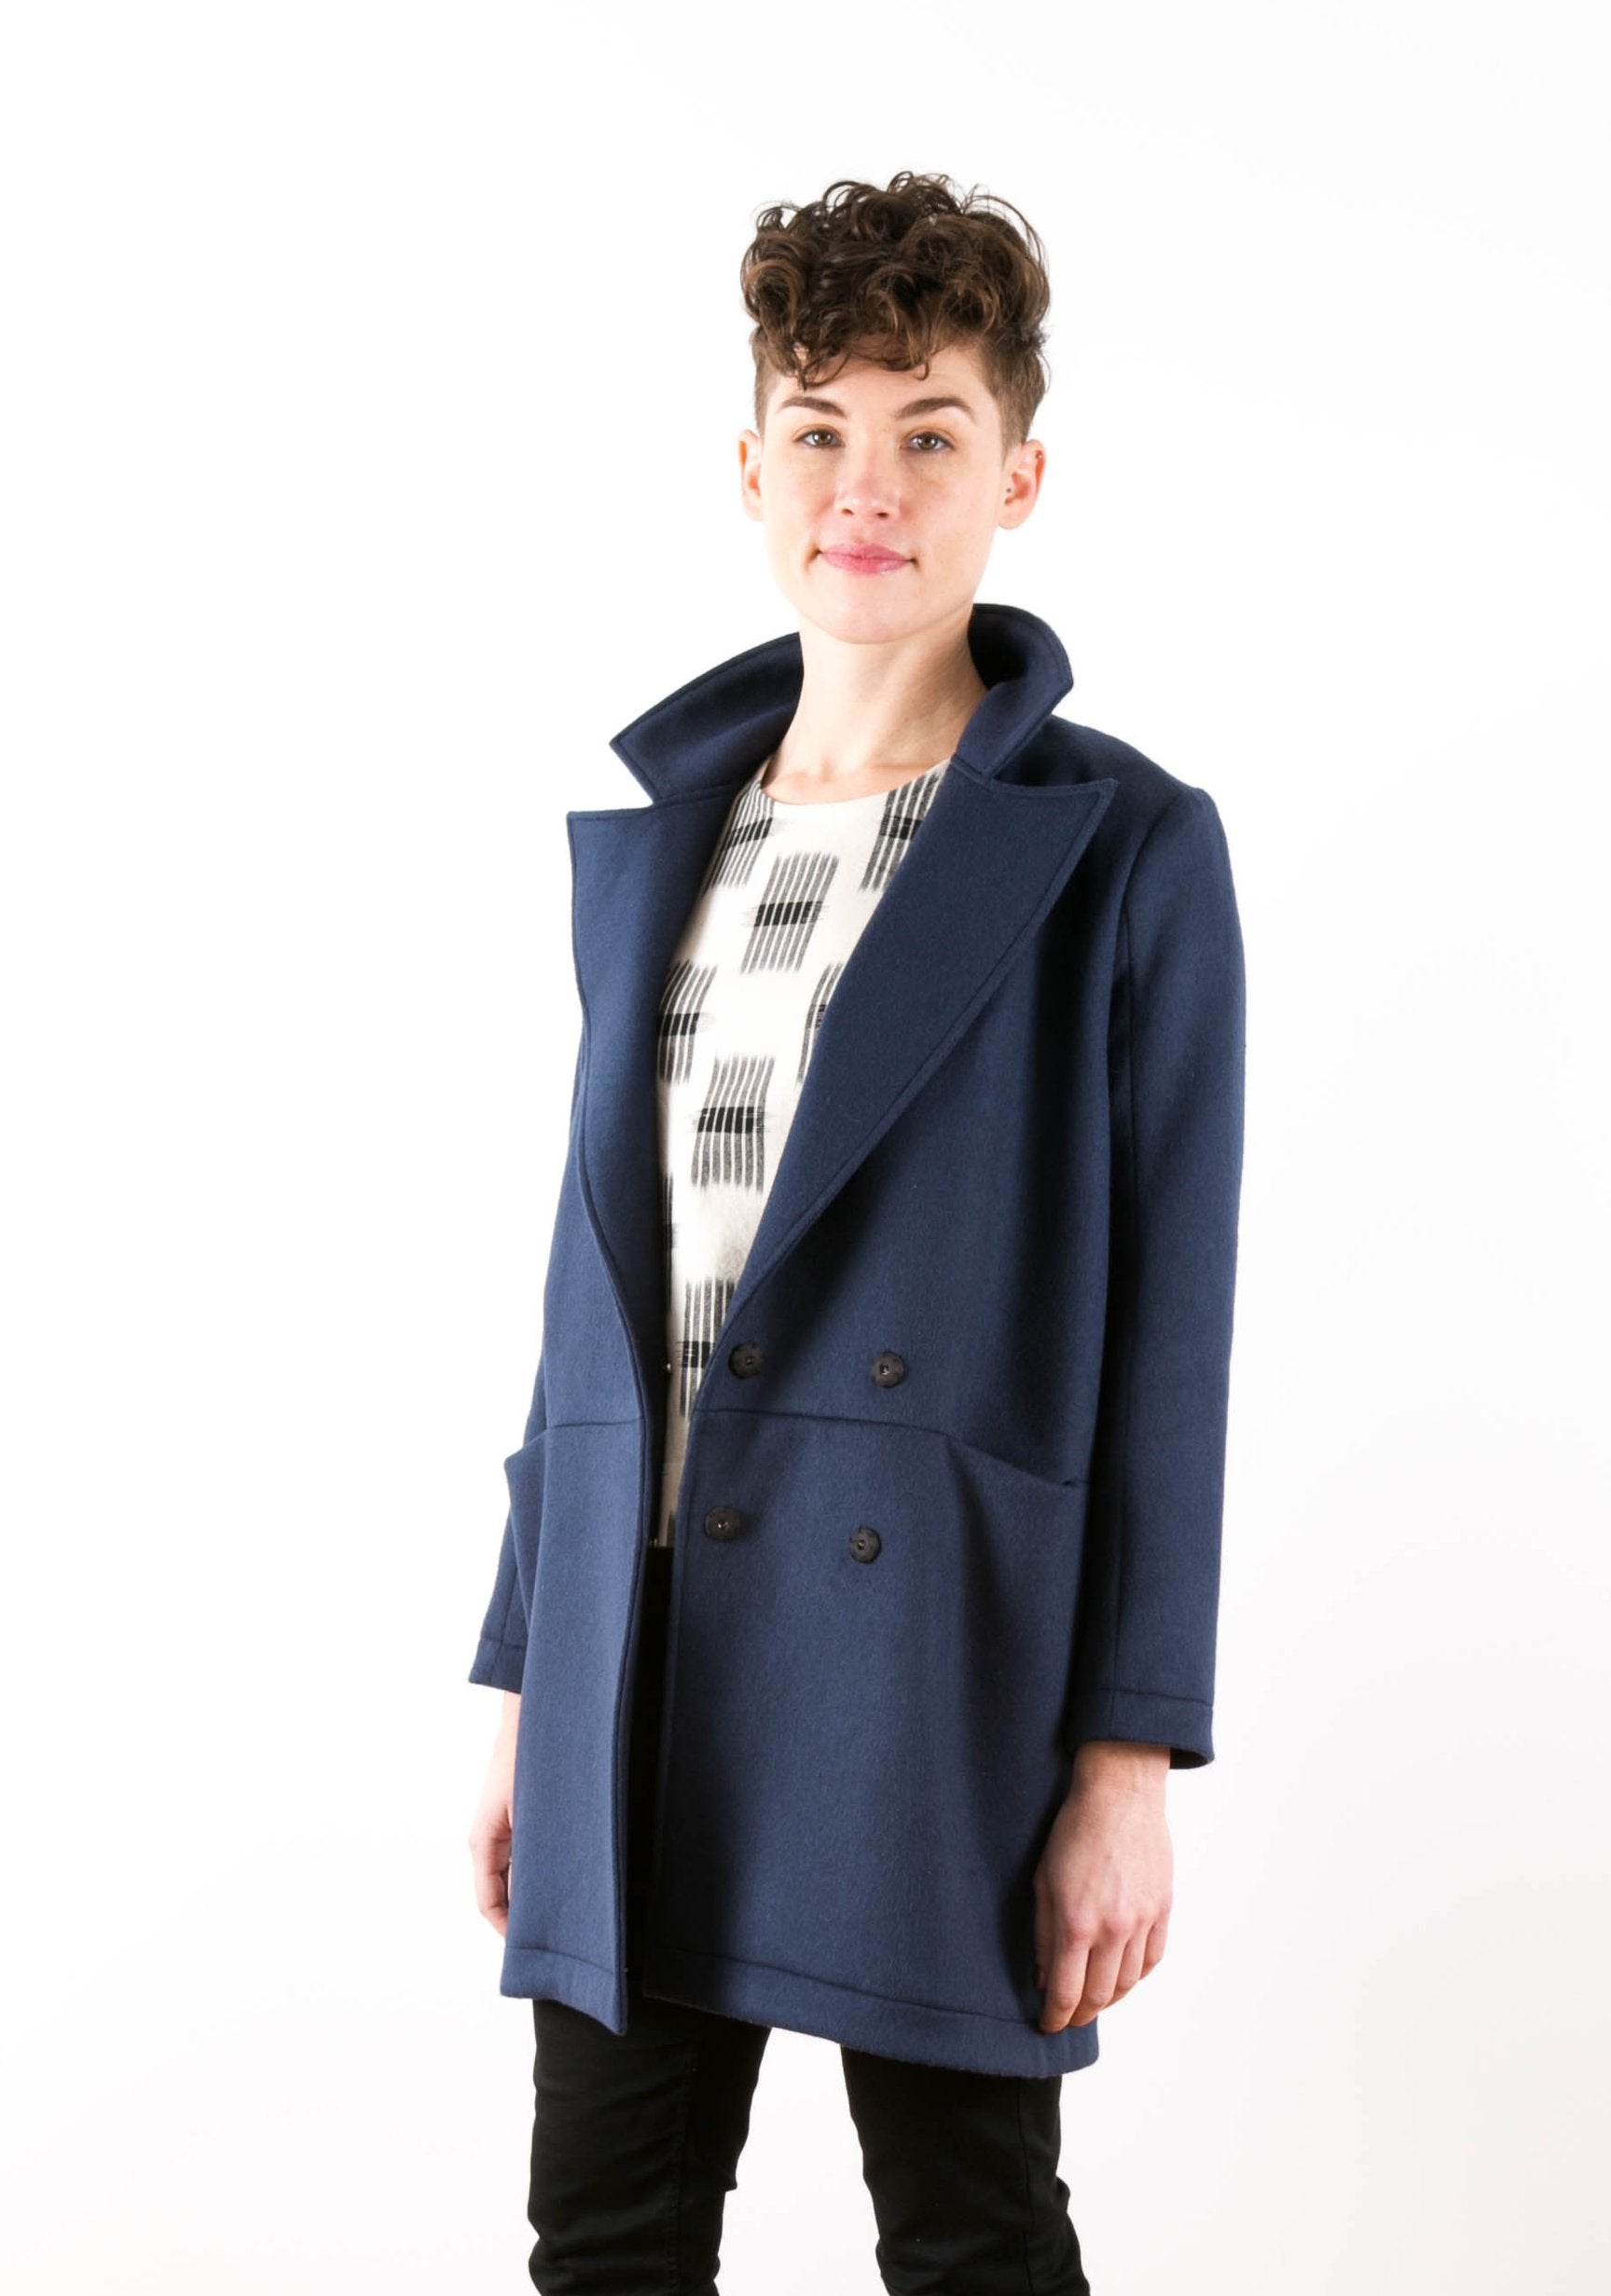
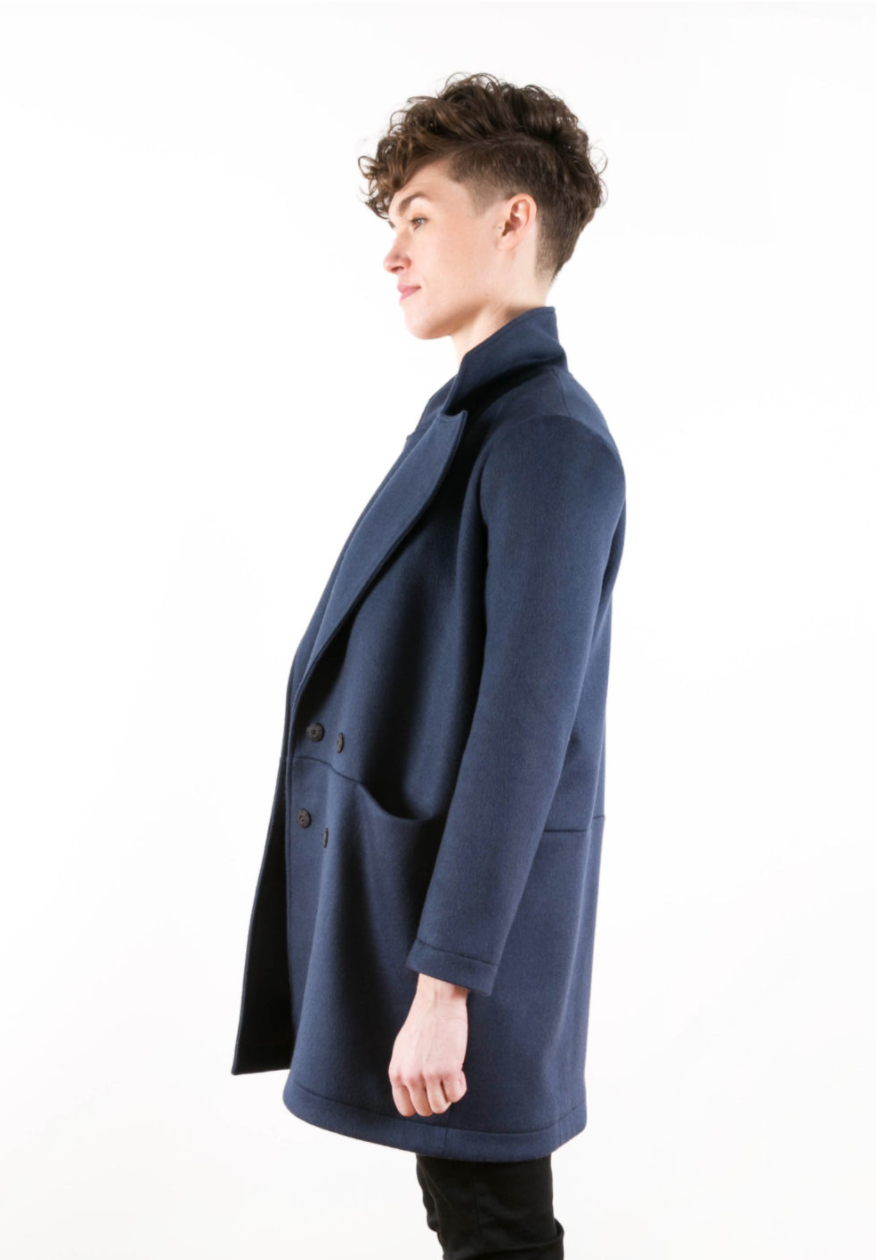
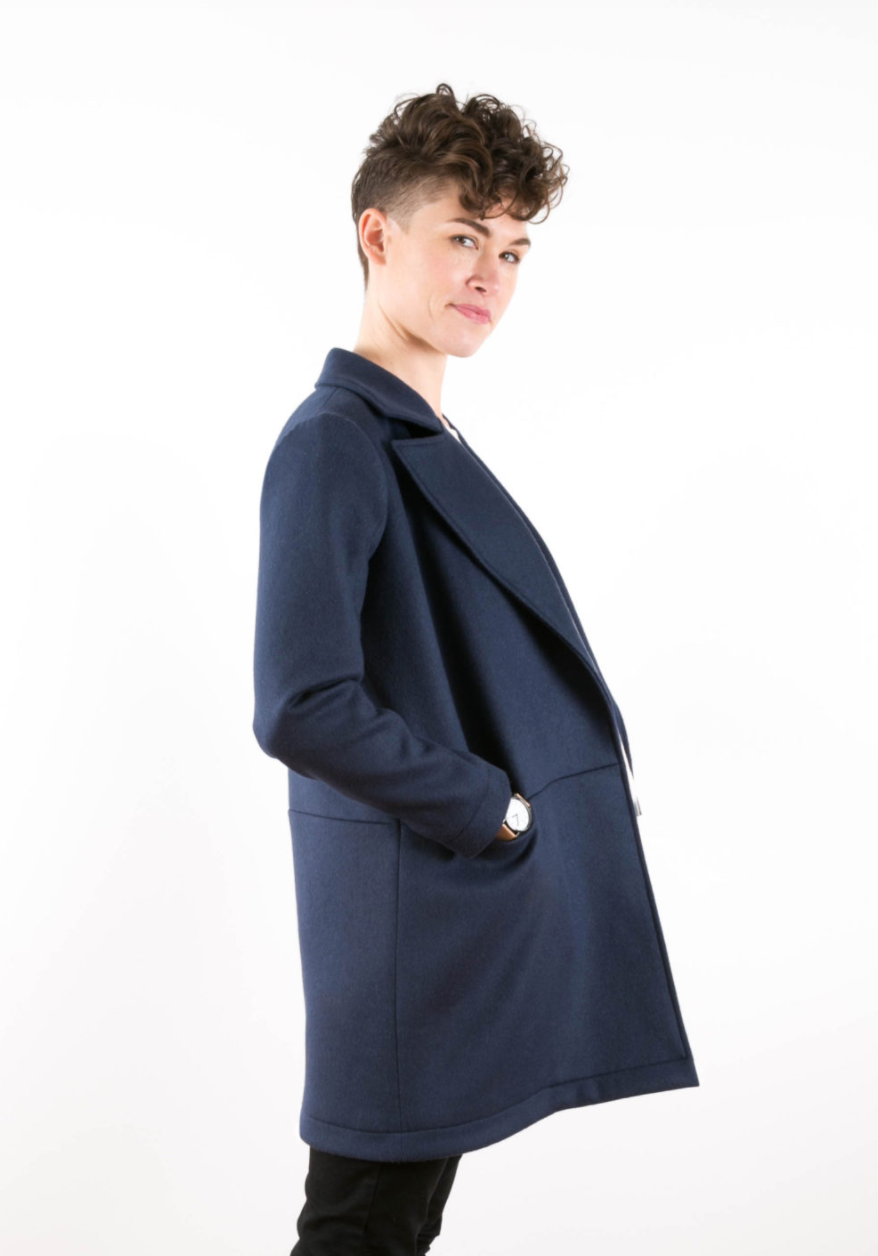
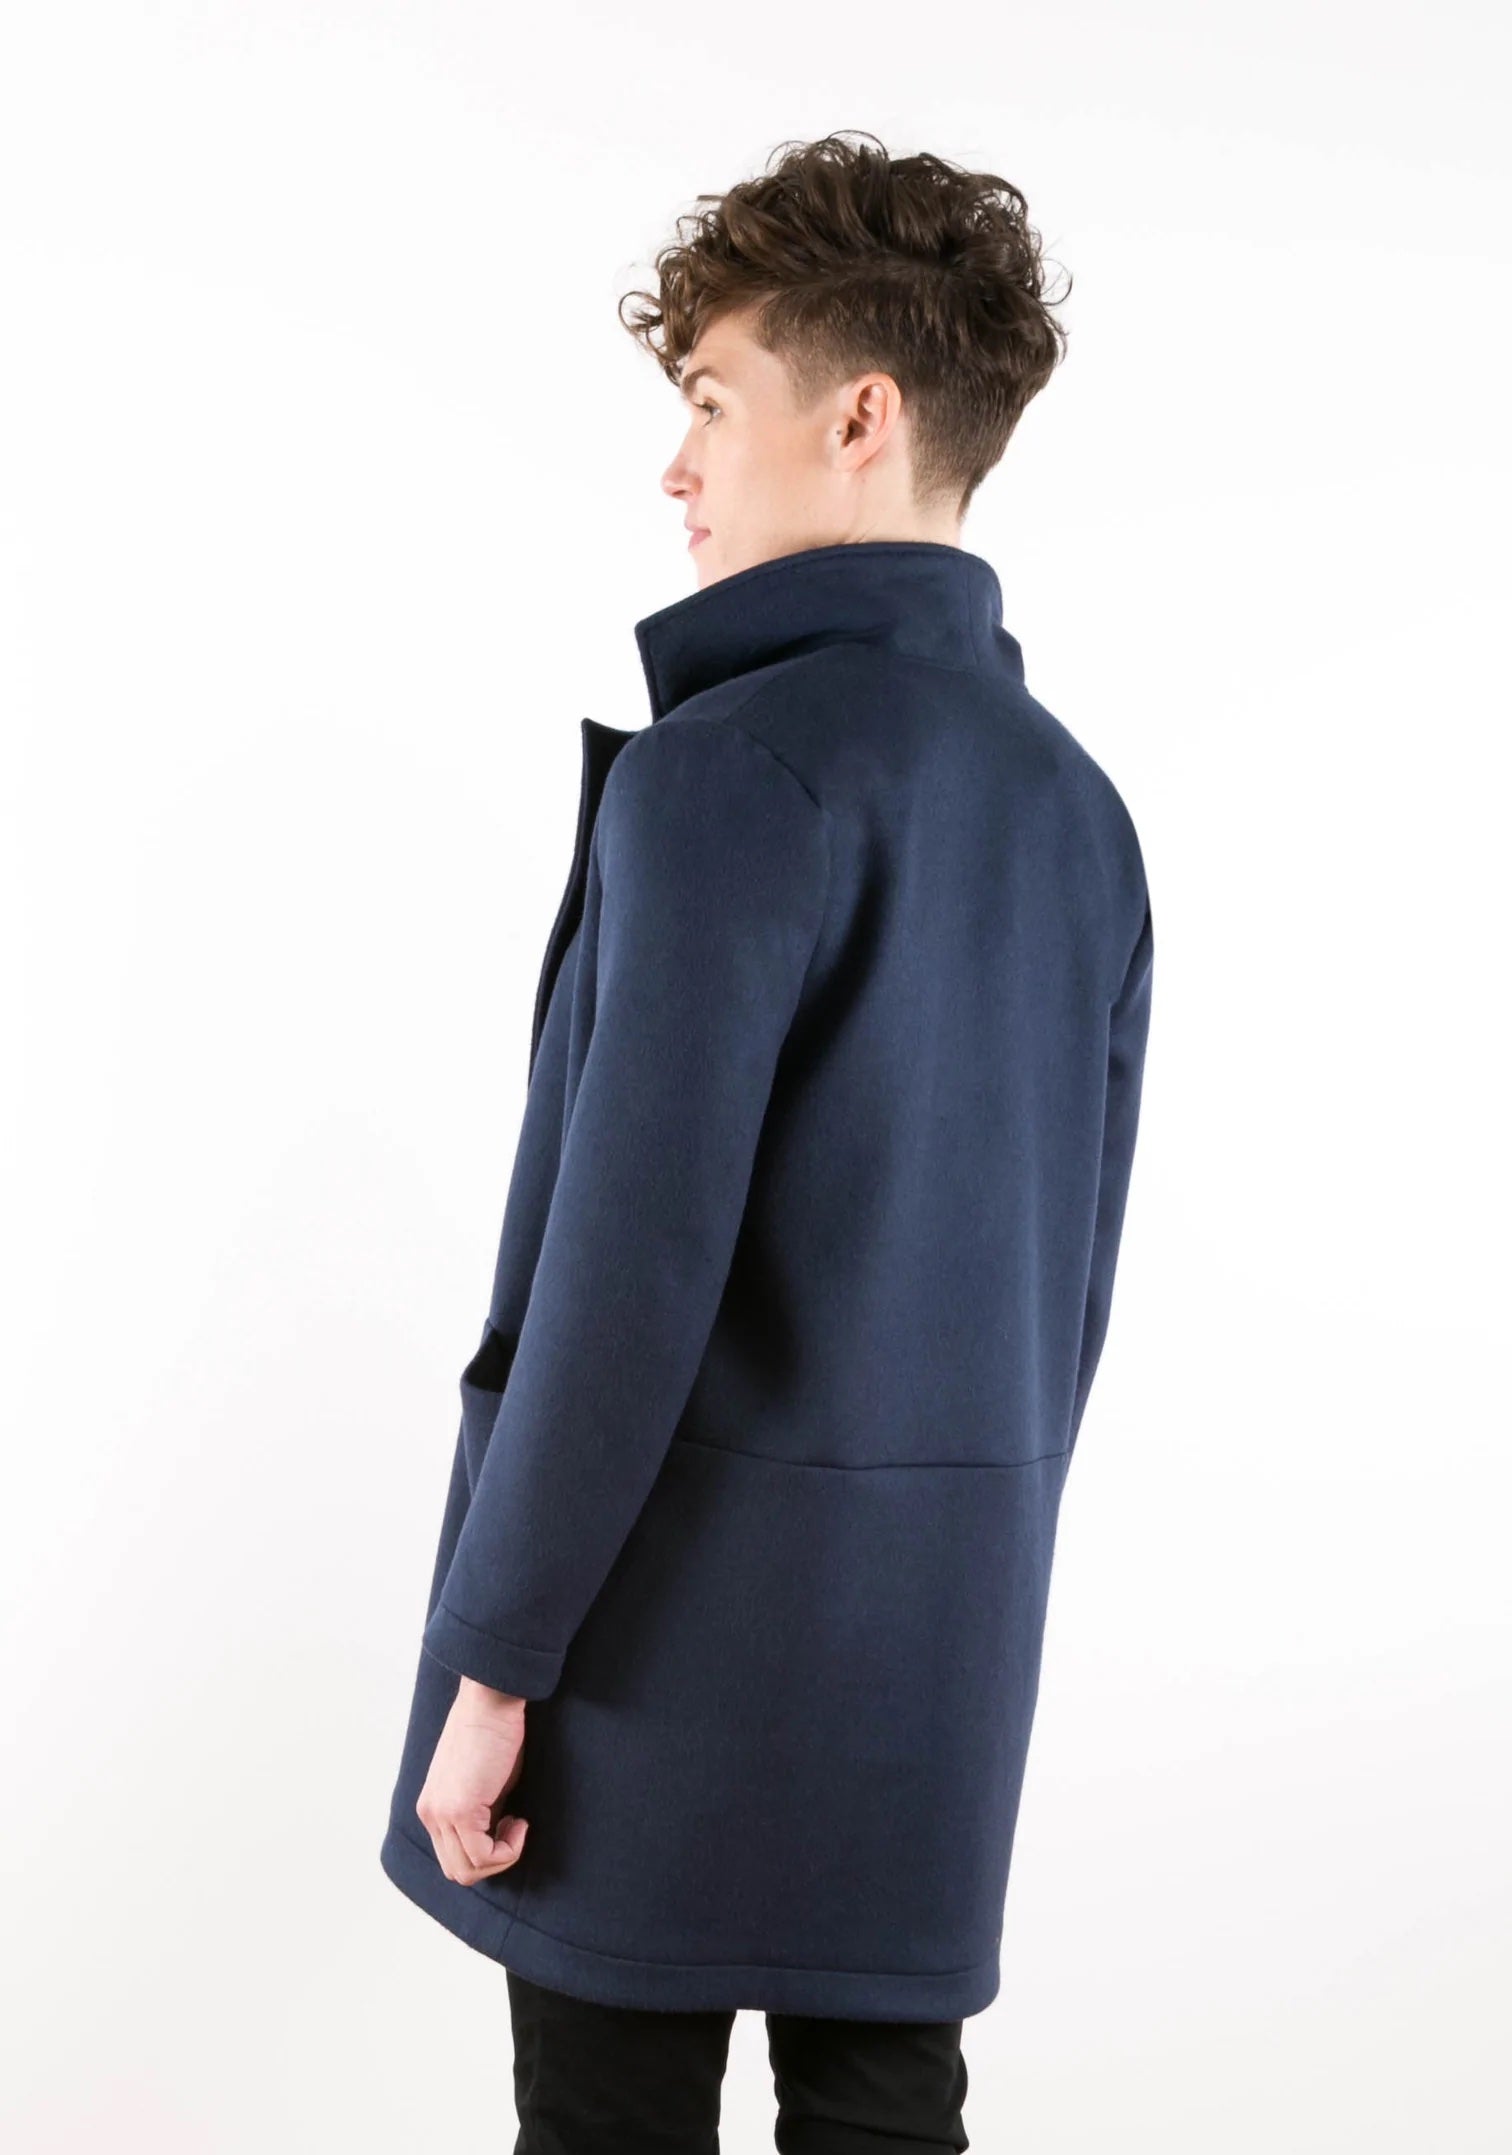
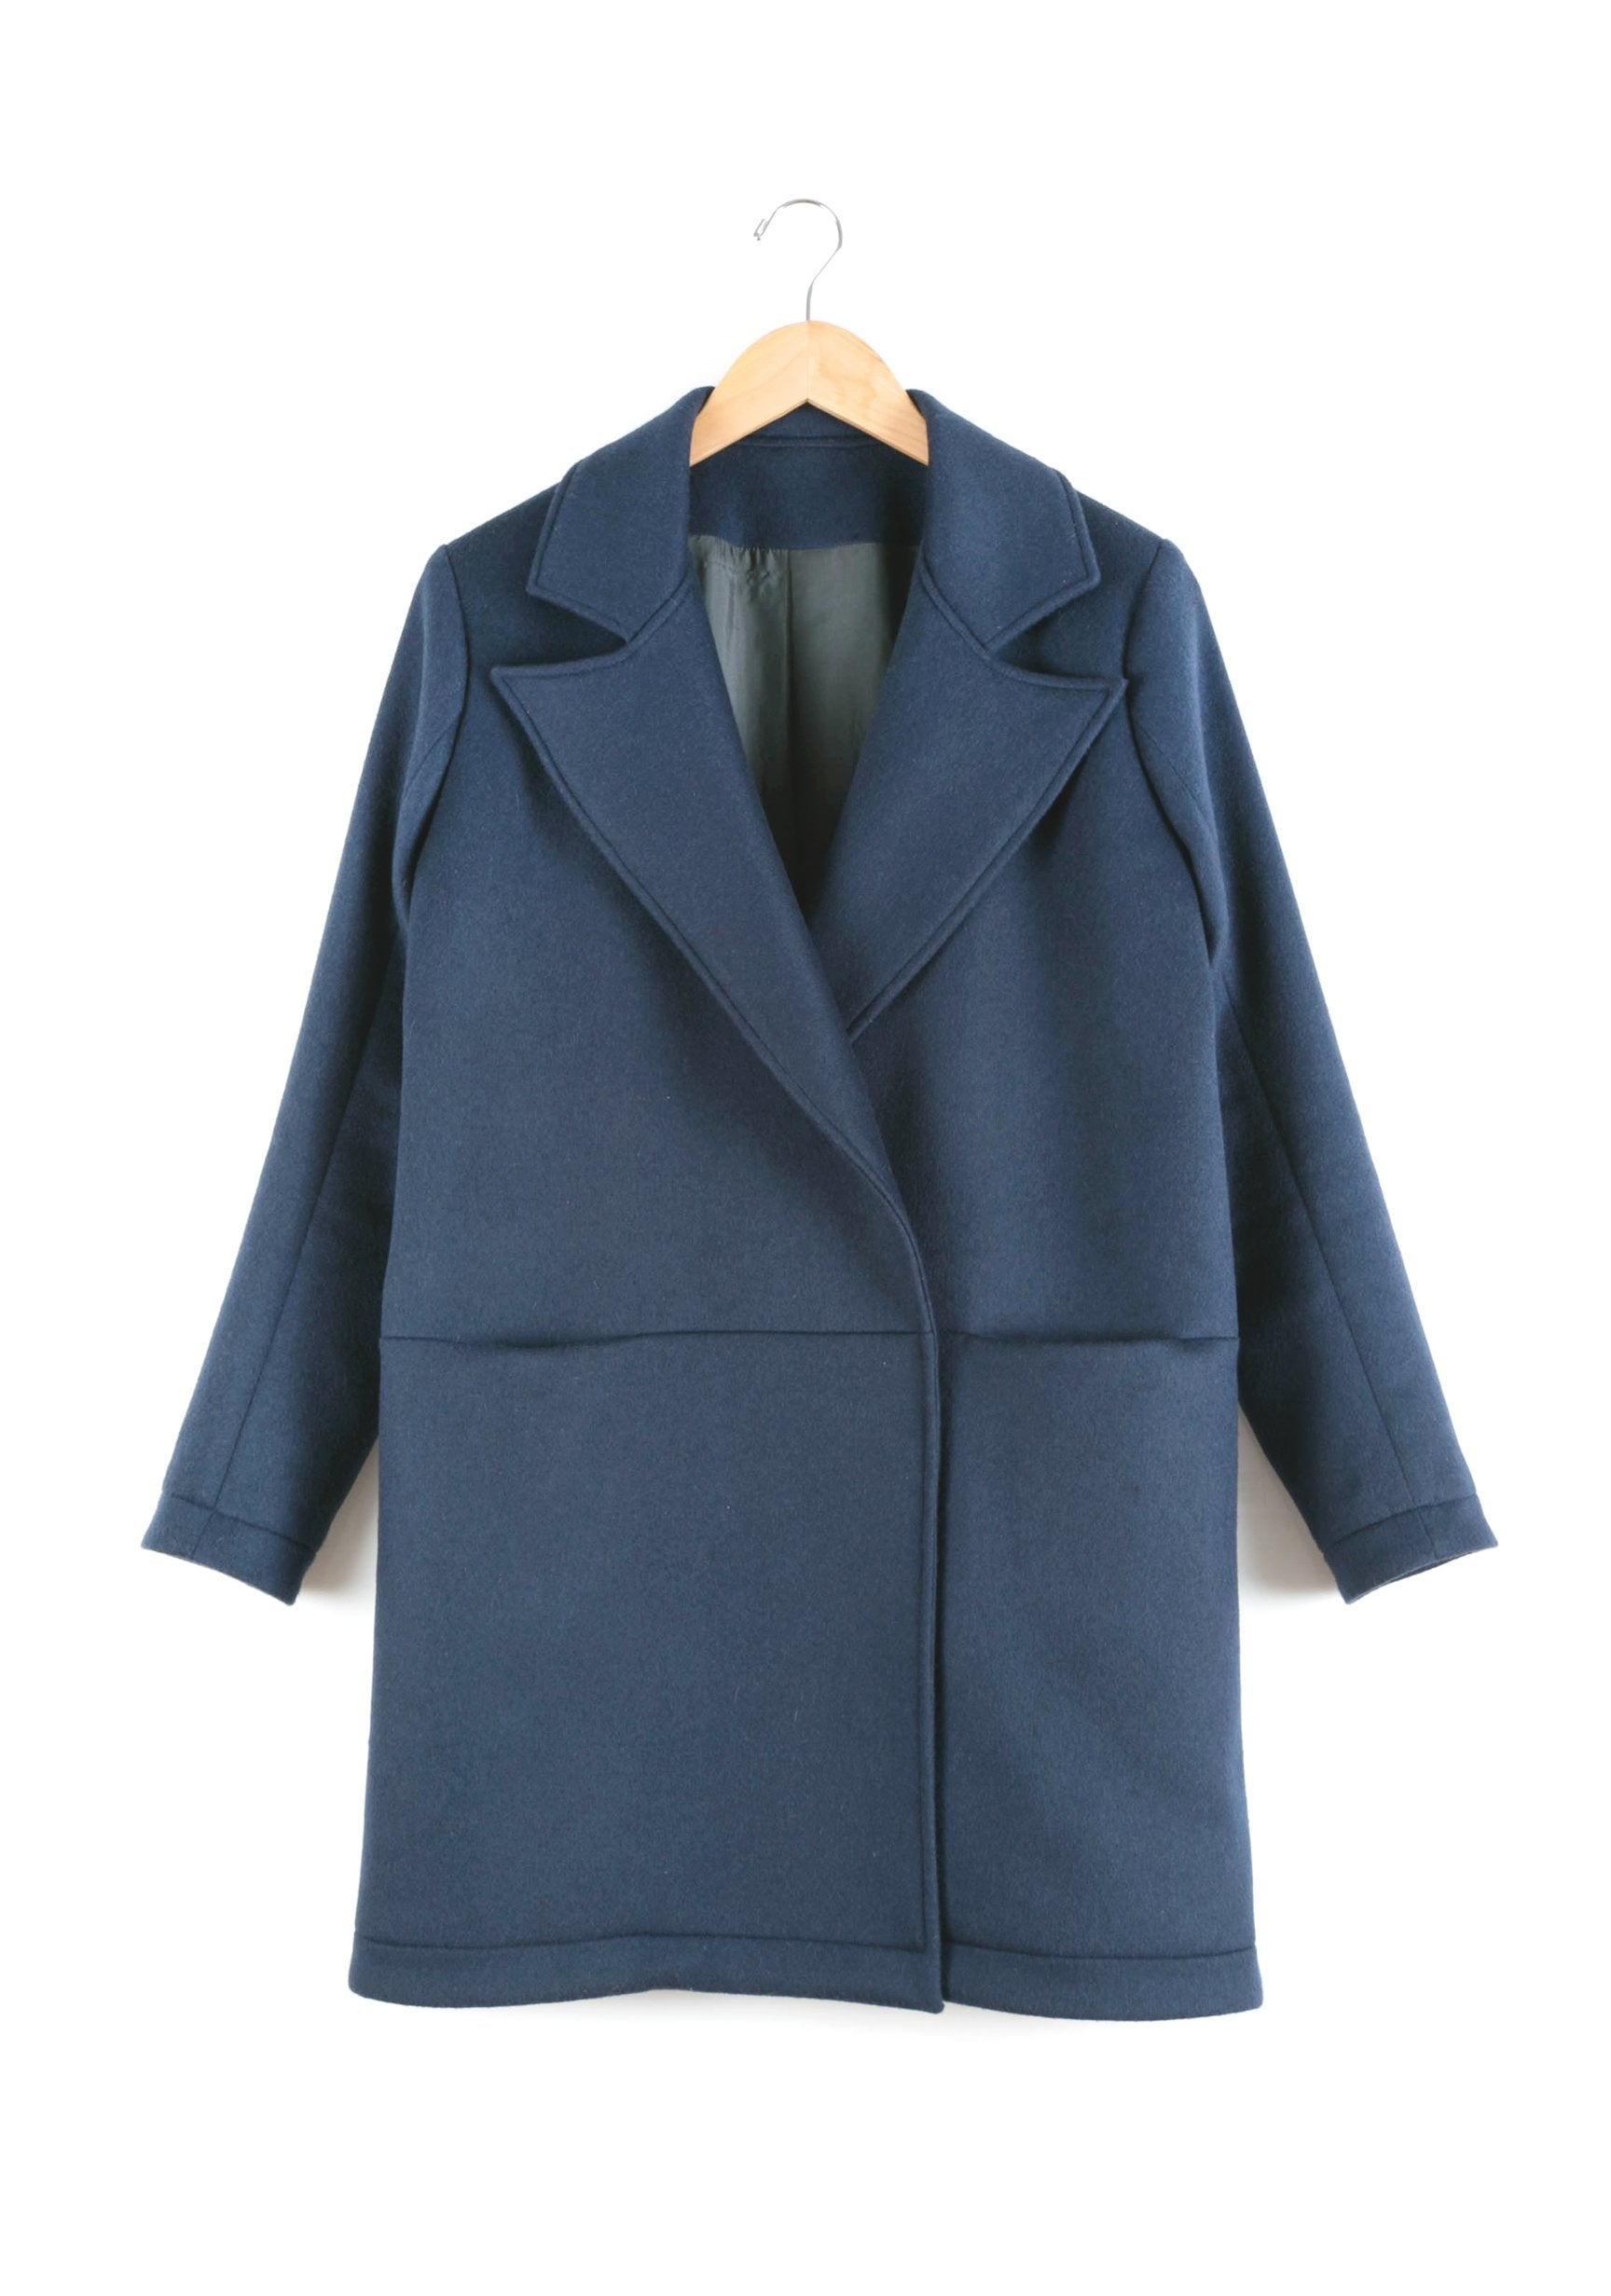
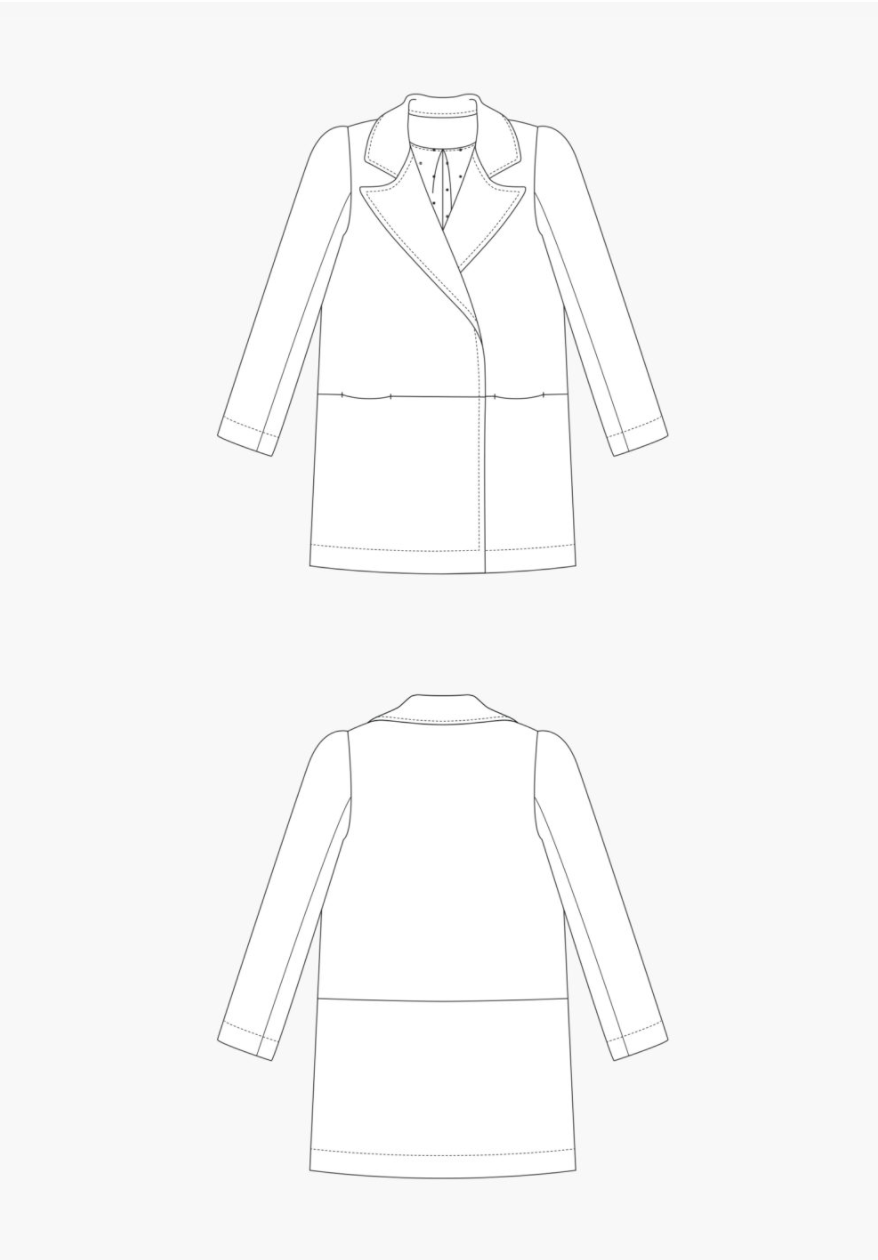
Buy the Yates Coat sewing pattern from Grainline Studio. The chic style of the Yates Coat will instantly upgrade any cool weather outfit. In-seam pockets and a hidden double breasted snap closure keep the silhouette sleek, while the slightly oversized lapel and mid-thigh length give the Yates a modern aesthetic. A full lining and two-piece sleeves ensure you’ll be wearing your Yates for years to come.
This sewing pattern is available to buy in the following format:
- PAPER (next working day dispatch on orders and FREE UK delivery over £50)
What we think: We love the simple shape and cut of this pattern, and the in-seam pockets are a great feature. It would look fantastic colour blocked too.
Suggested fabrics: Medium to heavy weight coating fabrics such as melton, boiled, or felted wool. Recommended lining is rayon bemberg or a similar fabric.
Fabric requirements: Extra fabric may be needed to match plaids, stripes, or one-way print designs.
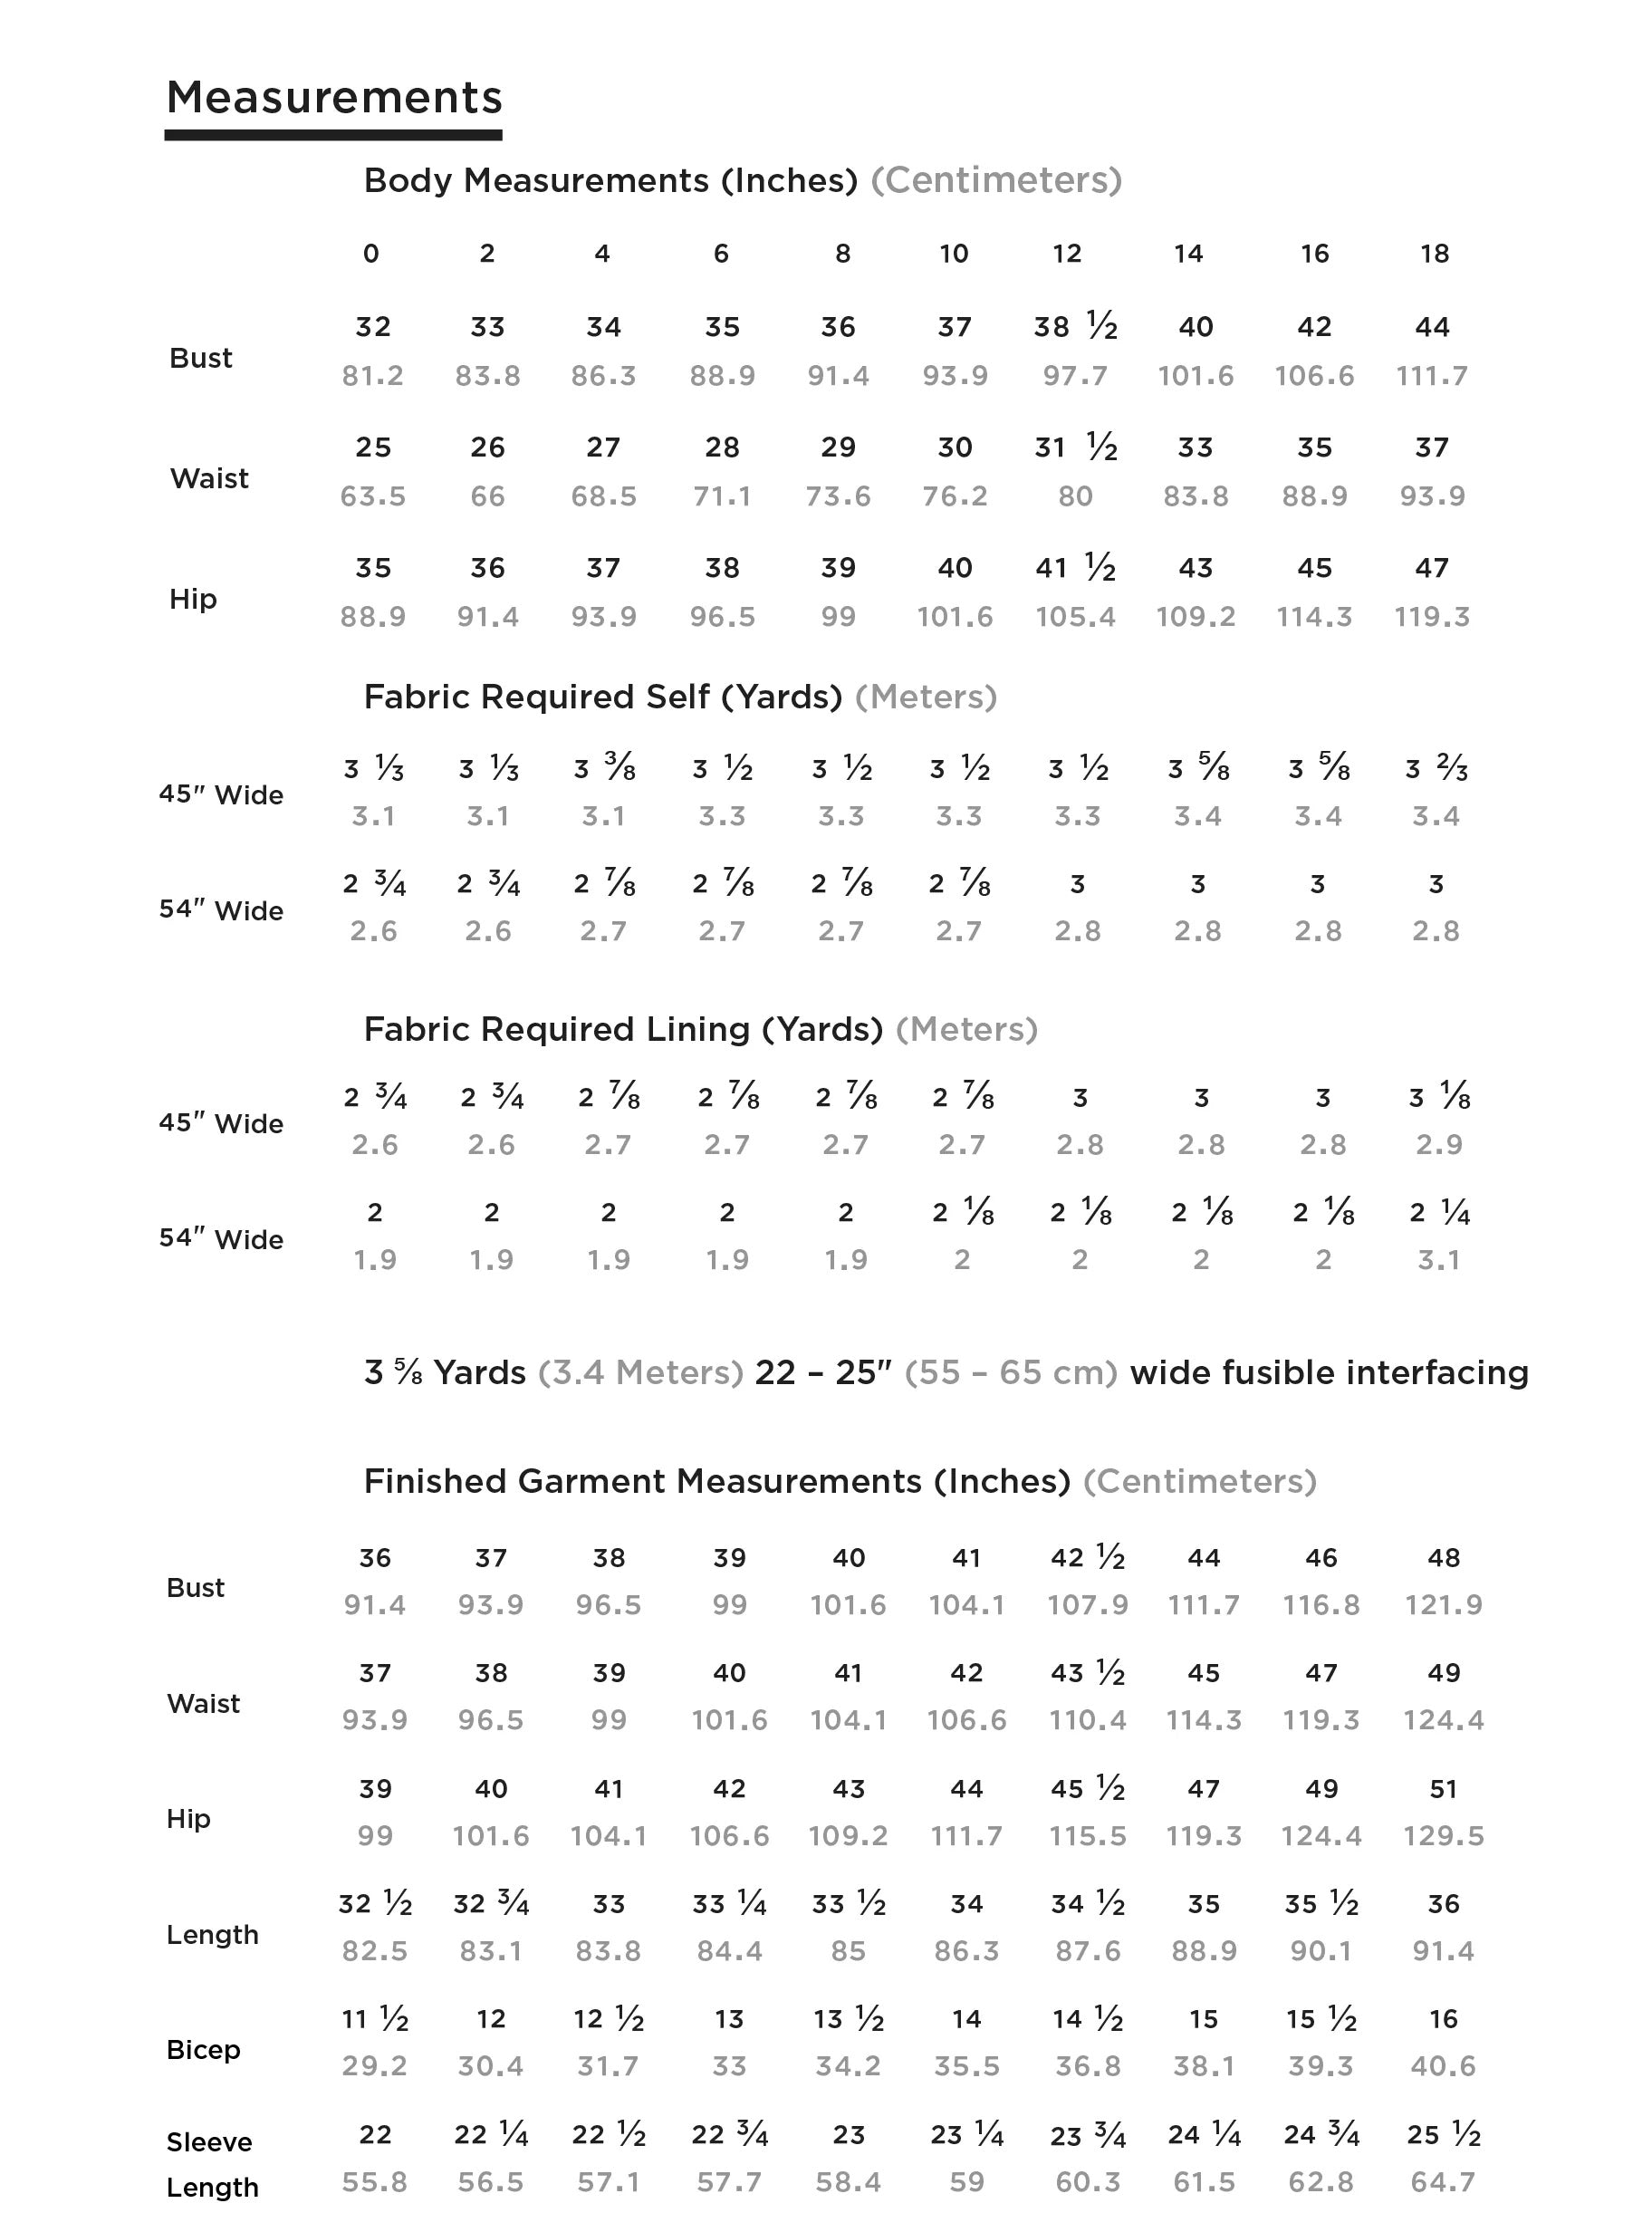
Coat: 45" (114 cm) wide fabric: 3 1/3 - 3 2/3 yd (3.1 - 3.4 m) // 54" (137 cm) wide fabric: 2 3/4 - 3 yd (2.6 - 2.8 m).
Lining: 45" (114 cm) wide fabric: 2 3/4 - 3 1/8 yd (2.6 - 2.9 m) // 54" (137 cm) wide fabric: 2 - 2 1/4 yd (1.9 - 2.1 m).
Sizing: US 0 - 18 (approx. UK 8 - 18). Please check the size chart and finished garment measurements.
Notions: Thread; fusible interfacing; four 3/4" snaps.
If you're looking for more maker inspiration, check out the latest sewing pattern reviews from the sewing community. We also have a sewing blog to keep you up to date with all the news from the world of sewing.
If you’re looking for maker inspiration check out our blog. With weekly updates on new patterns, styling ideas and maker inspiration, it's not to be missed.
This is a great introduction to formal coat making.
The instructions are really clear and I love the clean lines of this pattern.
I made mine in a reasonably heavyweight coating fabric and I forgot how heavy coats are to move around on a sewing machine.
I love the style lines on this coat pattern. I love how the pockets are hidden in the horizontal mid seam.
I made a narrow shoulder allowance as I find that coats can sometimes be a bit boxy on me and it worked out really well.
Would definitely recommend this pattern!
I chose this pattern to use up some Melton Wool I bought 2 years ago, intending to make a dress. But later realising it was really coat-weight and a dress wouldn’t work. It needed to be a coat.
Im a novice coat-maker (Ive made one coat before), so chose this pattern on the basis of
- popper snaps instead of buttonholes
- pockets, but no welts
- fully lined
- and the pattern has good reviews online, as being suitable for novices.
I made it exactly as the pattern said, the only changes being shortening of the sleeves and some decorative buttons. I used 2 poppers instead of 4.
There are a lot of pattern pieces – 22, including facings and lining. The fusible interfacing requires 25 separate pieces to be cut out, due to cutting 2 of most pieces, separately, and 4 of number 11.
The cutting-out took me a whole day.
The instructions come as a 32 page printed leaflet, but are really clear, with good diagrams.
Everything went swimmingly until Page 21 of the instructions:-
‘ Note: The next steps of attaching the sleeves and sleeve linings together can be a bit confusing, but trust that it will come out alright in the end’.
I trusted. I got the situation of sleeve spaghetti where the coat wont turn through the lining properly and cuddles itself with its own sleeves. Solution – unpick lower edge of sleeve. Slip stitch by hand. No-one knows apart from me and you.
Step 35 is to topstitch all round at ¼ inch. I did this, but found it really emphasized that my front edge wasnt completely straight, and just looked horrible. I unpicked it and did it again. No better. Unpicked. Sewed by hand using embroidery thread. No better. Unpicked and hung in wardrobe to decide if topstitching was really needed. Three months later, when coat-mojo returned, decided, yes. Bought Machine Topstitch Thread, and needles with larger eyes to accommodate thread thickness. I set my line much further back, from ¼ inch to about an inch/2cm, to disguise the wobble. This took about 10 minutes to do! Better. Consider that finished!
Things I would do differently next time :
- Not size up – I thought Id need a large size to fit jumpers underneath. But no.
- Cut out using a rotary cutter not scissors, for increased accuracy, which would mean the topstitching is easier too.
- Put a hanging loop in at CB when sewing the collar (the pattern doesnt include that).
- There is a lump at the hem where the front edge facing meets the lower edge facing. Partly I put this down to cutting inaccuracies but also being a novice :) and not achieving as polished a result as Id hoped for, I wasn’t entirely sure how it was supposed to be, so Id definitely want to do a better job of that next time.
It was as big a project as I expected, but even going slowly (very slowly) I was able to finish this in 2 weekends, and produce a coat that I like wearing. Im definitely warmed up to coat making now, and its not as scary as I thought.
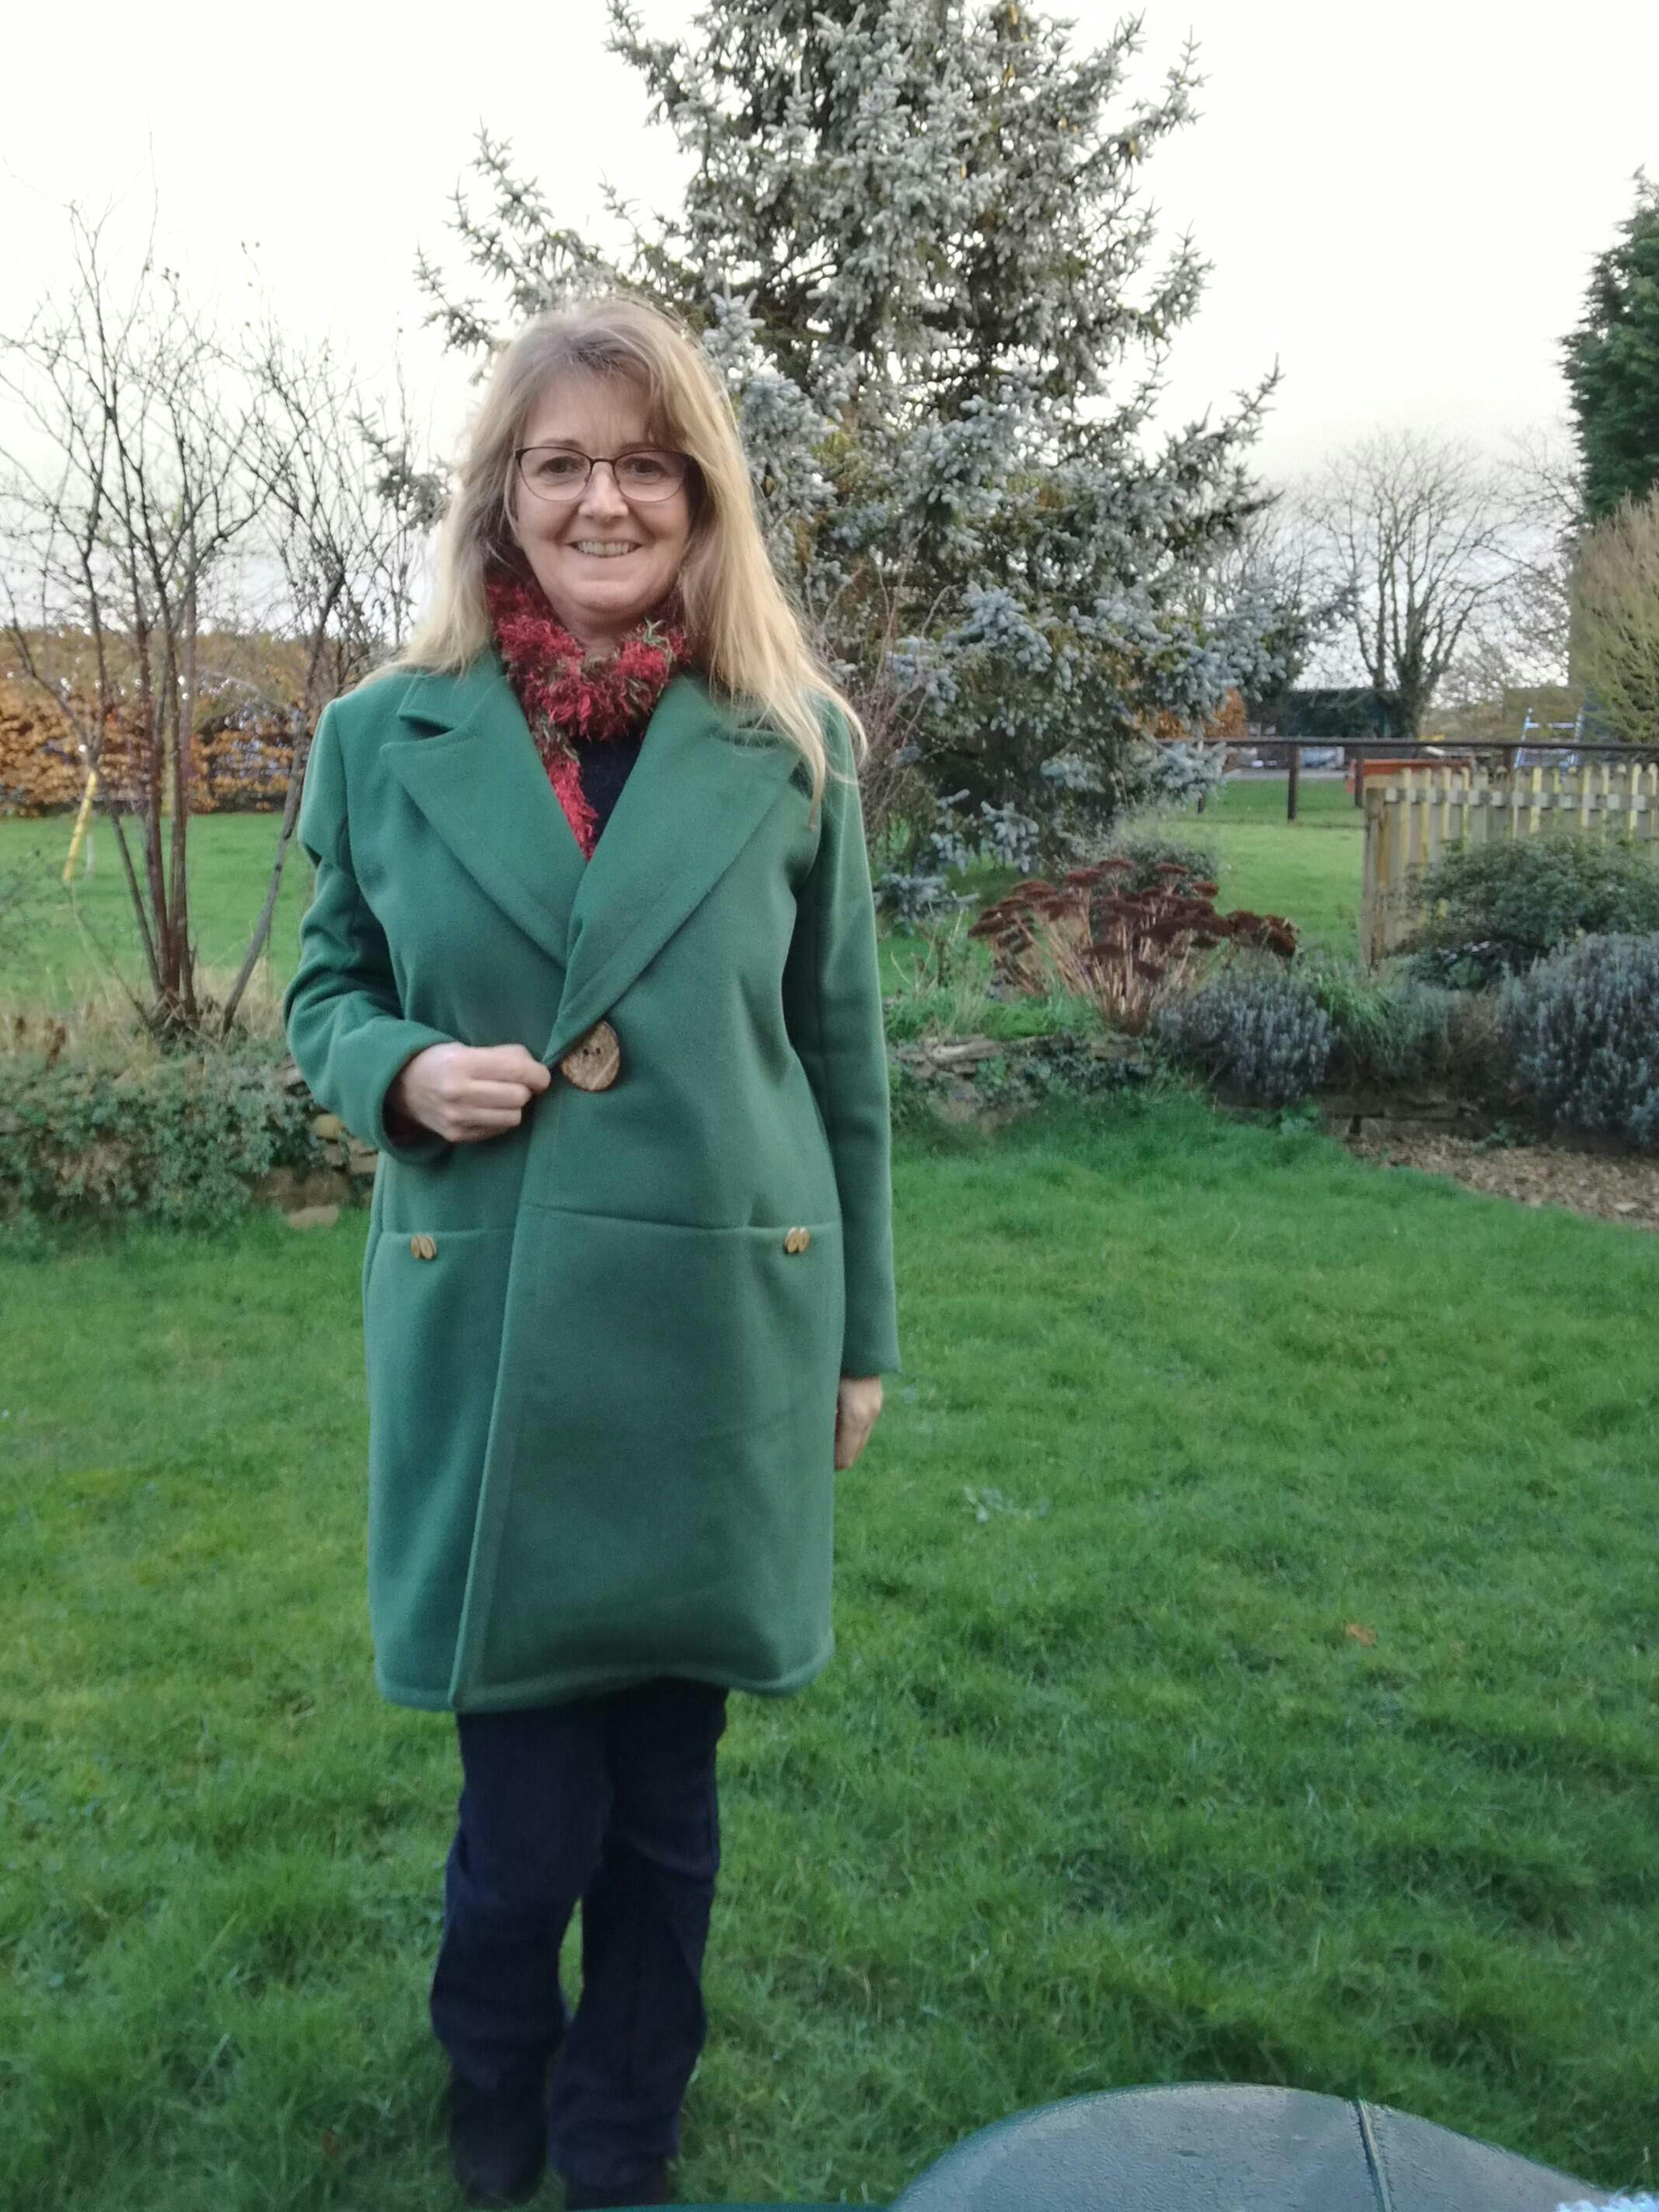
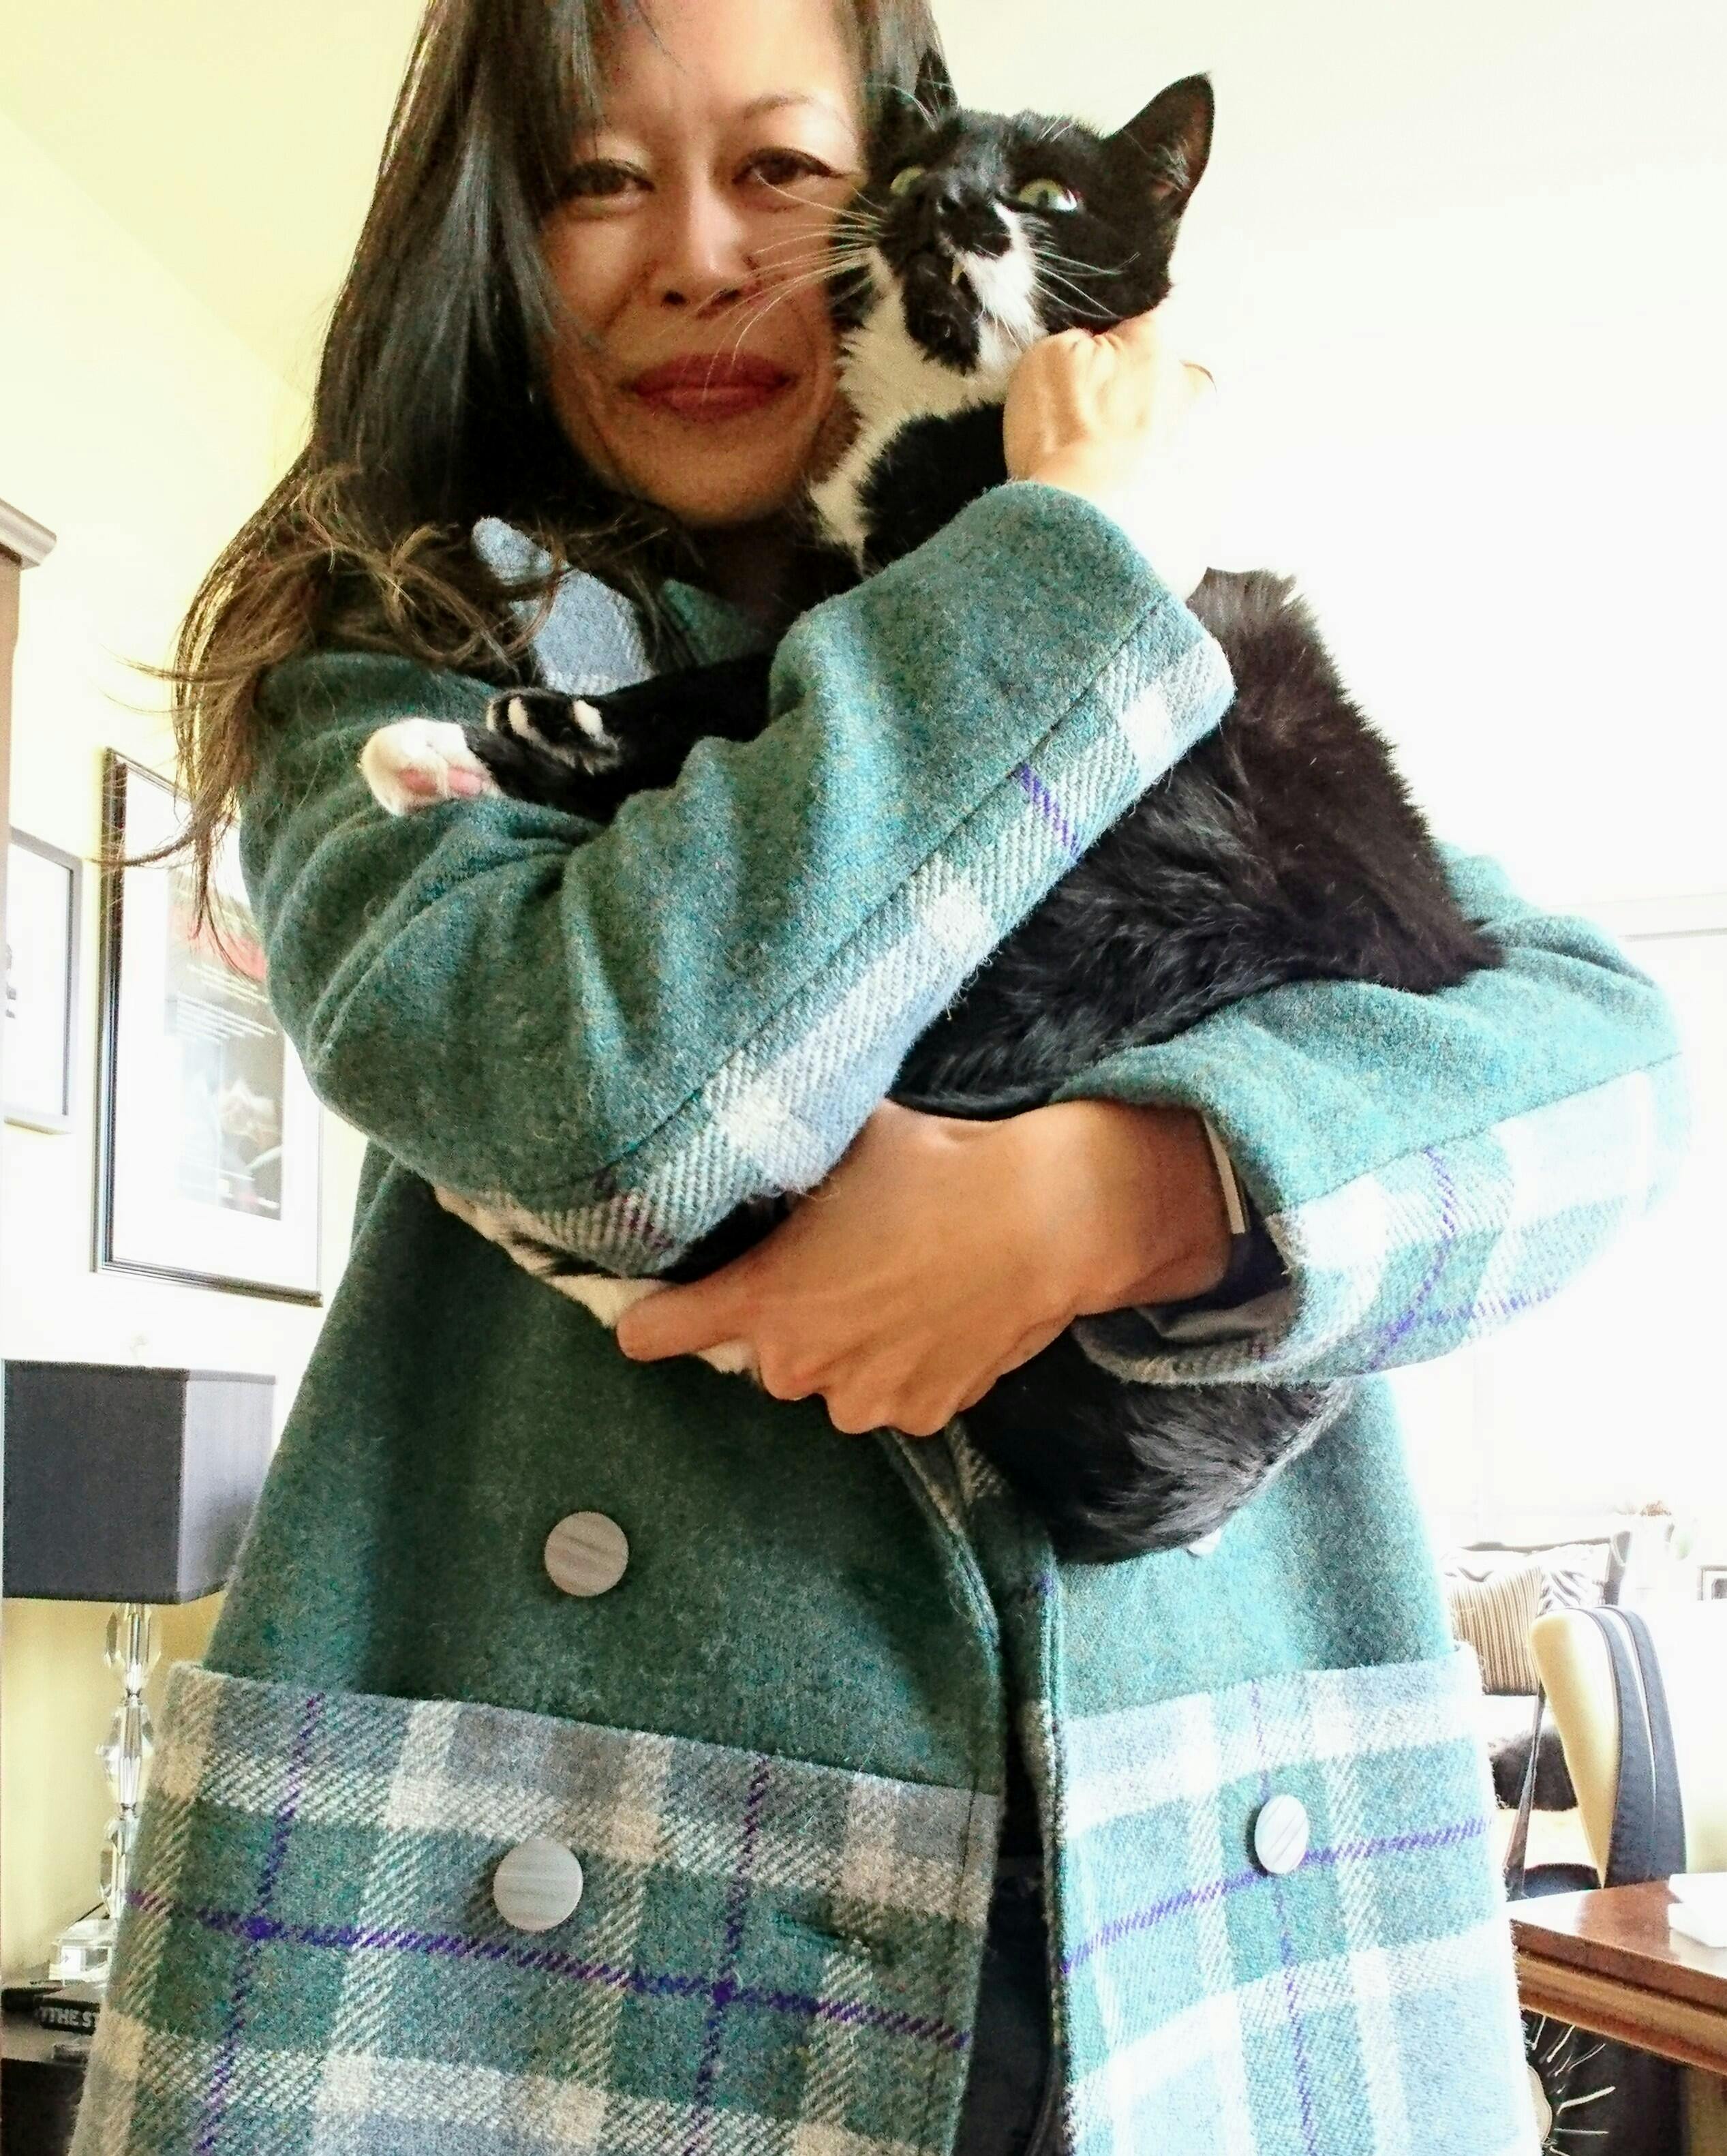
I liked this pattern so much I immediately sewed another, but this time with colour blocking. Two meters each of coordinated Harris Tweed, lined with simple Bemberg for a lighter jacket.
The first Yates I sewed is size 4 but I wanted a little more room in the shoulders and sleeves. Added an inch to the sleeve length and cut the arm hole depth to size 6 for a little more room. Also added weft interfacing to cap sleeves for a little more structure there as well. I adore this coat, even if my cat Matteo isn't nearly as thrilled.
I love this pattern: the easy pockets, the styling and the perfect collar. The instructions are really clear and even for someone who has sewn a lot of suits and coats, this pattern had loads of good tips. Notes: the sleeves are quite fitted which works for me but I would probably redraft for the size up if you want to wear a bulky sweater underneath. Also, I have extremely long arms, so I would probably lengthen on the next version. I added buttons, handstitched the hems instead of the top stitching and added a coat loop for easy hanging at the neckline. I sewed this in Harris Tweed so had to adjust for the narrow fabric width. I would love to try colour blocking on the next one.
Votre panier est vide
Dépensez £50.00 de plus et obtenez la livraison gratuite!